



Note: Replace bulbs only with bulbs of the same type. Before replacing a bulb, make sure that the corresponding lighting device is switched off. Do not handle the bulb with bare fingers, use a clean towel or cotton gloves. Fingerprints left on the bulb evaporate and settle on the reflector, which is especially noticeable on headlights and fog lights. Accidental fingerprints should be removed with an alcohol-soaked cloth. Do not wipe headlight reflectors covered with a protective varnish with a dry, hard cloth, or use any cleaners or solvents for this purpose. Use soft, damp cloths. Halogen bulbs are under pressure and may crack. Therefore, when replacing them, wear protective glasses and gloves.
1. The details of the halogen headlight are shown in the illustration.
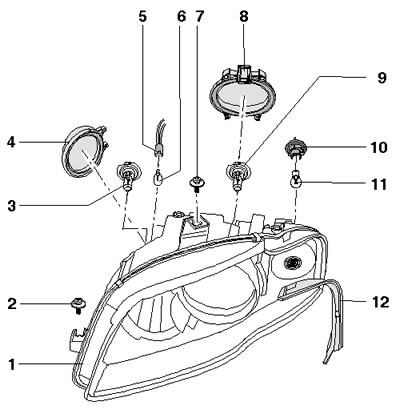
5.1 Halogen headlight parts 1. Headlight housing; 2, 7. Bolt, 4.5 Nm; 3. High beam lamp (H7. 55 W); 4. Housing cover for high beam lamp and parking light lamp; 5. Lamp holder 6; 6. Side light bulb (W5W. 5 W); 8. Lamp housing cover 9; 9. Low beam lamp (H7, 55 W); 10. Lamp holder 11; 11. Direction indicator lamp (21 W); 12. Overlay
2. To remove the headlight, remove the bumper cover (see Chapter 11), unscrew the bolt (3 in the illustration), loosen the bolts (1 and 2) a few turns, pull the headlight forward and disconnect its wiring connector.
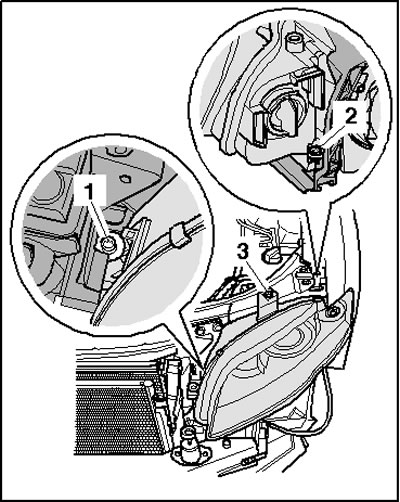
5.2. Removing the headlight
3. Installation is carried out in the reverse order of dismantling the components. Before installation, check that the adjusting nut (1 in the illustration) the regulator can be moved freely (arrows). Screw the adjusting nut until it stops, but do not tighten it. Install the headlight, tighten the bolts (1-3 in Illustration 5.2) two turns, install the front bumper cover and align the headlight. Tighten the bolts in the 2-1-3 sequence to 4.5 Nm.
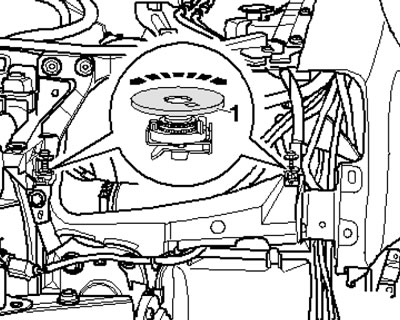
5.3. Adjusting nuts
4. To remove the parking light, low beam and high beam bulbs of the right headlight, first remove the air cleaner duct (see Section 16 Chapter 1). Then remove the cover of the corresponding lamp (4 or 8 in Illustration 5.1), release the lamp from the spring clips and remove it, then disconnect the lamp connector.
Note: To gain access to the parking light bulb, you must first remove the high beam bulb without disconnecting its connector.
5. To remove the turn signal lamp when working on the left side, remove the washer fluid reservoir (see Section 12), and when working on the right side - the front section of the right wheel arch liner (see Chapter 11). Turn the cartridge (3 in the illustration) counterclockwise and pull it out of the headlight housing. Then unscrew the bulb from the socket. Installation is done in the reverse order. The marks (1 and 2) should be opposite each other when installing the socket.
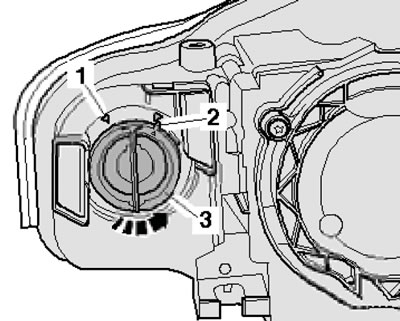
5.5. Removing the direction indicator bulb socket
A link to the original source is available on the website AudiManual