



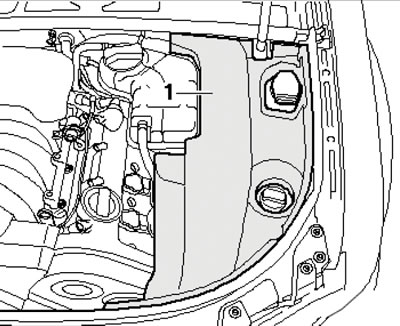
12.1. Left engine compartment casing
2. If present, separate the overflow hose (2 in the illustration) from the upper section of the tank (3). Loosen the nut (1) and unscrew the bolt (4). Pull the upper section of the tank out of the lower section upwards. Tighten the bolt/nut with a force of 18/5.5 Nm respectively, use a new bolt. The following describes how to remove the lower section of the tank.
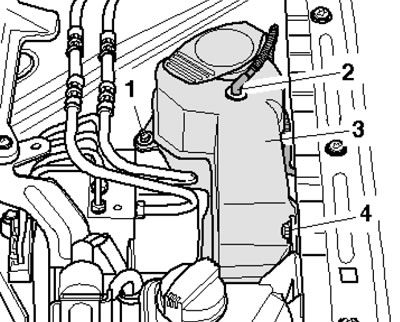
12.2. Removing the upper section of the tank
3. Remove the left front wheel and the left front wheel arch liner (see Chapter 11).
4. Unscrew the fastener (arrows in the illustration) lower section of the tank (2) and tilt it back slightly. If you cannot tilt the tank, unscrew the bolt (4) and remove the crossbar (1). If present, separate the overflow hose (3) from the tank.
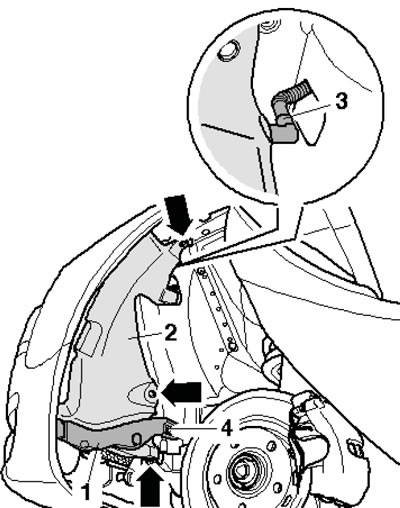
12.4. Fastening the lower section of the tank
5. Disconnect the connectors (2-4 in the illustration), press the tab and pull out the hose connection. Pull out the washer fluid tube (5) and remove the reservoir downwards.

12.5. Pump wiring connectors
6. Installation is performed in the reverse order of component removal. Tighten the fasteners with a force of 7 Nm.
[The original article is available on the website: AudiManual]