
1. Remove the multi-tooth screws 4 (at the same time, the lining on which the screws rest is also weakened along with the screws) and remove the door lock downwards.
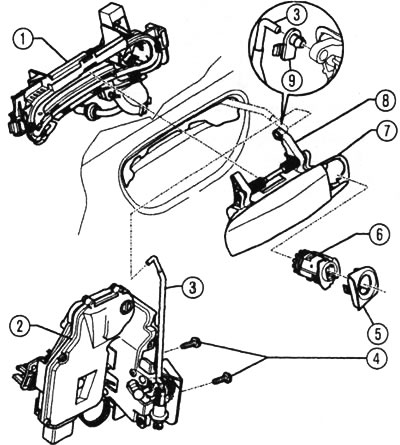
Front door lock and handle installation diagram: 1 - handle support, 2 - lock, 3 - drive rod, 4 - multi-tooth screws, 5 - cover for lock cylinder, 6 - lock cylinder, 7 - handle, 8 - drive lever, 9 - clamp
2. To remove the lock cylinder, open the driver's door. Remove cap 2. Turn the star-shaped screw (arrow) to the left until it stops. Bracket 1 moves back and releases the cylinder. Pull the cylinder out of the handle.
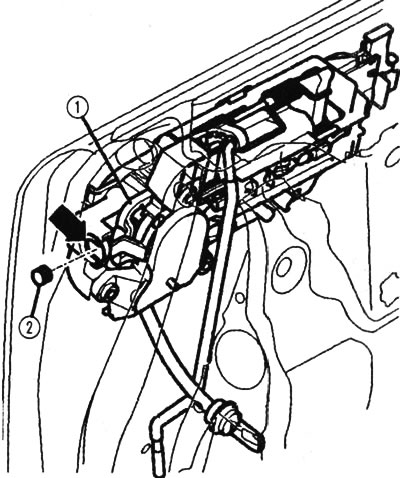
Removal the lock cylinder: 1 - bracket, 2 - cap
3. In order to remove the door handle 1, it is necessary to release the drive rod 3 from the clamp 2 (this location is shown on the detailed drawing). After installing the new lock, first insert the drive rod into the movable sleeve 4 and lock it by moving the sleeve upwards. Only then pull the locking pin 5 out of the lock.
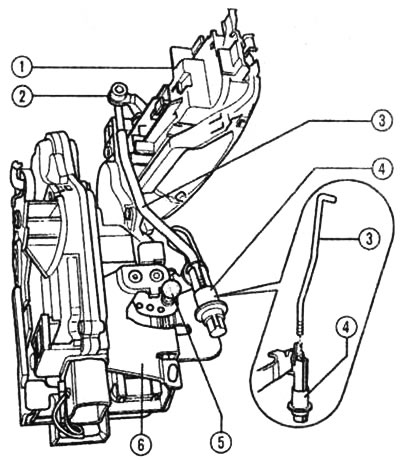
Door handle: 1 - handle, 2 - clamp, 3 - drive rod, 4 - movable sleeve, 5 - safety pin, 6 - lock
4. To release the door handle support, insert a screwdriver through the door panel and move the latch 2 away from the handle in the direction of the arrow.
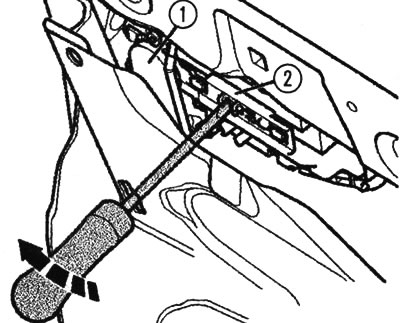
Unlocking the handle support: 1 - door handle, 2 - latch
5. To remove the decorative plug, pull the handle 1 upwards and use a small screwdriver to push the latch 3 in the longitudinal direction. Unhook the plug 2 at the top to the side and remove it from the handle downwards.
Removal the plug: 1 - door handle, 2 - plug, 3 - latch
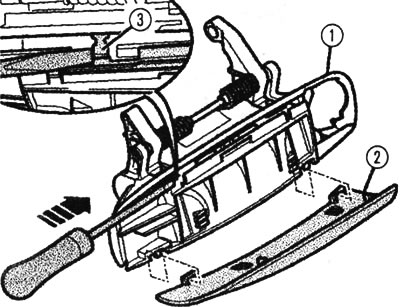
6. When installing, which is done in the reverse order, pay attention to detaching and attaching the drive rod. The rod must be threaded through the clamp (position 9 in general view). After this, the clamp must be turned 90° and engaged with the drive rod.
[The original publication in its entirety is posted on the website «AUDImanual.ru»]