
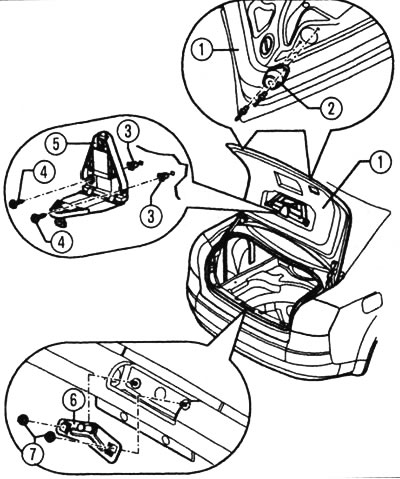
Rear door installation diagram: 1 - rear door, 2 - stop, 3 - expansion nut, 4 - screw, 5 - holder, 6 - wedge lock, 7 - nut (8 Nm).

Wedge lock: 1 - nuts (8 Nm)
2. With the help of an assistant, who should prop the door up, remove the rear door.
3. If you need to dismantle the wedge lock, remove the end sheet lining. Unscrew nuts 1. When installing, which is done in the reverse order, tighten the nuts to a tightening torque of 8 N·m.
Door fitting
4. After installing the old door, which is done in reverse order, it must be adjusted (before fitting a new door, gas-filled shock absorbers must be installed). Loosen nuts 1 so that wedge lock 2 can be moved. Carefully try to close the door until it is flush with the side panel. Then carefully open the door and tighten nuts 1 to a tightening torque of 8 Nm.

Rear door fitting: 1 - nuts (8 Nm), 2 - wedge lock.
5. If you want to remove the rear door lock 1 and the drive, detach the drive rod 4 from the articulated coupling 2 and remove it.
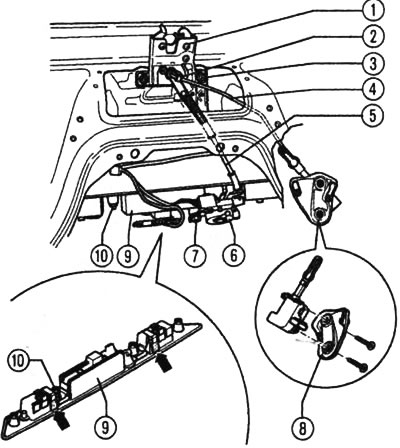
Lock and handle: 1 - rear door lock, 2 - articulated coupling, 3 - nut (8 Nm), 4 - drive rod, 5 - Bowden cable, 6 - lock cylinder, 7 - screw with washer (8 Nm), 8 - remote control motor, 9 - handle, 10 - hexagonal nut with flange (8 Nm).
6. Unscrew the hex nuts 3 and remove the lock. After installation, engage the drive rod with the articulated coupling 2 and lock the rod. The lock cylinder 6 can be removed by disconnecting the electrical connection, unhooking the Bowden cable 5 and unscrewing the screw with washer 7. To do this, turn the lock cylinder 90°. Installation is carried out in the reverse order.
[This article was previously published on the resource: AUDIMANUAL]