
Table of contents: Examination ↓ Replacement ↓
Examination
1. If better access is required, raise the front of the vehicle and install safety stands. If necessary, remove the lower powertrain protective cover.
2. Check for cracks, decomposition of the rubber or its separation from the metal parts of the support at any point; if there is such damage, replace the support.
3. Check the reliability of all threaded fastenings of the supports - if necessary, use a torque wrench.
4. Use a large screwdriver or a mounting blade to check the wear of the bearings by prying them up like a lever. If necessary, have an assistant rock the power unit back and forth, left and right, while watching the bearings. If even new components may have a gap, what to expect from old ones. If there is excessive play in the bearings, check the tightening of the threaded connections, replace worn components as described below.
Replacement
Front support (models without air conditioning)
5. Apply the handbrake, raise the front of the car and install safety supports.
6. Loosen the mounting bolts and remove the lever and rubber support from the front of the cylinder block. If necessary, the rubber cushion can be replaced separately.
7. Unscrew the bracket from the front of the body.
8. Install the new lever and bracket in reverse order.
Front support (models with air conditioning)
9. Apply the handbrake and raise the front of the car, install safety supports. If necessary, remove the protective cover of the power unit from them.
10. Loosen the mounting bolts and remove the stop from the bracket at the front of the engine. Pass the bracket over the rubber pad, then remove the pad from the through tube. Remove the bracket.
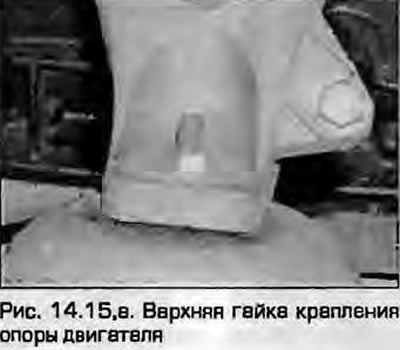
11. If necessary, the stop can be removed from the engine, as well as the side support brackets (fig. 14.11).

12. Install the new support in the reverse order of removal.
Right and left engine mounts
13. Apply the handbrake and raise the front of the car, install safety supports.
14. Transfer the weight of the engine to the hoist. You can also use a trolley jack for this purpose, placing a piece of board between it and the engine sump.
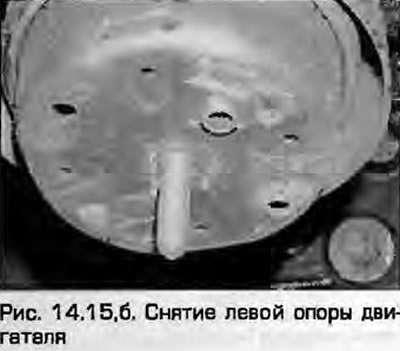
15. Loosen the mounting nuts, lift the engine and remove the support from the bracket on the engine and from the subframe (fig. 14.15, a, b). Please note that the support has a built-in hydraulic shock absorber, which reduces the transmission of vibration from the engine to the car.
 |
 |
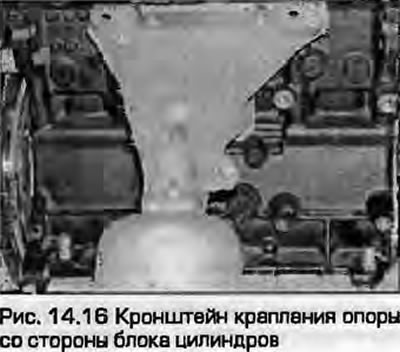
16. If necessary, remove the mounting bracket from the side of the cylinder block (fig. 14.16).
17. Install the new support in the reverse order of removal.
[The original source of the article can be found on the website audimanual.ru]