
Table of contents: Main and fog lights ↓ Parking lights ↓
Back side of the headlight without the fog light
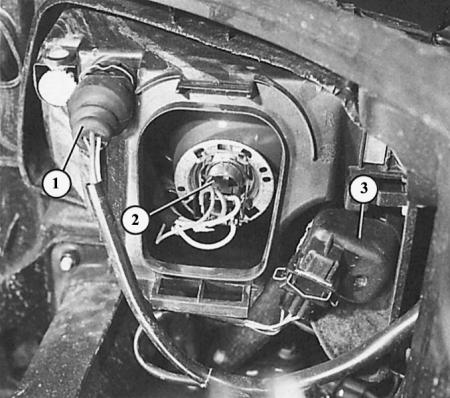
- 1 - connector for connecting all lamps;
- 2 - headlight bulb;
- 3 - headlight correction motor.
The back side of the removed headlight
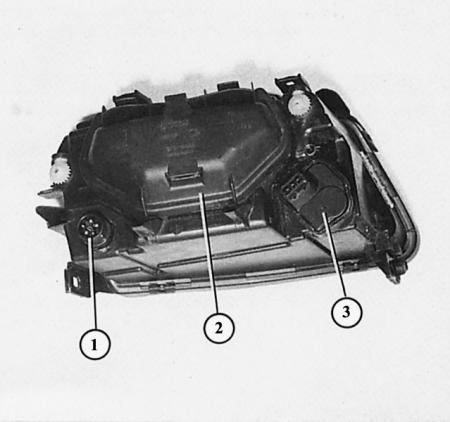
- 1 - Electrical connector for all lights;
- 2 - protective cap;
- 3 - headlight correction motor.
Details of the disassembled main headlight
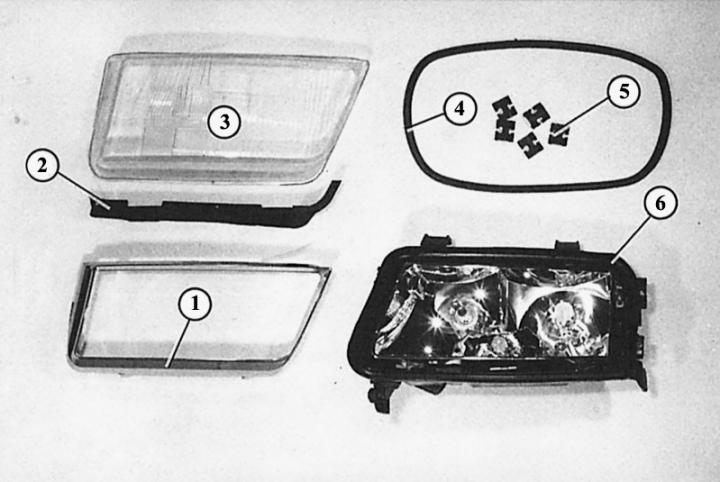
- 1 - decorative diaphragm;
- 2 - protective rubber on top;
- 3 - diffuser;
- 4 - sealing rubber;
- 5 - mounting clamps;
- 6 - reflector with headlight housing.
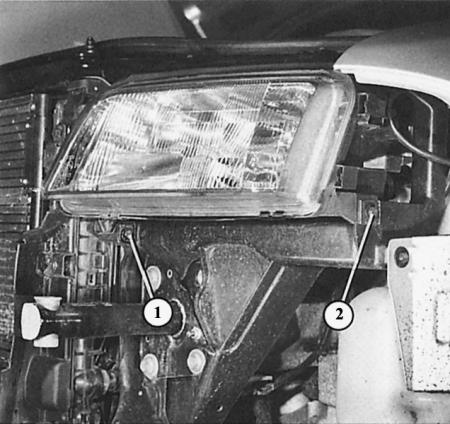
The lower mounting bolts (1 and 2) of the headlight housing are accessible only after removing the bumper and turn signal housing.
All incandescent lamps in the headlights are removed from the engine compartment. To do this, you first need to remove the air duct in the right headlight.
Main and fog lights
1. Remove the headlight protective cap in the engine compartment by pressing both buttons.
2. Disconnect the wire connector from the incandescent lamp.
3. Hang the spring clamp of the lamp bracket and fold it down.
4. Remove the incandescent lamp.
5. The new lamp, depending on the headlight and the lamp itself, should be inserted as follows:
6. H4 bulb in headlight without fog light: insert the bulb so that its three contact tabs form a "U" shape, open downwards.
7. H7 bulbs in headlight with fog light: insert the bulb so that the tail of the bulb dish faces upward vertically.
8. H1 bulb in the headlight with fog light: insert the bulb so that the beveled side of the bulb plate on the side stands vertically and both cones enter the holes on the headlight mirror.
Parking lights
1. The preparatory stage is the same as described in the last section.
2. Remove the parking light bulb holder from the reflector back.
3. Finger lamp (in the headlight without a fog light) press lightly into the socket, turn to the left and remove.
4. A lamp with a glass base (in headlight with fog light) just remove it from the socket.