
Table of contents: Removal ↓ Installation ↓
Removal
Remove the cylinder head cover. Rotate the crankshaft until the pair of cams of each of the installed or removed unit injectors are facing evenly upward.
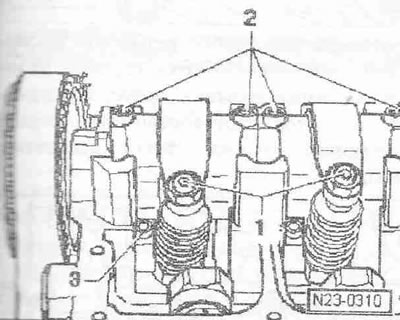
unscrew the locknuts of the adjusting bolts "1" and unscrew the adjusting bolts so that the corresponding rocker arm fits against the pump-injector pusher spring. Unscrew the bolts "2" of the rocker arm shaft from the outside inward using the 3410 attachment and remove the rocker arm shaft. Unscrew the bolt "3" of the clamping shoe using the "T10054" attachment and remove the clamping shoe.
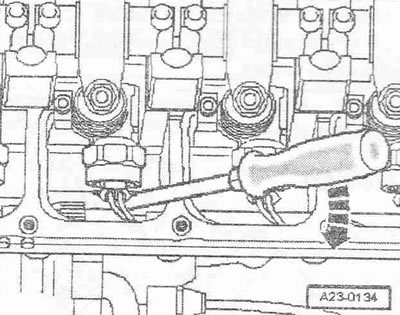
Remove the pump-injector plug connector using the "arrow" screwdriver. To avoid distortion, support the opposite side of the plug connector by pressing lightly with your finger.
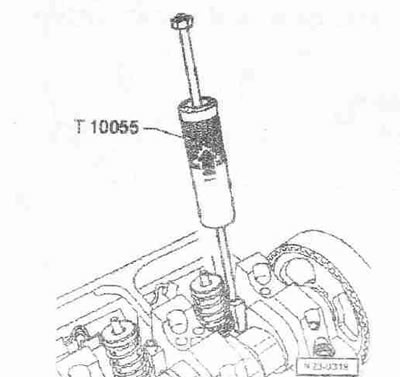
Fix the "T10055" puller instead of the block in the side slot of the unit injector. Remove the unit injector with careful tapping movements upwards from the corresponding socket in the cylinder head.
Installation
Instructions. When performing any work related to adjusting the unit injector, it is necessary to replace the adjusting bolt in the rocker arm and the bolt with the ball head of the unit injector. New unit injectors are supplied with sealing rings and a heat-protective seal. When installing a new unit injector, it is also necessary to replace the corresponding adjusting bolt in the rocker arm. When reinstalling a used unit injector, it is necessary to replace the sealing rings and heat-protective seal.
Before installing the unit injector, check the correct seating of the three sealing rings, heat-protective seal and retaining ring. Twisting of the sealing rings is not allowed. Lubricate the sealing rings and very carefully install the unit injector into the cylinder head socket. Pressing evenly, insert the unit injector until it stops in the socket on the cylinder head. Install the clamping block into the side slot of the unit injector.
Instructions: If the unit injector is not at a right angle to the clamping block, the mounting bolt may come loose, which will cause damage to the unit injector or cylinder head.
Align the unit injector as follows: Screw new mounting bolts into the clamping block so that the unit injector can be easily rotated. Now align the unit injector at right angles to the camshaft support brackets.
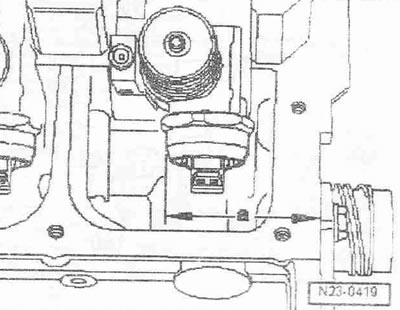
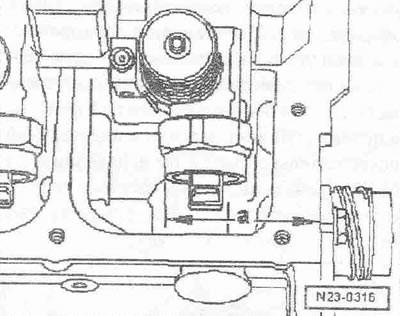
Check with the caliper "VAS 5276" (measuring range min. 400 mm) distance "a" from the outer edge of the cylinder head to the round surface of the pump injector.
Pump-injectors with cylindrical flange to nut
| Cylinder | Size "a" |
| 1 | 244.2±0.8 mm |
| 2 | 152.8±0.8 mm |
| 3 | 64.8±0.8 mm |
Unit injectors with beveled flange to nut
| Cylinder | Size "a" |
| 1 | 245.0±0.8 mm |
| 2 | 157.0±0.8 mm |
| 3 | 65.6±0.8 mm |
All cars
If necessary, align the unit injector again and tighten the clamping shoe mounting bolts: tightening torque: 12 Nm + 270° further. Install the rocker arm shaft and tighten the new mounting bolts as follows: first tighten the inner bolts, then the outer bolts in several stages. Tightening torque in the same sequence: 20 Nm + 90° further. Fit a dial indicator to the adjusting bolt of the unit injector as shown in the figure.
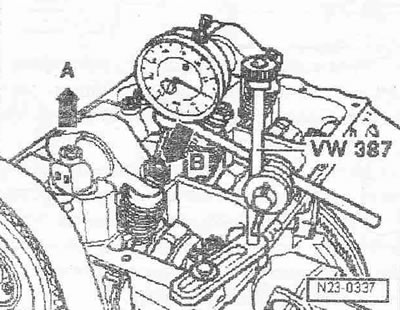
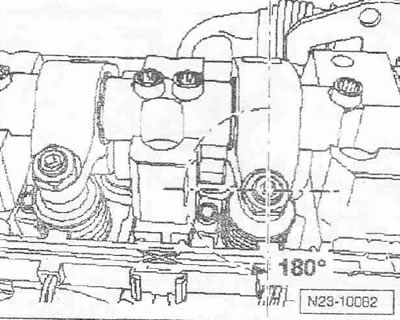
Rotate the crankshaft in the direction of engine rotation until the rocker arm roller is at the end of the drive cam. The "arrow A" side of the roller is at the highest point, the "arrow B" dial indicator is at the lowest point. Remove the dial indicator. Now screw the adjusting bolt into the rocker arm until you feel a noticeable resistance (the pump-nozzle is screwed in all the way).
Turn the adjusting bolt back from the stop by 180° using the special tool (torque wrench -VAG 17'5.6-). Hold the adjusting bolt in this position and tighten the lock nut (tightening torque: 30 Nm). Connect the plug connector of the pump-injector. Install the cylinder head cover and the timing belt cover.