
Note: When the locking magnet is removed, do not turn the steering wheel or change the straight-ahead position or the steering angle of the front wheels. Otherwise, this may result in the steering wheel becoming misaligned after the work is completed. Absolute cleanliness must be observed when performing the following work.
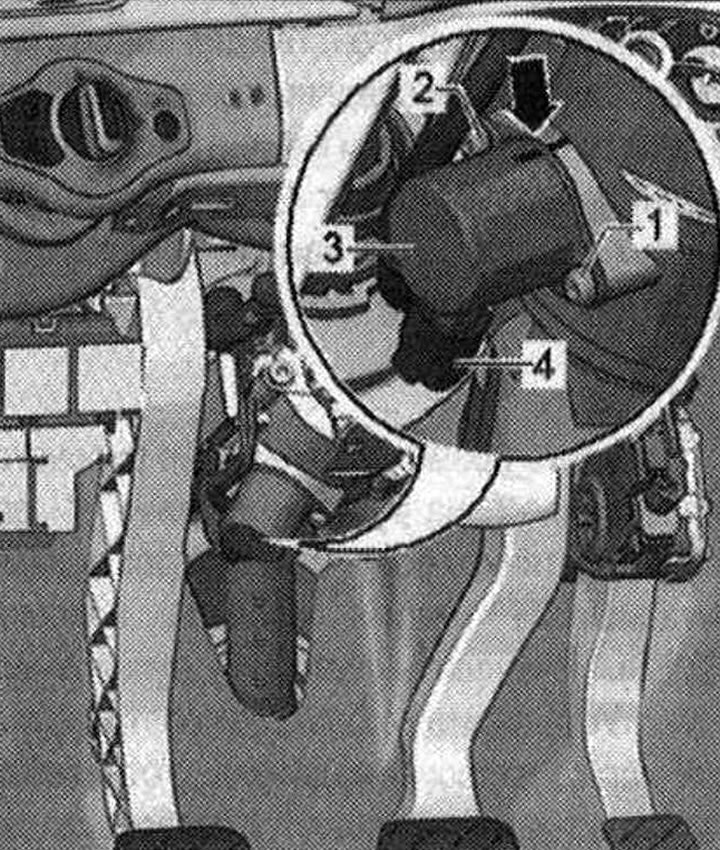
Set the steering wheel to the straight ahead position (the front and rear axle wheels must be in line) and, if possible, lock the steering lock in the straight-ahead position. Switch off the ignition. Mark the installation position and the position of the locking magnet "arrow" (necessary for subsequent assembly). Remove the electrical plug connection "4" from the blocking magnet "3". Clean the head ("star") of bolts "1 and 2" from the remains of thread varnish. Unscrew bolts "1 and 2" and remove the blocking magnet "3" from the steering column.
Installation
Installation in reverse order. Please note the following: After replacing the locking magnet, the software of the active steering control unit "J792" must be updated by running the appropriate program on the diagnostic system. When installing a new locking magnet, the marking must be transferred from the old locking magnet to the new one. Install the new locking magnet according to the marking applied before removal and, as shown in the following table, secure with both new bolts "1 and 2" (using the included tool).
| Subsequence | Bolt number | Tightening torque |
| 1 | 1 | 2 + 2 Nm |
| 2 | 2 | 4 + 2 Nm |
| 3 | 1 | 8 + 2 Nm |
| 4 | 2 | 8 + 2 Nm |
Connect the electrical plug connection to the locking magnet. Clear the event memory. Perform an initialisation drive - to do this, turn the steering wheel about 45° left/right from the straight-ahead position.
Functional check: During the test drive, the steering functions must be checked on a closed area. Drive forces Return to the initial position. Clearance. Noises. Indicator lamp. After the test drive, the event memory must be interrogated. The event memory must not contain any error information.