



Table of contents: Removal and installation the tailgate ↓ Tailgate adjustment ↓ Removal and installation hinges ↓ Replacing the lock cylinder ↓ Removal and installation the lock ↓ Fuel filler flap flap ↓
Removal and installation the tailgate
1. Remove the tailgate trim (see Part B), disconnect the connectors and separate the washer fluid supply hose.
2. Open and support the tailgate.
3. Use a screwdriver to lift the spring (3 in the illustration) and separate the drain (1) from the hinge (2).
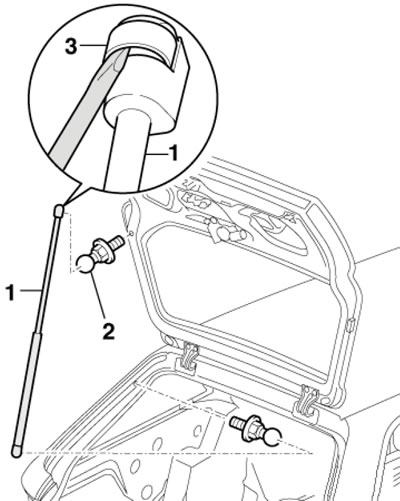
5.3. Removing the drain
4. Separate the trim from the tailgate (1 in the illustration) loops and bushing (2) for electrical wiring.
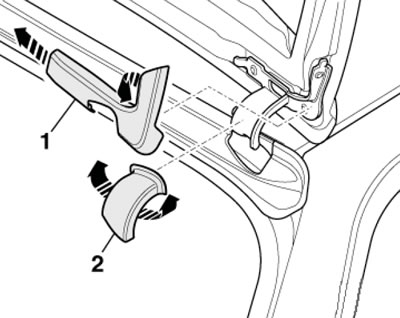
5.4. Hinge cover
5. Ask an assistant to hold the tailgate and remove the bolts (arrows in the illustration) left and right, and remove the tailgate.
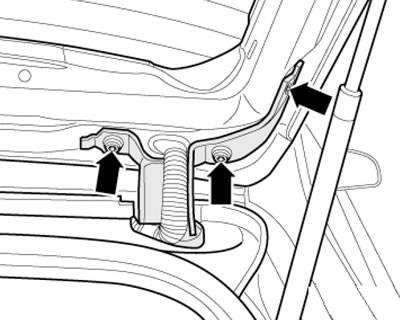
5.5. Fastening the hinge
Tailgate adjustment
Note: The dimensions for adjustment are given in the Specifications at the beginning of the chapter.
6. Remove the tailgate sill trim and loosen the nuts (1 and 3 in the illustration), so that the engine striker (2) can be used.
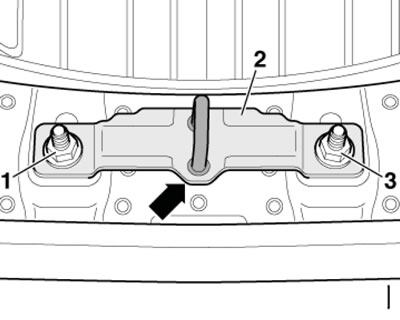
5.6. Fastening the lock striker
Note: When installing, the protrusion (arrow) must face backwards.
7. Remove the cover (1 in the illustration) adjusting buffer and turn the screw (2) counterclockwise to the "0" position.
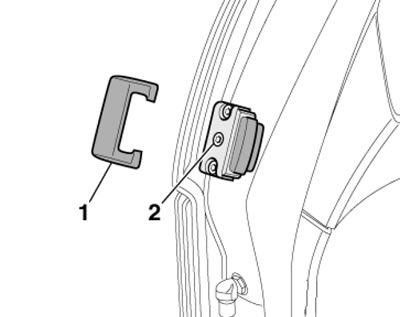
5.7. Adjustment buffer
8. Tighten the striker mounting nuts by hand, close the tailgate and press it approximately 2 mm into the body by hand. Open the tailgate in this position and tighten the striker mounting nuts with a force of 21 Nm.
9. Make sure the tailgate closes easily and there is no play in the lock. Repeat the adjustment if necessary.
10. Make sure that there is no play in the tailgate when pressing on its left or right edge. If necessary, preload the adjusting buffers by turning the screws (2 in illustration 5.7) clockwise.
11. Repeat all checks again.
Removal and installation hinges
12. Separate the trim from the tailgate (1 in illustration 5.4) loops and bushing (2) for electrical wiring.
13. Remove the rear roof trim (1 in the illustration), releasing it from the clips (2). Remove the D-pillar trim.
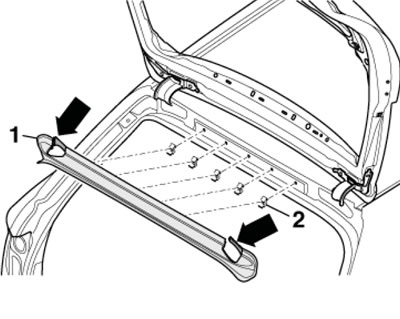
5.13. Rear roof trim fasteners
14. Have an assistant hold the tailgate to prevent damage to the paint and remove the nuts (arrows in the illustration).
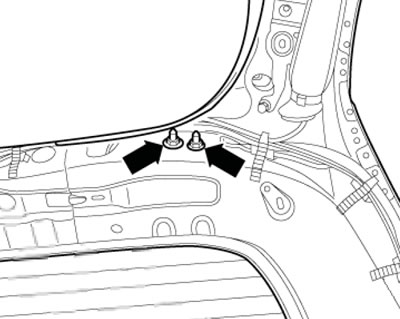
5.14. Nuts for fastening the hinge to the body
15. Unscrew the bolts securing the hinges to the tailgate and remove the hinges.
16. Installation is performed in the reverse order of component dismantling. Tighten the nuts securing the hinges to the body with a force of 21 Nm. After installation, adjust the position of the tailgate (see above).
Replacing the lock cylinder
17. Remove the tailgate trim (see Part B).
18. Disconnect the connector (2 in the illustration), unhook the control cable (3) leading to the lock, unscrew the bolt (1), tilt the lock cylinder 90° around its axis and remove it.
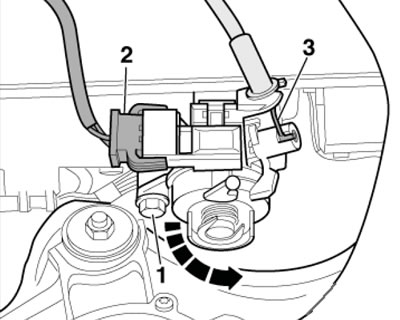
5.18. Removing the lock cylinder
19. Installation is carried out in reverse order.
Removal and installation the lock
20. Remove the lower section of the tailgate trim (see Part B).
21. Press the lock (5 in the illustration) from the control lever and unhook the control cable (6).
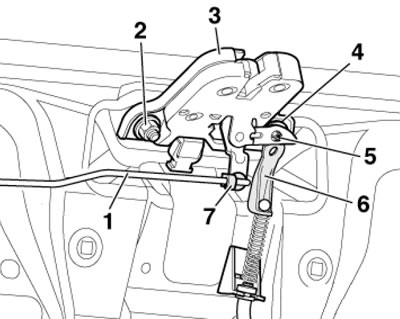
5.21. Lock fastening details
22. Unhook the control rod (1) by tilting the hinge bushing (7) to the right. Loosen the nuts (2 and 4) and remove the lock (3).
23. Installation is performed in the reverse order of component dismantling. Tighten the lock fasteners with a force of 21 Nm.
Fuel filler flap flap
24. The installation details of the fuel tank filler neck and its cover are shown in the illustration.
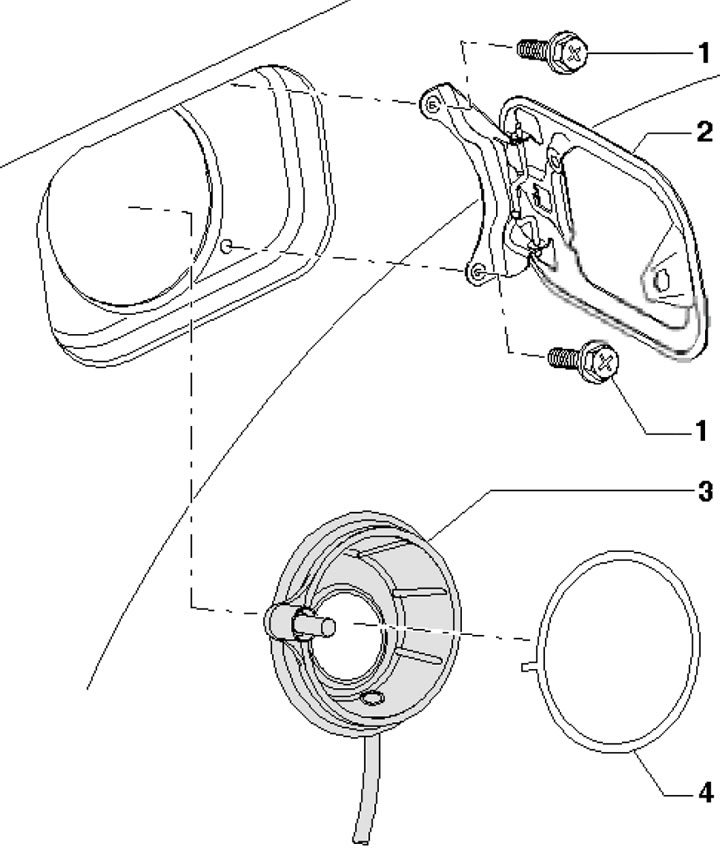
5.24. Fuel tank filler neck and cap installation details 1. Self-locking bolt; 2. Manhole cover; 3. Filler neck; 4. Neck ring