Repair Chevrolet Repair Toyota Repair Honda Repair AvtoVAZ Repair Mercedes-Benz Repair BMW Repair Opel
Home  |  Contacts  |  Sitemap  |    
English Русский
Български
Беларускі
Український
Српски
Hrvatski
Română
Polski
Slovenský
Magyar
AudiManual.ru


  • AUDI 80
  • AUDI 100
  • AUDI A3
  • AUDI A4
  • AUDI A6
  • AUDI A8
  • AUDI Q
  • OTHER
  • ARTICLES
A2 (1999-2005)

Removal the rear cover of the sliding and tilting sunroof (Audi A2)

  • Home
  • Audi
  • A2 (1999-2005)
  • Body
  • Doors, locks and windows
  • Removal the rear cover of the sliding and tilting sunroof
            0
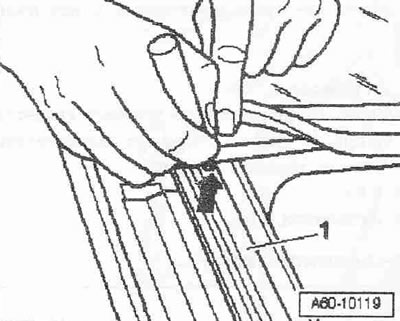
Before removing the rear cover, it is necessary to mark its position on the left and right on the frame of the sliding hatch "arrow".

Remove the seal from the rear cover and mark the front edge of the cover at the hatch frame on the…


Remove the seal from the rear cover and mark the front edge of the cover at the hatch frame on the left and right with a white marker "arrows".
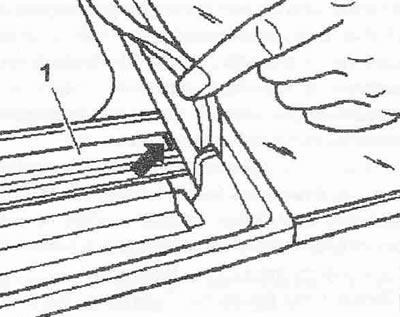
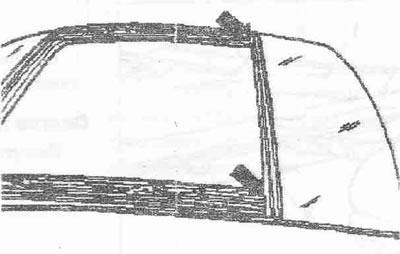
Unscrew the bolts and nuts of the rear cover «arrows».

Unscrew the bolts and nuts of the rear cover "arrows".
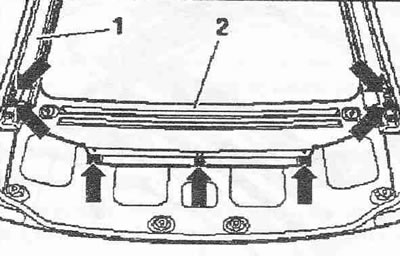


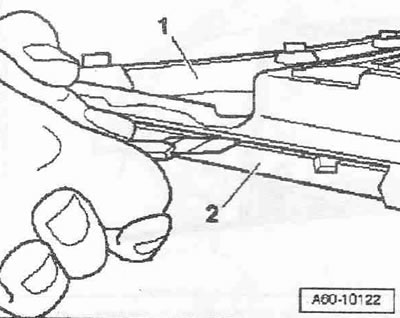
Separate the adhesive joints between the back cover «2» and the frame «1» on the left and right…


Separate the adhesive joints between the back cover "2" and the frame "1" on the left and right with a regular carpet knife.
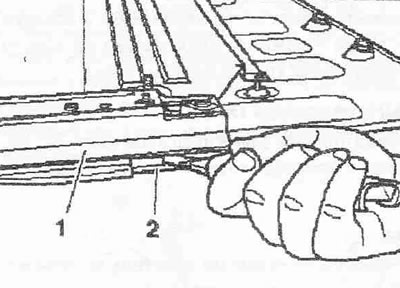
Use a plastic wedge to loosen the connection between the rear cover «1» on the right and left.

Use a plastic wedge to loosen the connection between the rear cover "1" on the right and left.
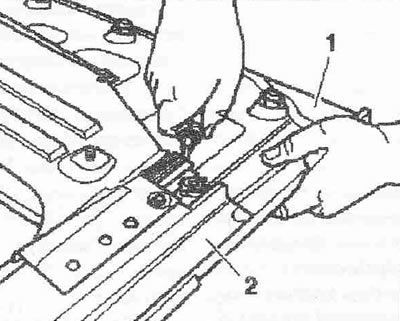
Press the rear cover «1» away from the frame «2» and remove the cover.


Press the rear cover "1" away from the frame "2" and remove the cover.
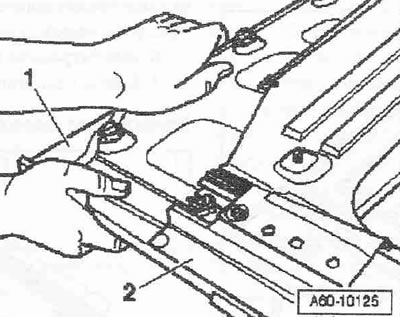


Remove any remaining glue from frame «1» and back cover «1».


Remove any remaining glue from frame "1" and back cover "1".
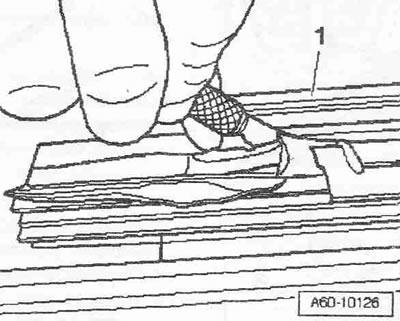
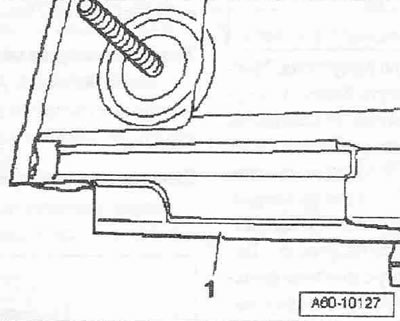
Completely remove seal «1» from the sliding sunroof frame.

Completely remove seal "1" from the sliding sunroof frame.
The article was checked by auto expert Daniil Ushakov
This article is available at russian, bulgarian, belarusian, ukrainian, serbian, croatian, romanian, polish, slovak, hungarian

Share information:
Previous articles
Audi A2: Doors, locks and windows
Next articles

Sealing of a lift and slide hatch
Removal the lift-and-slide sunroof
Removal and installation a lift-and-slide sunroof
Rear Door and Rear Door Mounting Bracket Seal
Removal and installation the guides of the lift-and-slide sunroof
Installing the rear cover of the sliding and lifting sunroof
Installation of a lift and slide hatch
Removal and installation the hatch cover


Similar articles on other Audi car models:
Electric sunroof cover wiring diagram Audi 80 B4 (1991-1996)
Sliding sunroof Audi 100 C4 (1990-1994, petrol)
Electric windows and rear view mirrors Audi A3 Type 8L (1996-2003)
Removal and installation the rear wheel cover Audi A4 B6 (2000-2006, petrol)
Sliding sunroof Audi A6 C5 (1997-2004)
Checking the drive shaft protective cover Audi A8 D2 (1994-2002)
Removal the sliding sunroof control unit Audi Q5 Type 8R (2008-2017)
Link to this page in different formats


Visitor comments

No comments yet


How much will 25 + 46 =


Audi A2(1999-2005) 
  • General information
  • Introduction to the guide
  • Maintenance
  • Engine 1.4 l (gasoline)
  • Engine repair
  • Lubrication system
  • Cooling system
  • Exhaust system
  • Engine 1.6 l (gasoline)
  • Engine repair
  • Lubrication system
  • Cooling system
  • Exhaust system
  • Engine 1.2 l (diesel)
  • Engine repair
  • Lubrication system
  • Cooling system
  • Injection and turbocharging
  • Engine 1.4 l (diesel)
  • Engine repair
  • Lubrication system
  • Cooling system
  • Turbocharging system
  • Supply system
  • Fuel injection system
  • Exhaust system
  • Transmission
  • Mechanical gearbox 02J
  • Mechanical gearbox 02T
  • Mechanical gearbox 085 DS
  • Chassis
  • Car suspension
  • Steering
  • Brake system
  • Body
  • Exterior
  • Interior
  • Seats
  • Doors, locks and windows
  • Safety system
  • Heating and air conditioning
  • Electrical equipment
  • Power devices
  • Equipment and devices
  • Wipers and washers
  • Lighting and lamps
  • Breakers and switches
  • Electrical circuits
 
AudiManual.ru © 2017-2026 · Mobile version · Feedback · Sitemap: EN BG BY UA RS HR RO PL SK HU · Site search · News and articles
80 B2 · 80 B3 petrol · 80 B3 · 80 B4 · 100 C3 diesel · 100 C3 petrol · 100 C3 · 100 C4 petrol · 100 C4 · A3 Type 8L · A4 B5 petrol · A4 B5 · A4 B6 petrol · A4 B6 · A4 B7 · A4 B8 · A6 C4 · A6 C5 · A6 C5 Allroad · A8 D2 · Q5 Type 8R · Q7 Typ 4L · Audi A2 ·
This site uses cookies 🍪. Click the button to accept this fact.