
Table of contents: Removal and installation wind… ↓ Removal and installation the curtain ↓ Removal and installation trim ↓ Removal, installation and adjusting… ↓
1. The details of the installation of the top hatch are shown in the illustrations.
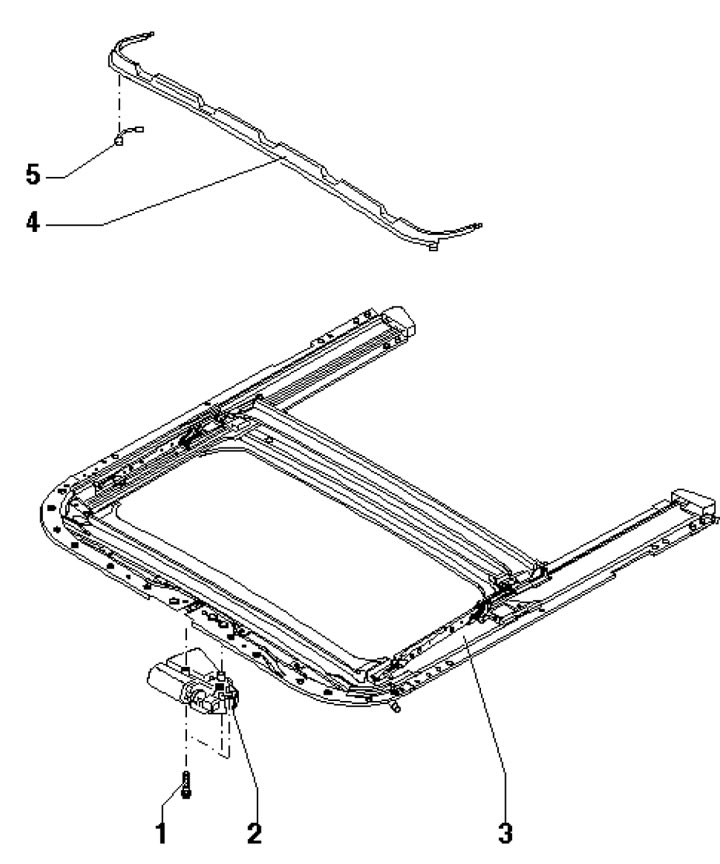
7.1a. Upper hatch drive installation details 1. Bolt with washer, 3 Nm; 2. Electric motor for the top hatch cover drive; 3. Frame; 4. Wind protection; 5. Wind protection tilting spring
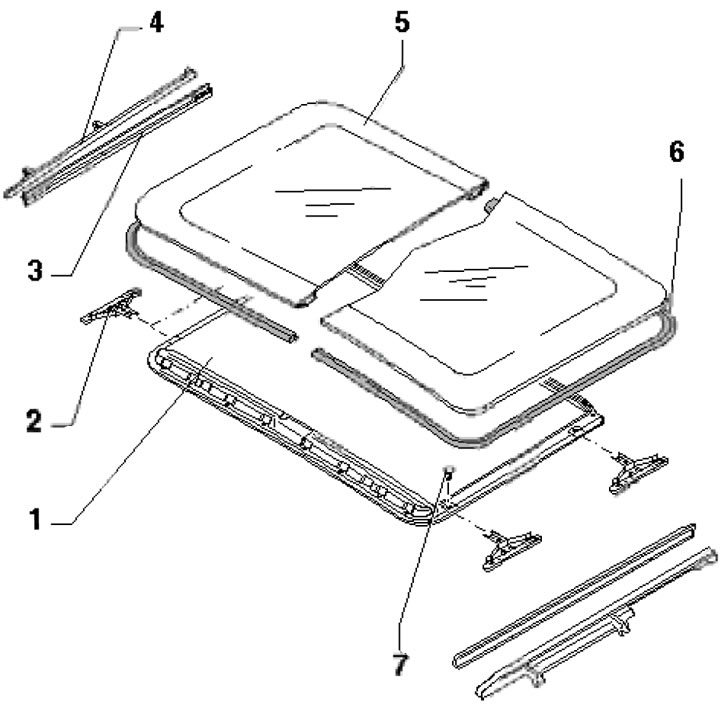
7.1b. Upper hatch installation details 1. Sliding curtain; 2. Curtain spring 1; 3/4. Bottom/top trim; 5. Upper hatch cover; 6. Compaction; 7. Bolt, 1.5 Nm
Removal and installation wind protection
2. Open the top hatch completely.
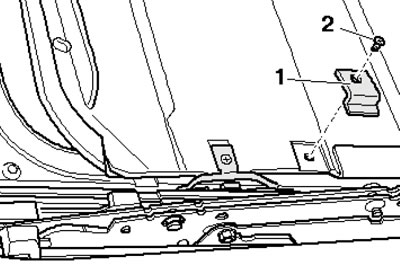
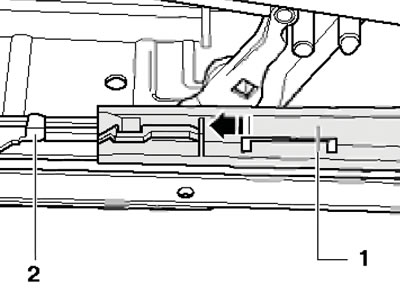
3. Squeeze out the wind protection (1 in the illustration) in the direction of the arrow from the holder (3). Remove the wind protection from the hatch towards the rear.
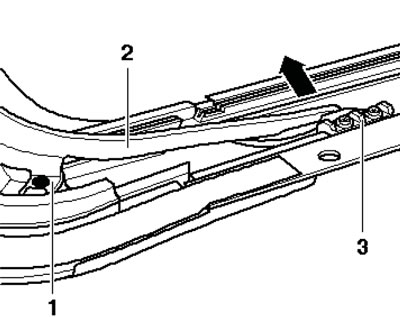
7.3. Removing the wind protection
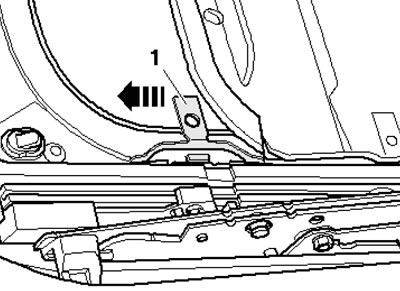
4. Position the spring (3 on the accompanying illustration) around the windscreen retaining pin (2) and insert the spring into the windscreen groove.
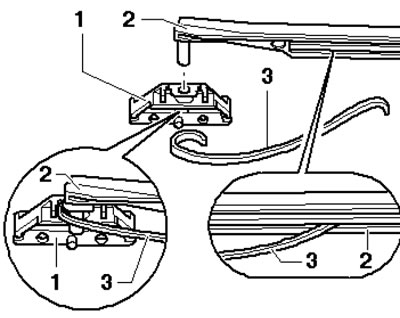
7.4. Installing wind protection
5. Slide the stopper (1 in illustration 7.3) wind deflector (2) towards the front under the sunroof, insert one retaining pin into the holder (3). On the other side, press the wind deflector towards the centre of the vehicle and engage the second retaining pin into the holder.
Removal and installation the curtain
6. Remove the top hatch panel (see subsection below) and unscrew the spring retainer bolt (1 in the illustration). On solar powered models, remove the bolt and slide the rail off.
7.6. Spring retainer bolt
7. Slide the curtain back slightly and pull out the front spring clip (1 in the illustration) to the front. Slide the rear spring clip to the rear and remove the curtain.
7.7. Removing the sunroof curtain
8. Installation is carried out in the reverse order of dismantling the components.
Removal and installation trim
9. Lift the sunroof cover and carefully slide the sunshade back.
10. Unhook the bottom trim (1 in the illustration) from the rear in the direction of the arrow (A) from the holder and slide it forward (B). Separate the lower trim from the mounting guide towards the center of the car, unhook the trim (2) from the front and center, separate it in the direction of the arrow.
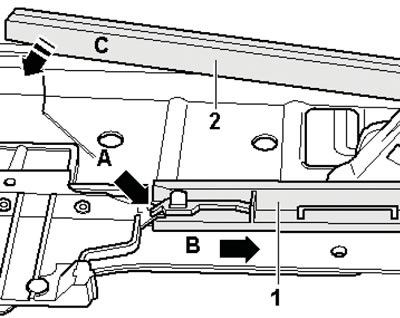
7.10. Removing the upper hatch trim
11. Press the bottom trim (1 in the illustration) into the upper edge (arrow) of the mounting guide (2).
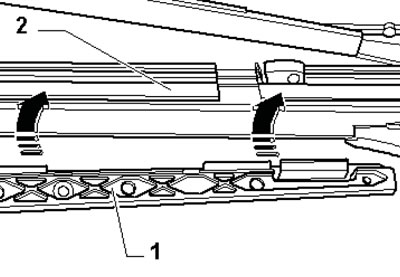
7.11. Fastening the lower trim
12. Slide the bottom trim (1 in the illustration) back in the direction of the arrow until the lock engages with the drive (2). Press the top trim into the guide plate.
7.12. Installing the top trim
Removal, installation and adjusting the upper hatch panel
13. Remove the trim (see subsection above), remove T25 bolts (arrows in the illustration) on both sides and slide the panel.
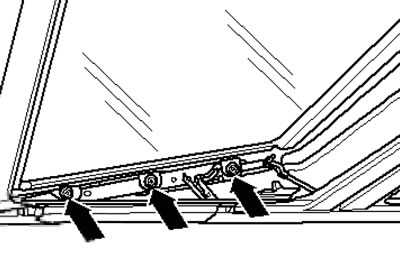
7.13. Fastening the upper hatch panel
14. Installation is carried out in the reverse order of dismantling the components. Before tightening the fasteners, adjust the panel so that it is flush with the roof. The front/rear edge of the panel can be lowered/raised by no more than 1 mm.
(This article was copied from the website AUDIMANUAL.RU)