
Table of contents: Replacing control cables ↓ Removal the folding air nozzle liners ↓
When the glove box is removed, the ends of all three heating/ventilation cables are visible.
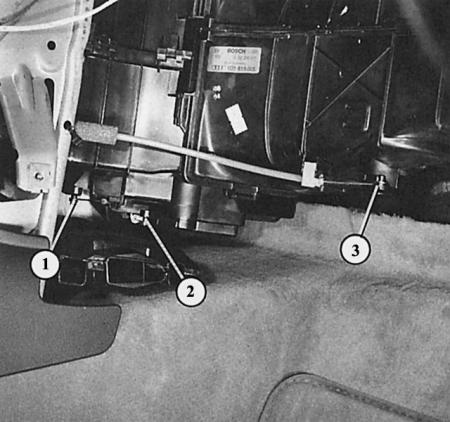
- 1 - air flow distribution cable;
- 2 - heating cable;
- 3 - air supply cable.
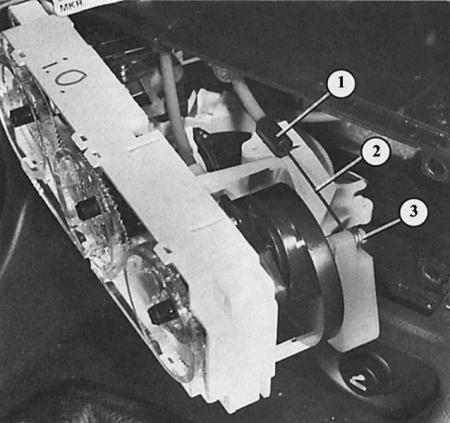
Removing the Bowden cable on the heating/ventilation control module: remove the counter support (1) with pliers, remove the end of the cable (2) from the lever (3).
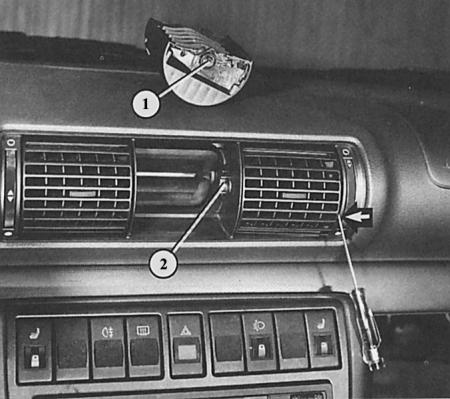
To remove the air nozzle fold-out inserts, insert screwdrivers from the sides of the inserts (arrows) and press them out. When installing, make sure that the fold-out axes (1) of the inserts fit into the guides (2) (they have different thicknesses on the right and left).
All functions of the heating/ventilation system in the Audi A4 can be controlled from a module in the instrument cluster.
Three so-called Bowden cables run from there to the duct housing, often called the "air box." This housing contains air flaps that direct the air flow in the desired direction.
Replacing control cables
1. Remove the glove box (Chapter Salon).
2. The end of the cable is bent into an eye and freely suspended from the control lever in the air box.
3. The Bowden cable sheaths are secured in the air box with plastic clamps.
4. Press the lock on the plastic clamp with a small screwdriver and hang the clamp.
5. Remove all three heating/ventilation rotary control knobs.
6. Unscrew the two Phillips-head screws underneath.
7. Remove the radio receiver (chapter Tools and instruments).
8. Remove the four hex bolts in the radio mounting shaft and remove the center console trim panel.
9. Remove the now visible four Phillips head screws on the heating/ventilation control module.
10. Now push the heating/ventilation control module back a little and then remove it from the instrument panel diagonally past the mounting pads.
11. The control module cannot be completely removed, but this is enough to get to the Bowden cable mount.
12. Use a screwdriver to pry the control cable retainer out of the hook on the control module.
13. The end of the cable is bent into an eye and freely suspended from the control lever.
Removal the folding air nozzle liners
1. Place small screwdrivers on the right and left sides of the flap and gently pry it out.
2. Please note during installation: the tilt axes are of different thicknesses.
[This publication is borrowed from the resource «AudiManual.ru»]