
Table of contents: Removal the left receiving pocket ↓ Removal the glove box ↓
Removal the left receiving pocket
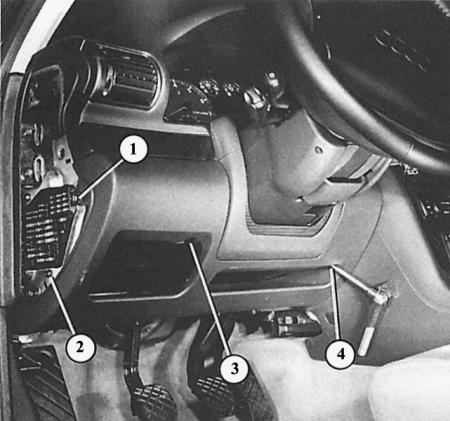
To remove the left instrument panel trim combined with the receiving pocket, loosen bolts 1 through 4. When installing, insert the receiving pocket into the guides at the front at the bottom.
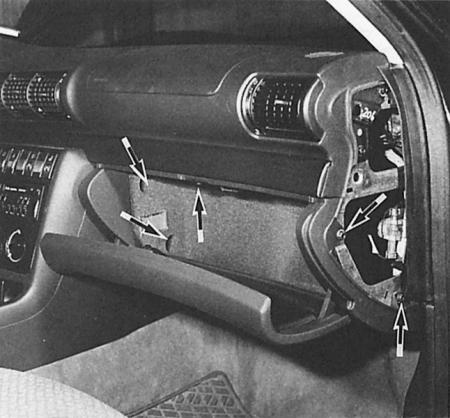
The arrows show where the bolts are that need to be unscrewed when removing the glove box.
The lower left instrument panel trim, which is combined with the receiving pocket, almost always has to be removed when access to the back of the instrument panel is required. Removal is accordingly simple:
1. Remove the fuse box trim on the left outside of the instrument panel.
2. Remove the four Allen bolts - two on the fuse box and one each on the right and left of the steering wheel.
3. Fold the receiving pocket down slightly and remove it back.
4. When installing, make sure that the front edge of the trim is pushed into both guides at the front on the bottom of the car and on the pedals.
5. Also, slide the right upper edge into the bracket on the dashboard.
6. Do not tighten the bolts too much.
Removal the glove box
1. Remove the trim on the right side of the outside of the dashboard. Unscrew the two hex bolts underneath.
2. Open the glove box.
3. Remove the two screws in the glove box and the second one at the top of the box itself.