
Table of contents: Removal ↓ Installation ↓
Removal
1. Remove the rear section of the engine protective cover.
2. Jack up the front of the car, place it on jack stands, remove the front left wheel and engine mudguard (protection), see the corresponding chapter.
3. Unscrew bolt 2 securing the protective shield above the left drive shaft and remove the shield by disengaging 1 (see illustration).
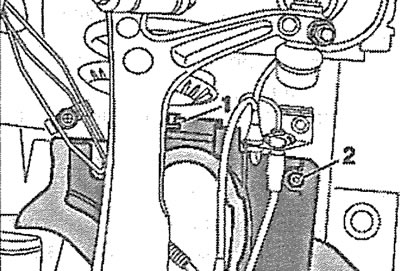
4.3. Unscrew bolt 2 securing the protective shield above the left drive shaft and remove the shield by disengaging 1
4. Unscrew the bolts securing the left drive shaft A to the gearbox and move the shaft to the side (see illustration). It is recommended to tie the shaft to the body so that it does not sag.
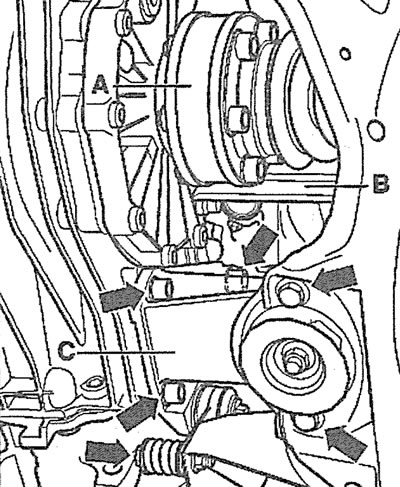
4.4. Unscrew the bolts securing the left drive shaft A to the gearbox and move the shaft to the side
5. Disconnect the protective shield B from the gearbox (see illustration 4.4).
6. Unscrew the mounting bolts (see arrows in illustration 4.4) and remove the left support from the gearbox.
7. Unscrew the clutch slave cylinder mounting bolt (see arrow in illustration) and feed the cylinder back together with the connected pipeline. The cylinder mounting bolt should be replaced with a new one.
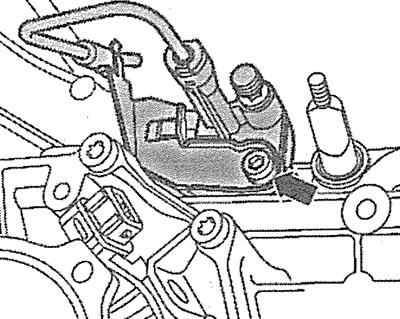
4.7. Unscrew the clutch slave cylinder mounting bolt (see arrow) and feed the cylinder back together with the connected pipeline
8. Disconnect the pipeline from the clutch slave cylinder, having first pinched the hose on it with a suitable clamp and removed clamp A (see illustration).
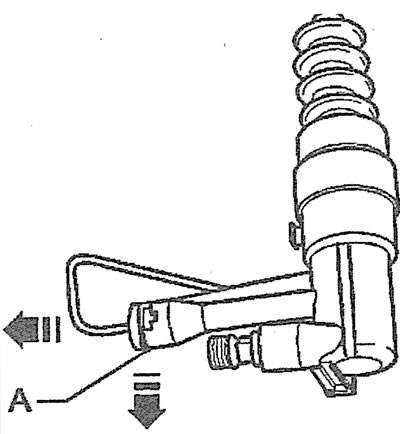
4.8. Disconnect the pipeline from the clutch slave cylinder by removing clamp A
Installation
The installation of the clutch slave cylinder is performed in the reverse order of its removal. To facilitate installation, it is recommended to engage 6th gear.
9. Apply lithium grease, for example, G052150A2, to the cylinder seal in place "a" before installing it (see illustration).
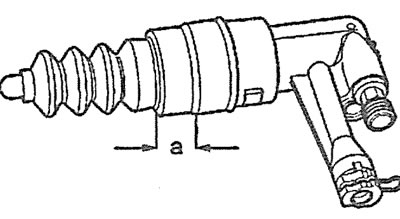
4.9. Apply lithium grease to the cuff at location "a" before installing the cylinder
(A link to the original source is available on the website: AudiManual.ru)