
Table of contents: Checking the lubrication clearance… ↓ Final installation ↓
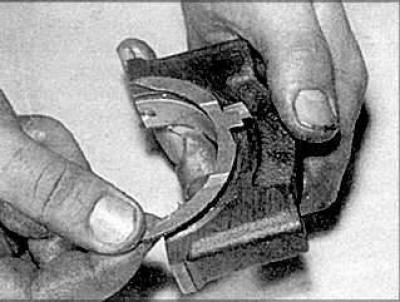
Installing main bearing shells
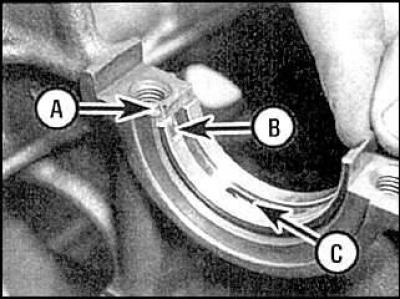
- A - slot
- B - protrusion on the insert
- C - lubrication hole
1. Install new main bearing shells.
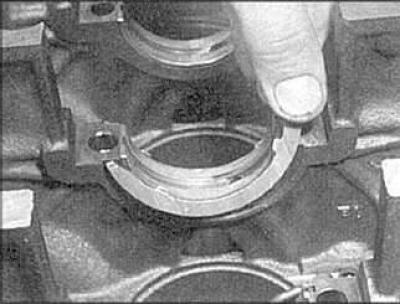
2. Install the thrust half rings.
Checking the lubrication clearance of the main bearings
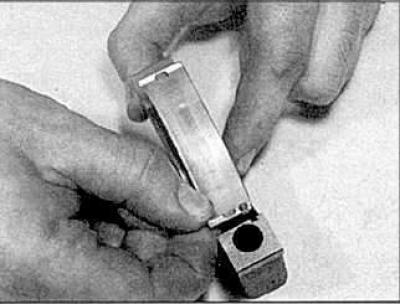
1. To measure the lubrication gap, you can use an internal micrometer or other special device, but the most accurate and easiest method is to use a special plastic gauge.
2. Clean the crankshaft, bearings and oil holes, then carefully install the crankshaft onto the bearings.

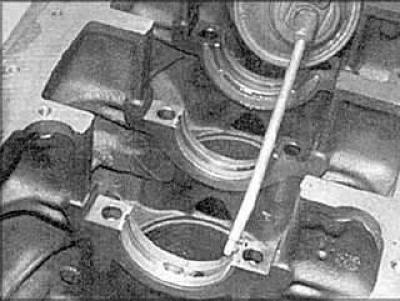
3. Place a piece of plastic on each of the main bearings along the shaft axis.
4. Install the main bearing caps, being careful not to displace the plastic. Tighten the cap mounting bolts to the specified torque in the sequence shown. Do not turn the crankshaft.
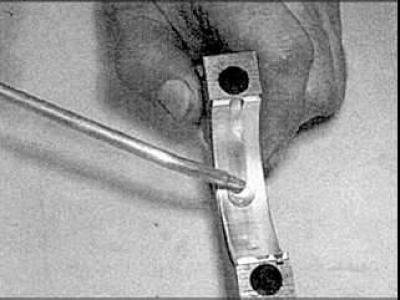
5. Unscrew the bolts and carefully remove the covers.
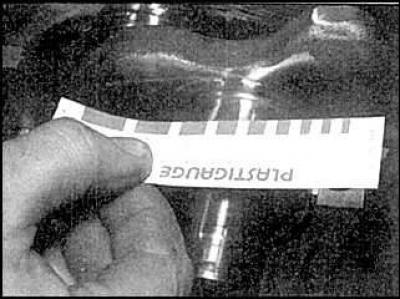
6. Compare the width of the crushed film with a special scale to determine the size of the lubrication gap.
7. If the clearance does not meet the specifications, install liners of a different size. If necessary, the bearings can be ground.
8. Carefully remove any traces of film from the shaft and bearings.
Final installation
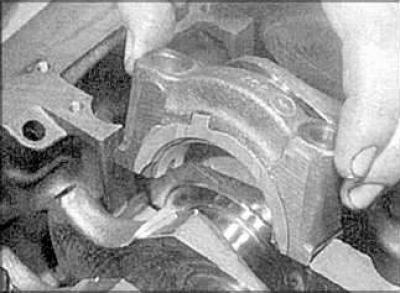
1. Carefully remove the crankshaft.
2. Clean the surface of the bearings and lubricate them with grease or motor oil.
3. Check that the crankshaft bearings are clean and install the crankshaft in place.
4. Lubricate and install the lower bearings.
5. Install the thrust half rings.

6. Install the main bearing caps and insert the mounting bolts.
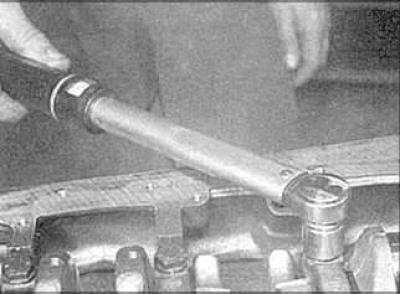
7. Tighten the bolts to the specified torque.

8. Tighten the bolts to the required angle.
9. Turn the crankshaft by hand several times and check for ease of movement.