
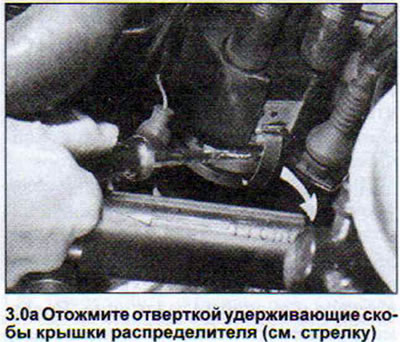
To remove the distributor cap, use a screwdriver to press the clamps holding it in place (see illustrations).
1. Disconnect the ground wire.
2. Remove the distributor cap. Do not disconnect the high-tension wires.
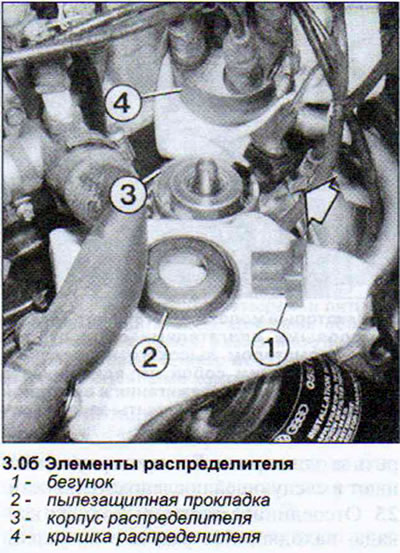
3. Remove the distributor rotor and the dust seal under the rotor. When assembling the distributor, install the dust seal so that its protrusion fits into the groove on the edge of the distributor housing (see illustration).
The distributor rotor has a lug that also fits into the groove. The distributor cap also has a protrusion that fits into the groove to prevent the cap from turning.
Examination
4. Remove the distributor cap. It must be clean both inside and on top to prevent leakage currents. The contact carbon brush must be smooth and shiny. The brush holder spring must be easy to compress and release. The runner contact must not be melted or burnt. The runner must be marked "R1". Thin lines, as if drawn with a pencil, on the distributor cap are traces of leakage currents. You can fix the situation by removing these traces with a screwdriver or a knife blade, and then painting them over with nail polish, universal glue or even lipstick.
Removal
5. Set the piston of cylinder No.1 to TDC.
6. Remove the distributor cap.
7. Unscrew the distributor mounting bolt on the holder and remove the distributor.
Installation
8. Make sure that the camshaft and crankshaft are at TDC of piston No.1.
9. Four-cylinder engines only: Position the oil pump shaft mounting journal in the distributor shaft bore parallel to the crankshaft.
10 Turn the distributor shaft so that the contact plate of the rotor faces the mark on the distributor housing (see illustration).
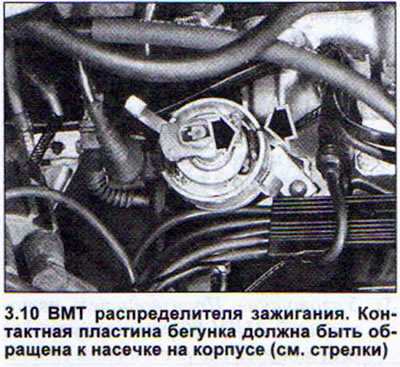
11. Install the distributor so that the mark coincides with the runner contact plate.
12. Adjust the ignition timing.
(The original article is available on the online resource: AUDImanual.ru)