



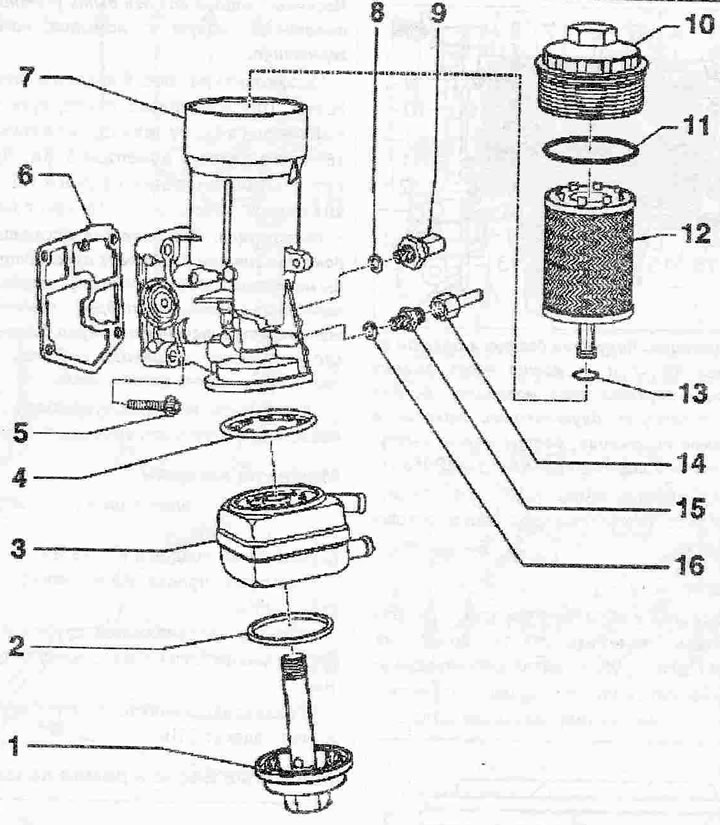
Oil filter bracket with oil cooler:
1. Threaded plug, 25 Nm
2. Gasket. Replace
3. Oil radiator. Various designs. Observe the instructions
4. Gasket. Replace
5. Bolt. Replace, tighten crosswise, 14 Nm + tighten by +90°
6. Gasket. Replace
7. Oil filter bracket with oil check valve. The oil check valve cannot be replaced separately
8. Sealing cuff. Replace
9. Oil pressure sensor "F1", response pressure 0.7 bar, brown insulation, check, 20 Nm
10. Cover, 25 Nm
11. O-ring. Replace
12. Remove the oil filter element from the threaded cover "pos. 10". If replacing the filter, replace the sealing rings "pos. 11" and "pos. 13", taking into account the installation position, Observe the replacement intervals
13. Sealing ring. Replace
14. Oil line for preliminary oil supply to turbocharger. Observe the installation sequence: first screw both ends of the line loosely, then screw the ends of the line finally with a torque of 22 Nm. Secure the bracket
15. Connecting nipple
16. Sealing cuff. Replace
Mounting position of oil cooler gasket for AMF, VNS
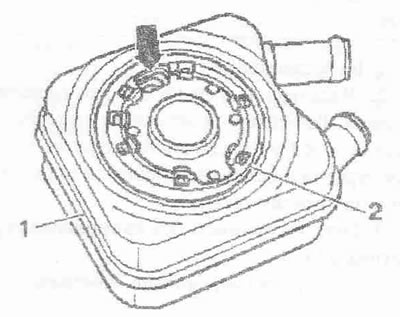
Install the gasket "2" so that it can enter all the projections of the oil radiator "1". The oil hole "arrow" should not be covered by the gasket.
Mounting position of oil cooler gasket for ATL
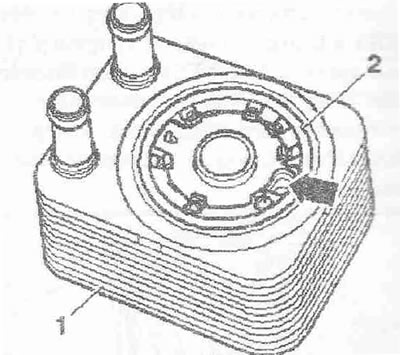
Install the gasket "2" so that it can enter all the projections of the oil radiator "1". The oil hole "arrow" should not be covered by the gasket.
This article was copied from an online resource audimanual.ru