



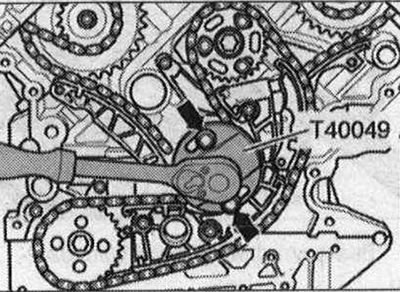
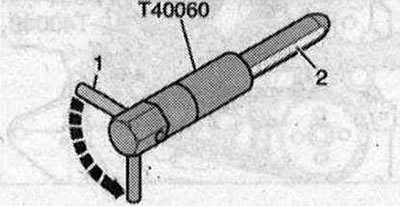
The installation pin "T40060" has a flat "2" facilitating its installation with a slight shift in the holes for fixing the camshaft and cylinder head. First, insert the installation pin so that the pin "1" is located across the camshaft axis. To achieve the correct "TDC" position, move the pin "1" by 90° "arrow" so that it is perpendicular to the camshaft axis.
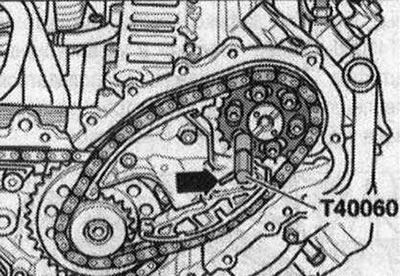
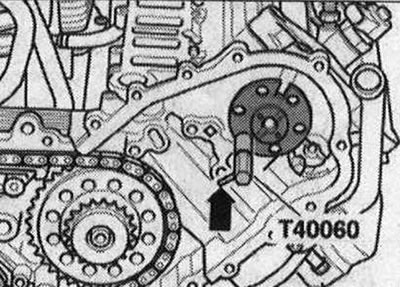
Risk of damage due to camshaft drive chain jumping. Turn the crankshaft only in the direction of engine rotation. Turn the crankshaft to the "TDC" position: the camshafts must be secured with pins "T40060"; the "arrow" finger in the "T40060" installation pin must be positioned perpendicular to the axis of symmetry of the camshaft at cylinder bank 1 (right).
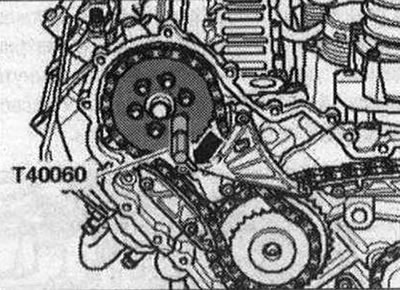
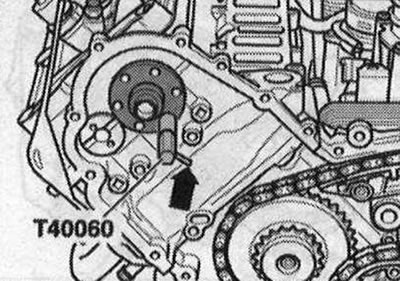
The "arrow" pin in the "T40060" installation pin must be positioned perpendicular to the axis of symmetry of the camshaft at cylinder bank 2 (left).
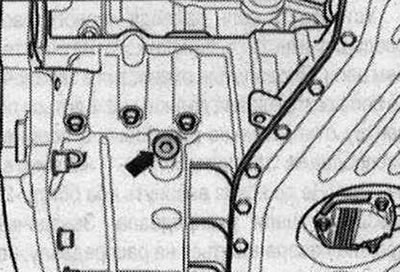
Unscrew the threaded plug "arrow" of the "TDC" mark from the upper part of the oil pan, use a long wrench with an internal Allen key with a ball head for this.
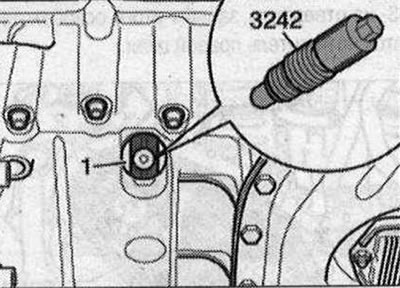
If necessary, tighten the fixing bolt "3242" to a torque of 20 Nm in the hole: turn the crankshaft "1" until the bolt is completely centered.
To protect against cuts, wrap the tip and cutting edge of the 3.3 mm drill with electrical tape. Press the left camshaft chain tensioner shoe "in the direction of the arrow" and lock the chain tensioner with a 3.3 mm drill "pos. 1". Risk of malfunction due to reverse running of the camshaft drive chain already in use. For reassembly, mark the direction of travel of the drive chain with an arrow, use paint for this. Remove the dowel pin "T40060" from both camshafts.
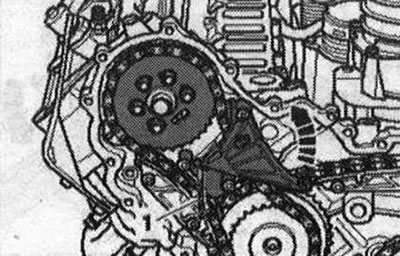
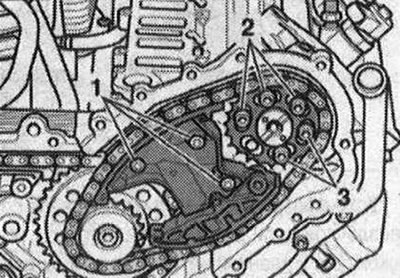
Unscrew bolt "3" and remove the tensioner bar. Unscrew bolts "1" of the tensioner bar and "2" of the camshaft chain drive sprocket. Remove the chain sprocket, tensioner bar and left camshaft drive chain.
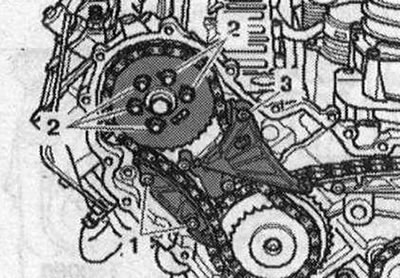
To protect against cuts, wrap the tip and cutting edge of the 3.3 mm diameter drill with electrical tape. Press the right camshaft chain tensioner damper bar "in the direction of the arrow" and lock the chain tensioner with a 3.3 mm diameter drill "pos. 1".
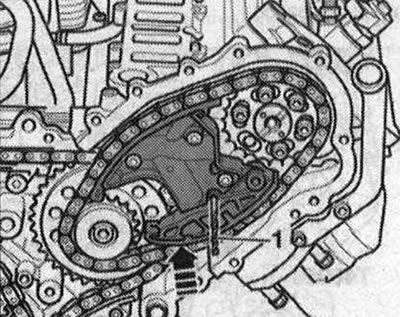
Risk of failure due to reverse running of the already used camshaft drive chain. For reassembly, mark the direction of the drive chain with an arrow, use paint for this. Unscrew bolts "1" of the chain tensioner, as well as "2" and "3" of the camshaft chain sprocket. Remove the chain sprocket, tensioner and right camshaft drive chain.
Installation
Crankshaft "1" is fixed in the "TDC" position using locking screw "3242". The drive chain of the chain drive is installed. Replace the bolts that were tightened with additional turning. Risk of damage to the valves and piston crowns. When turning the camshaft, not a single piston of the crankshaft should be in the "TDC" position. Make sure that the camshafts of both cylinder heads are in the "TDC" position. The camshafts should be fixed with pins "T40060". The "arrow" pin in the "T40060" installation pin should be located perpendicular to the axis of symmetry of the camshaft at cylinder bank 1 (right).
The "arrow" finger in the "T40060" locating pin must be positioned perpendicular to the camshaft symmetry axis at cylinder bank 2 (left). Remove the "T40060" locating pin from both camshafts.
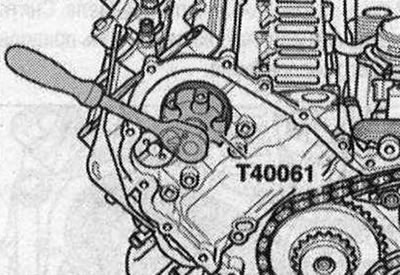
If the camshafts cannot be fixed, their position can be adjusted using the adapter "T40061"; to do this, screw the bolts of the chain drive sprocket into the camshaft.
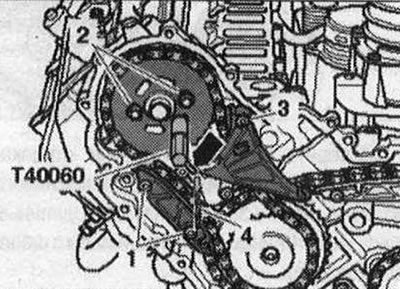
Install the left camshaft chain with the camshaft chain sprocket, the guide bar and the tensioner bar. The longitudinal holes in the camshaft chain sprocket must be centered relative to the threaded holes in the camshaft. Tighten bolts "1" and "3" of the guide bar and the tensioner bar. Do not screw in both bolts "2" of the camshaft chain sprocket all the way. The sprocket must rotate on the camshaft, but must not be skewed. Secure the left camshaft with the "T40060" locating pin. The "arrow" pin in the "T40060" locating pin must be parallel to the axis of symmetry of the camshaft chain transmission. Remove drill "4" from the hole, due to which the left chain tensioner is released.
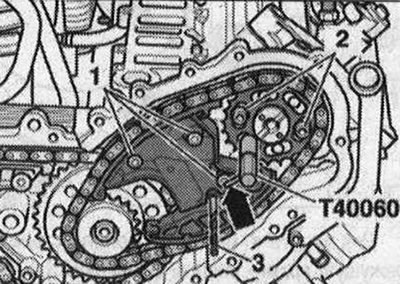
Install the right camshaft drive chain together with the sprocket and chain tensioner. The longitudinal holes in the camshaft chain sprocket must be centered relative to the threaded holes in the camshaft. Tighten bolts "1" of the chain tensioner. Do not fully screw in both bolts "2" of the camshaft chain sprocket. The sprocket must rotate on the camshaft, but must not be skewed. Secure the right camshaft with the dowel pin "T40060". The "arrow" pin in the dowel pin "T40060" must be parallel to the axis of symmetry of the camshaft chain transmission. Remove drill "3" from the hole, due to which the right chain tensioner is released.
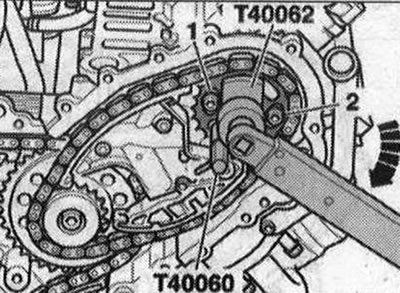
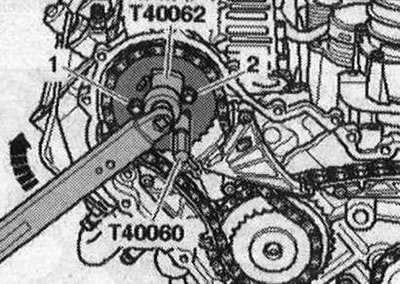
Tighten the right camshaft chain sprocket with the adapter "T40062" and a torque wrench to 20 N·m clockwise "arrow" and hold the pre-tension. Tighten bolts "1" and "2". Remove the adapter "T40062" and the installation pin "T40060". Tighten the remaining bolts of the right camshaft chain sprocket.
Tighten the left camshaft chain sprocket with the adapter "T40062" and a torque wrench to 15 N·m clockwise "arrow" and hold the pre-tension. Tighten bolts "1" and "2". Remove the adapter "T40062" and the installation pin "T40060". Tighten the remaining bolts of the left camshaft chain sprocket.
Unscrew the fixing bolt "3242".
The original version of the article is posted on the website: AudiManual.ru