
Table of contents: Removal ↓ Installation ↓
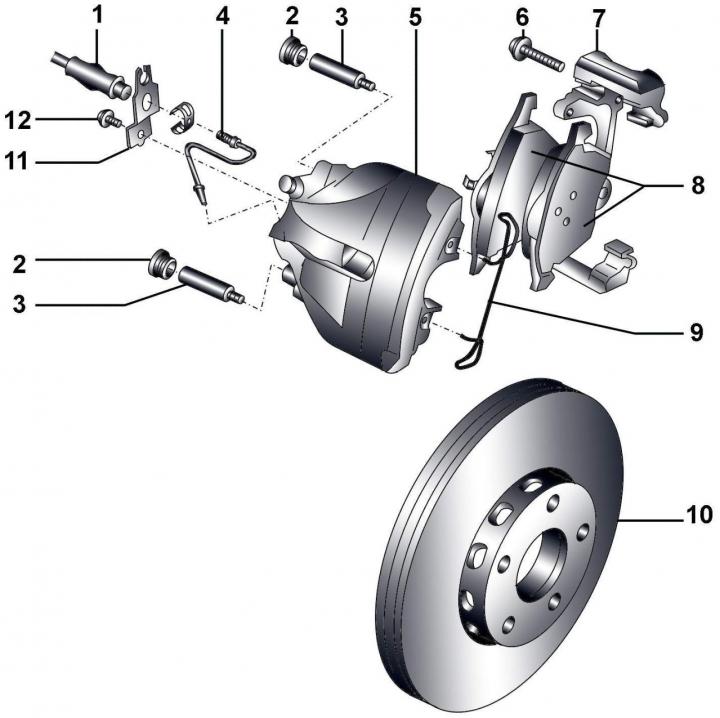
Fig. 15–4. FN-3 Front Brake: 1 – brake pipe; 2 – protective cap; 3 – guide pin, 25 Nm; 4 – brake hose, 15 Nm; 5 – support; 6 – bolt, 120 Nm;7 – caliper holder (brake pad guide; 8 – brake pads; 9 – spring; 10 – brake disc; 11 – bracket; 12-bolt, 10 Nm
The front brake device is shown in Fig. 15–4.
Removal
Loosen the front wheel mounting bolts, then raise the front of the car and secure it on stands. Unscrew the mounting bolts and remove the wheel.
Always replace all pads on one axle of the vehicle, even if only one pad is worn. If brake pads are to be reinstalled, they must be marked before removal.
Remove the protective caps from the inner ends of the guide bolts.
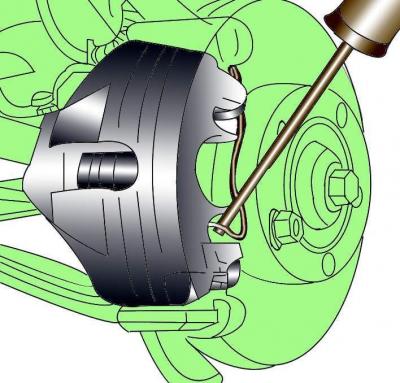
Fig. 15–5. Removing the retaining spring from the outside of the caliper
Using a screwdriver blade as a lever, remove the retaining spring from the outside of the caliper (Fig. 15-5).
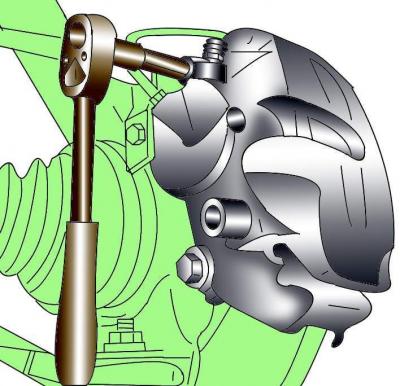
Fig. 15–6. Unscrewing the guide pin from the caliper
Unscrew the guide pins from the caliper (Fig. 15–6).
Lift the caliper with the inner shoe and tie it to the front strut with soft wire. The caliper should not hang on the brake hose. The brake hose should not be stretched or twisted.
Remove the inner pad from the caliper piston and the outer pad from the caliper bracket.
Installation
Do not press the brake pedal when the brake pads are removed.
When replacing brake pads, do not unscrew the brake pipe.
Clean any dust or dirt from the caliper and any rust from the edge of the brake disc. If the pads are still serviceable, clean them with a wire brush and rag.
Check it out brake disc for cracks, especially around the holes for the wheel mounting bolts, as well as for wear or mechanical damage, and replace both discs if necessary.
Measure the thickness of the brake disc.
If new brake pads are installed, press the piston into the caliper using a special device. You can also press the piston into the caliper using a wooden rod or a hammer handle. Make sure that the piston is not warped and that the surfaces of the piston and dust boot are not damaged. When the piston is pushed in, the brake fluid is forced out of the brake cylinder into the expansion tank, so constantly monitor the fluid level in the tank and, if necessary, pump a little out of the tank.
Install the inner pad on the caliper, with the spring clip inserted into the piston recess. There is an arrow on the inner brake pad with the spring. It should match the direction of rotation of the disc when moving forward. Otherwise, the brake pad will make extraneous noise during operation.
The outer brake pads are attached with an adhesive layer to the backing plate.
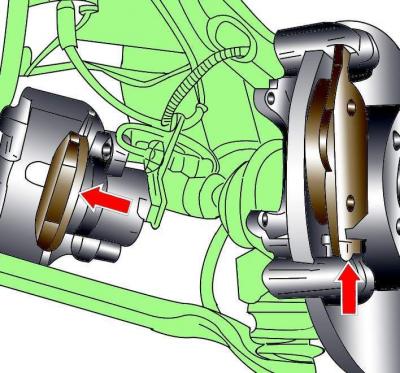
Fig. 15–7. Positioning the front brake pads before installing the caliper
Remove the protective film from the adhesive layer of the outer brake pad and install it on the caliper holder (Fig. 15-7).
Install the caliper with the inner shoe on the caliper holder. Screw in the caliper guide pins and tighten them to 25 N·m.
Install the protective caps on the caliper guide pins.
Install the retaining spring onto the caliper, locating the ends of the spring in the holes in the caliper.
Replace the brake pads on the second front wheel in the same way.
Install the wheels and lower the vehicle to the ground. After cleaning the ribbed base of the bolt heads, tighten the mounting bolts to a torque of 120 N·m.
Press the brake pedal several times to press the brake pads against the brake disc.
Check the brake fluid level in the reservoir and top up if necessary.
After installing new brake pads, avoid sudden braking for the first 200 km of the vehicle's mileage.
The original publication in its entirety is posted on the website: audimanual.ru