
Table of contents: Removal ↓ Installation ↓
Removal
1. Unscrew the bolts (see arrows in the illustration) and remove the upper engine protective cover.
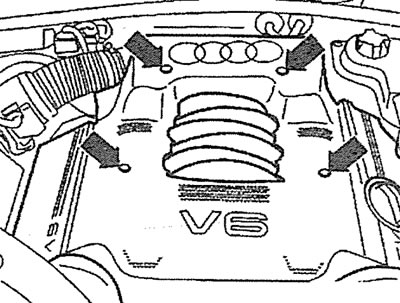
3.1. Unscrew the bolts (see arrows) and remove the upper engine cover
2. Unscrew the bolts (see arrows in the illustration), then disconnect air ducts 1 and 2.
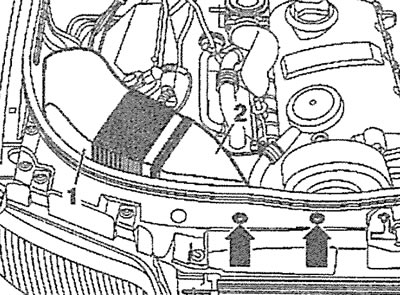
3.2. Unscrew the bolts (see arrows), then disconnect air ducts 1 and 2
3. Cars with parking heater. Unscrew the bolts (see arrows in the illustration) fastening the heater pipe to the soundproofing shield.
3.3. Unscrew the bolts (see arrows) fastening the heater pipe to the soundproofing shield. Cars with a parking heater
4. Unscrew the bolts (see arrows in the illustration) fasteners and remove the engine splash guard.
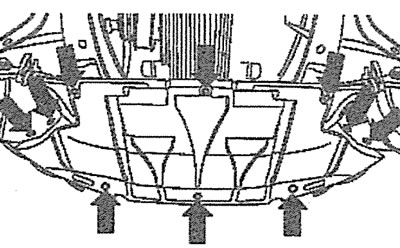
3.4. Unscrew the bolts (see arrows) fasteners and remove the engine splash guard
5. Mark the direction of rotation of the V-belt with chalk, marker or paint if the belt is to be reinstalled.
Attention! The bolt for fastening the tensioner roller of the V-belt of the auxiliary drive may have a head for a hexagonal open-end wrench or a hexagonal socket wrench.
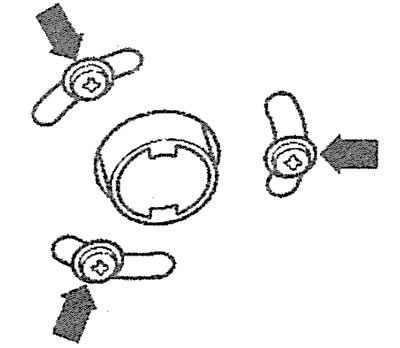
6. Loosen the tension of the auxiliary drive V-belt by turning the V-belt tensioner roller mounting bolt with a hexagonal open-end or socket wrench in the direction indicated by the arrow in Illustrations 3.6 and 3.6a until holes 1 and 2 are aligned.
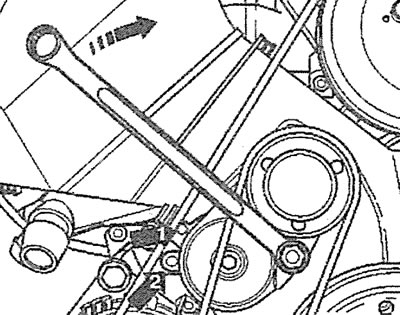
3.6. Using a hexagonal open-end wrench, turn the V-belt tensioner roller mounting bolt in the direction indicated by the arrow until holes 1 and 2 are aligned |
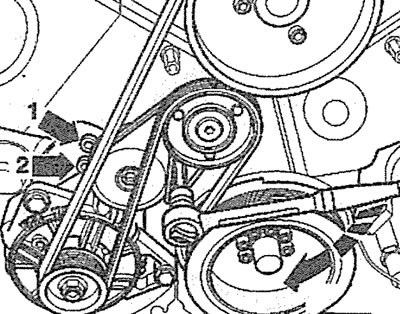
Z.ba. Turn the V-belt tensioner roller mounting bolt with a hexagonal socket wrench in the direction indicated by the arrow until holes 1 and 2 are aligned |
7. Lock the tensioner by inserting a pin of the appropriate diameter, such as a thrust pin, part number 3204, into the aligned holes.
8. Carefully remove the auxiliary drive V-belt.
Installation
The installation of the auxiliary drive V-belt is carried out in the reverse order of removal.
9. Lay the V-belt in a counterclockwise direction. The belt is laid on the crankshaft pulley first and on the tensioner roller last.