



Table of contents: Removal ↓ Installation ↓
Removal
1. Unscrew the radiator fan with a viscous coupling, holding its hub from turning with a second key (see illustration).
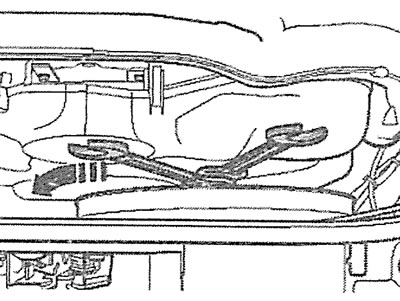
2.1. Unscrew the radiator fan with a viscous coupling, holding its hub from turning with a second key
2. Remove the front left and right parts of the timing cover.
3. Remove the intake manifold pipe (see points 3.1-3.9).
4. Remove the cap from the oil filler neck.
5. Turn the crankshaft in the direction of engine rotation until the inscription "OT" appears in the oil filler neck hole (top dead center) on the camshaft (see illustration).
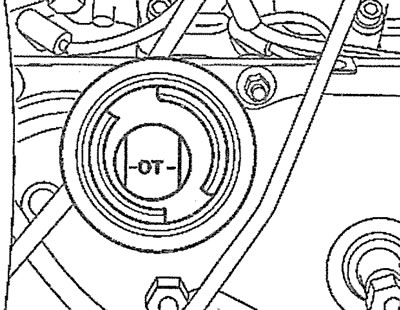
2.5. Turn the crankshaft in the direction of engine rotation until the inscription "OT" appears in the oil filler neck hole (top dead center) on the camshaft
6. Screw in the locking pin, catalog number 3242, instead of the plug, and lock the crankshaft at TDC of the piston of cylinder No.1 (see illustration).
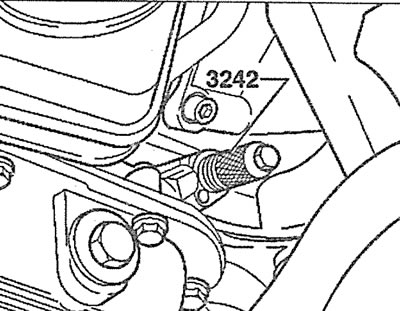
2.6. Screw in the locking pin, catalog number 3242, instead of the plug and lock the crankshaft at TDC of the piston of cylinder No.1
7. Remove the timing belt of the gas distribution mechanism drive (see the relevant chapter).
8. Disconnect the fuel injection pump plug, then unscrew the nuts securing the fuel injection pump supply and return lines.
9. Unscrew the nuts securing the fuel supply lines to the injectors.
10. Unscrew the mounting bolts (see arrows in the illustration) and carefully remove the high-pressure fuel pump without disconnecting the fuel lines from it.
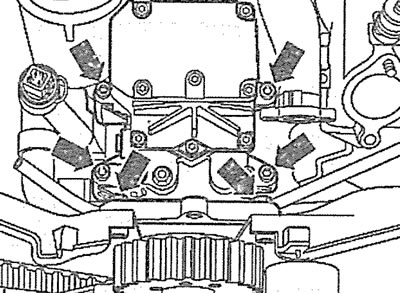
2.10. Unscrew the mounting bolts (see arrows) and carefully remove the fuel injection pump without disconnecting the fuel lines from it
11. Unscrew the fastening nuts and disconnect the fuel lines from the high-pressure fuel pump, having first marked them.
Installation
The high-pressure fuel pump (HPFP) is installed in the reverse order of removal.
Information obtained from this resource AUDImanual.ru