
Table of contents: Removal ↓ Installation ↓
Removal
Cars with gasoline engines
Attention! Cars with a petrol engine are equipped with two radiator fans.
Left radiator fan
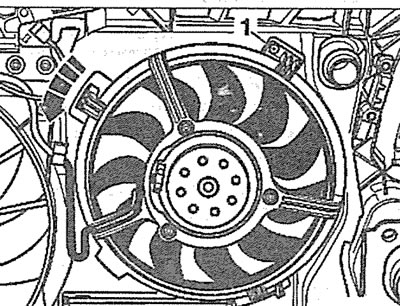
1. Disconnect the plug (see arrow in illustration) radiator blower fan.
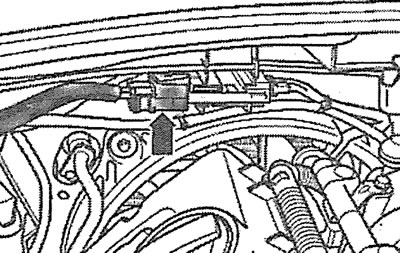
7.1 Disconnect the plug (see arrow) radiator fan. Cars with gasoline engine
2. Set the upper front cross member to the service position.
3. Release the radiator fan wiring harness from the fasteners and move it away from the work area.
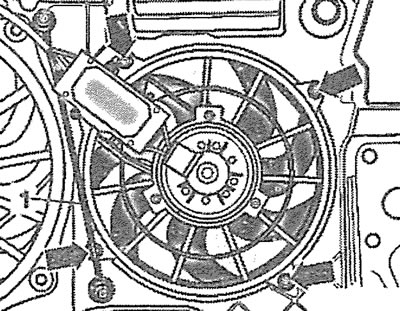
4. Remove the spacer 1, unscrew the bolts (see arrows in the illustration) fasteners and carefully remove the left radiator fan.
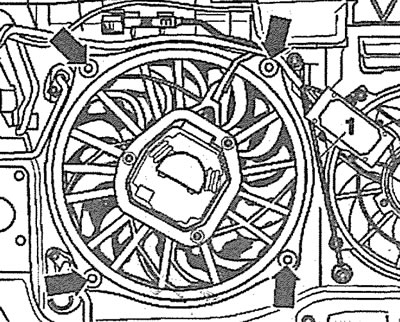
7.4. Remove the spacer 1, unscrew the bolts (see arrows) fasteners and carefully remove the left radiator fan. Cars with a gasoline engine
Right radiator fan
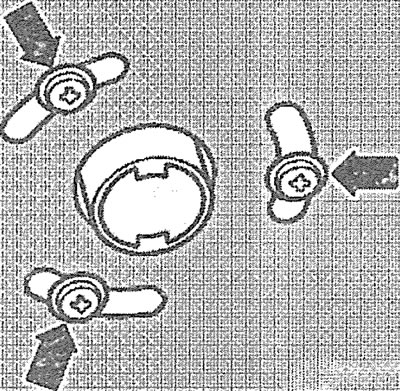
5. Remove the cover(see arrow in illustration) power steering fluid reservoir.
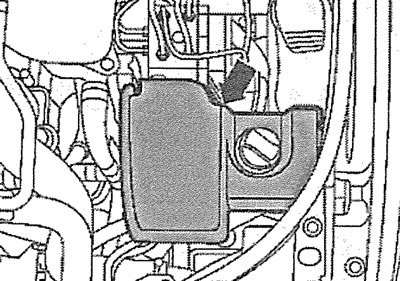
7.5 Remove the cover (see arrow) power steering fluid reservoir. Cars with gasoline engine
6. Set the upper front cross member to the service position.
7. Disconnect plugs 1 and 2, release the wiring harness of the right radiator fan from the fasteners and move it away from the work area (see illustration).
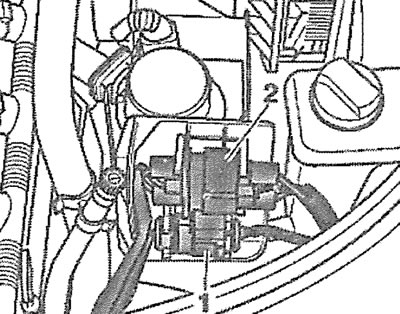
7.7. Disconnect plugs 1 and 2, release the wiring harness of the right radiator fan. Cars with a gasoline engine
8. Remove stretcher 1, unscrew the bolts (see arrows in the illustration) fasteners and remove the right radiator fan.
7.8. Remove stretcher 1, unscrew the bolts (see arrows) fasteners and remove the right radiator fan. Cars with a gasoline engine
Diesel Engine Cars
9. Cars with parking heater. Unscrew the bolts (see arrows in the illustration) fastening the parking heater pipe to the noise-insulating shield.
7.9. Unscrew the bolts (see arrows) fastening the parking heater pipe to the noise insulation shield. Cars with a diesel engine and parking heater
10. Unscrew bolts/press fasteners 1-3 and 5 and remove the front part of the engine mudguard (see illustration).
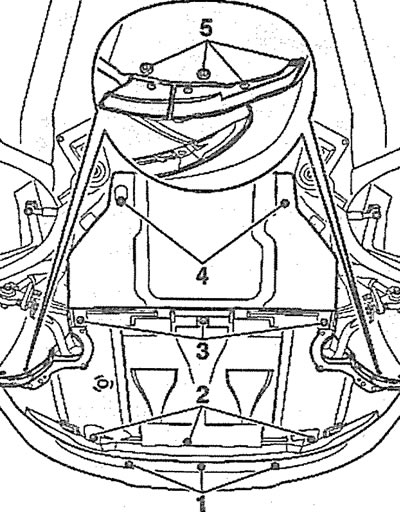
7.10. Unscrew bolts/press fasteners 1-3 and 5 and remove the front part of the engine mudguard. Vehicles with a diesel engine
11. Remove the front bumper (see the relevant chapter).
12. Set the upper front cross member to the service position (see paragraphs 3.1-3.6 in Section 2C).
13. Unscrew the bolts (see arrows in the illustration) and remove the upper engine protective cover.

7.13. Unscrew the bolts (see arrows) and remove the upper engine cover. Diesel vehicles
14. Remove the cap from the power steering fluid reservoir (see arrow in illustration 7.5).
15. Disconnect plugs 1 and 2 of the radiator fan with viscous coupling and move the wiring harness away from the work area.

7.15. Disconnect plugs 1 and 2 of the radiator fan with viscous coupling and move the wiring harness away from the work area. Vehicles with a diesel engine
16. Unscrew bolt 1 securing the radiator fan with viscous coupling (see illustration 7.16), holding its hub from turning with a second wrench (see illustration 7.16a).
7.16. Unscrew bolt 1 securing the radiator fan with a viscous coupling. Vehicles with a diesel engine |
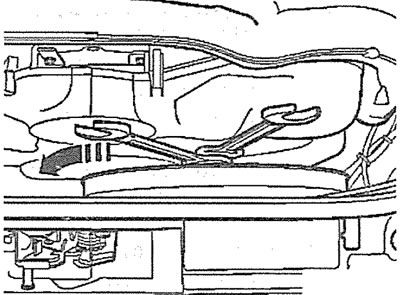
7.16a. Unscrew the mounting bolt of the radiator fan with a viscous coupling, holding its hub from turning with a second wrench. Cars with a diesel engine |
17. Carefully turn the radiator fan in the direction indicated by the arrow in Illustration 7.16 and remove the fan.
Installation
The radiator fan is installed in the reverse order of removal.
[Content source: the specified website «Audimanual.ru»]