
Table of contents: Removal ↓ Installation ↓
Attention! Additional radiators are supplied with cars with petrol engines.
Removal
1. Remove the cap from the coolant expansion tank.
Caution! When the engine is hot, place a rag on the expansion tank cap before removing it to avoid being burned by hot coolant or steam. Remove the cap only when the coolant temperature is below +90°C.
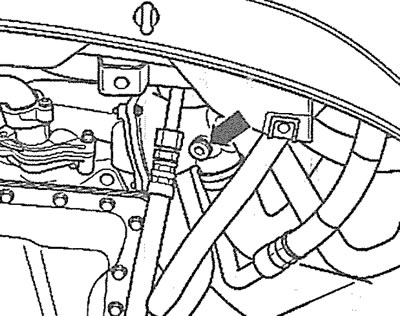
2. Unscrew the vent plug (see arrow in illustrations 6.2 and 6.2a).
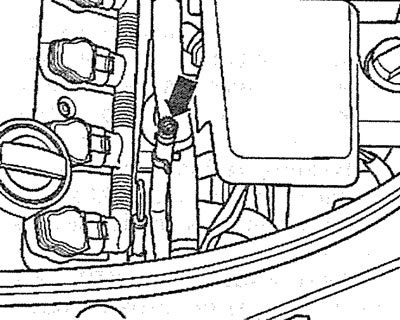
6.2. Unscrew the vent plug (see arrow). Left additional radiator |
6.2a. Unscrew the vent plug (see arrow). Right additional radiator |
3. Cars with parking heater. Unscrew the bolts (see arrows in the illustration) fastening the parking heater pipe to the noise-insulating shield.
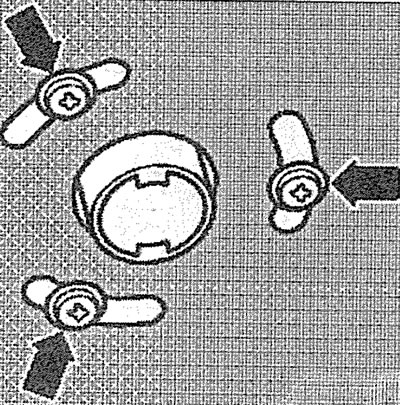
6.3 Unscrew the bolts (see arrows) fastening the parking heater pipe to the noise insulation shield. Cars with parking heater
4. Press the fasteners 1 and 2 and remove the front part of the engine splash guard (see illustration).
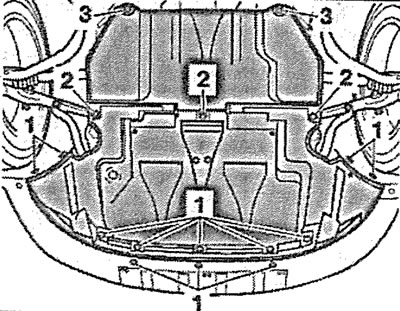
6.4. Press down on fasteners 1 and 2 and remove the front part of the engine mudguard
5. Remove the front bumper (see the relevant chapter).
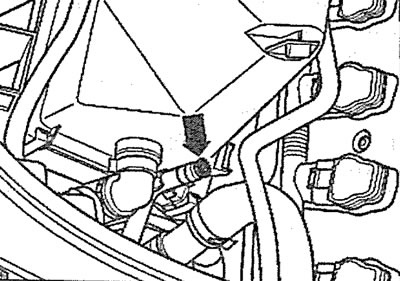
6. Unscrew the plug (see arrow in illustration) drain hole on the thermostat housing and drain the coolant into a suitable container.
6.6. Unscrew the plug (see arrow) drain hole on the thermostat housing and drain the coolant into a suitable container
7. Remove the fairing (see arrow in illustration) left additional radiator.
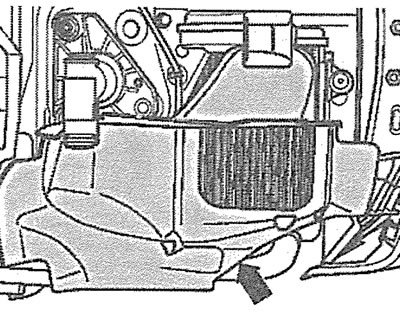
6.7. Remove the fairing (see arrow) left additional radiator
8. Disconnect the coolant hoses from the additional radiator by removing clamps 1 and 2(see illustrations 6.8 and 6.8a).
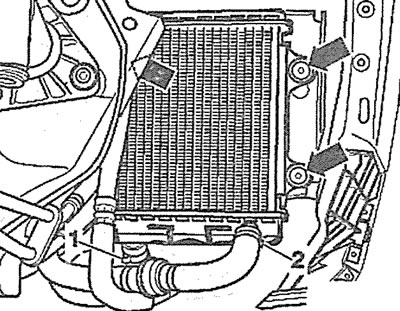
6.8. Disconnect the coolant hoses from the additional radiator by removing clamps 1 and 2. Left additional radiator |
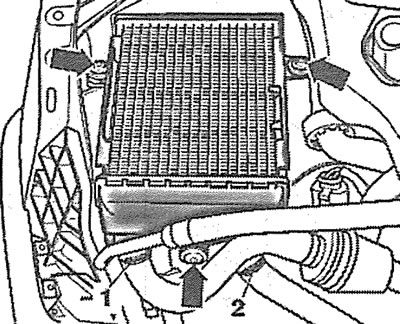
6.8a. Disconnect the coolant hoses from the additional radiator by removing clamps 1 and 2. Right additional radiator |
9. Unscrew the bolts (see arrows in illustrations 6.8 and 6.8a) fasteners and remove the additional radiator.
10. Cars with automatic transmission. Unscrew the bolts (see arrows in illustration 6.8)fastenings of the left additional radiator.
11. Cars with automatic transmission. Unscrew the bolts (see arrows in the illustration) fasten the transmission fluid cooling radiator to the rear of the left auxiliary radiator and remove the auxiliary radiator.
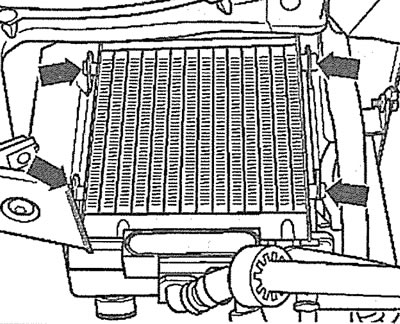
6.11. Unscrew the bolts (see arrows) fastening the transmission fluid cooling radiator to the rear side of the left additional radiator. Cars with automatic transmission
Installation
The installation of an additional radiator is carried out in the reverse order of removal.
(The original article is located on the online resource: «audimanual.ru»)