
Timing belt
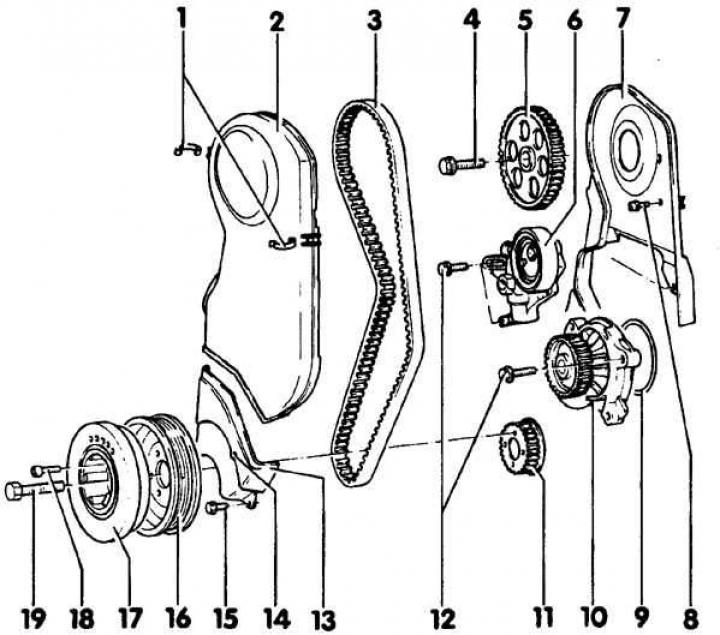
- 1. Spring clamp
- 2. Upper belt cover
- 3. Timing belt
- 4. Camshaft sprocket bolt
- 5. Camshaft sprocket
- 6. Tensioner
- 7. Rear timing belt cover
- 8. Bolt
- 9. Water pump sealing ring
- 10. Water pump
- 11. Crankshaft sprocket
- 12. Bolts
- 13. Lower timing belt cover
- 14. Synchronization mark
- 15. Bolt
- 16. Crankshaft pulley
- 17. Shock absorber
- 18. Pulley and shock absorber bolt
- 19. Pulley bolt
Removal
1. Disconnect the negative battery cable.
2. Raise and support the front of the vehicle.
3. Remove the front bumper.
4. Remove both front headlights.
5. Disconnect the cable from the hood lock and remove the crossbar.
6. Unscrew the radiator fasteners and move it to the side without disconnecting the hoses from it.
7. Remove the radiator fan.
8. Remove the auxiliary drive belt.
9. Remove the drive belt tensioner.
10. Set piston N1 to TDC, remove the upper and lower timing belt covers.
11. Unscrew the crankshaft pulley bolt, having first locked the flywheel.
12. Loosen the timing belt tensioner bolts, turn the tensioner counterclockwise to relieve its pressure. Remove the timing belt.
13. Remove the crankshaft shock absorber together with the belt.
Examination
Inspect the belt for grease or oil contamination, wear or damage. Replace the belt if necessary.
Installation
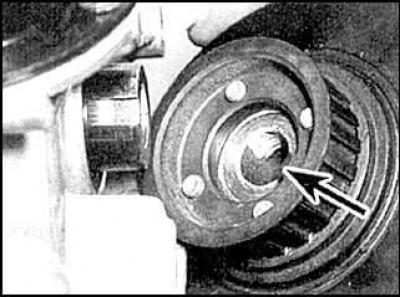
1. Install the timing belt and crankshaft sprocket. Tighten the sprocket bolt. The arrow indicates the installation lug.
2. Align the timing marks.
3. Turn the tensioner clockwise to tighten the belt. The belt is tensioned correctly if it can be twisted no more than 90°. Tighten the tensioner bolts.
4. Install the remaining parts.