



Table of contents: Installation diagram: cigarette… ↓ Removal and installation the "L28"… ↓ Removal and installation the… ↓ Removal and installation the… ↓ Removal and installation the 3 12V… ↓ Removal and installation the 3 12 V… ↓
Installation diagram: cigarette lighter, 12V socket, 230V socket
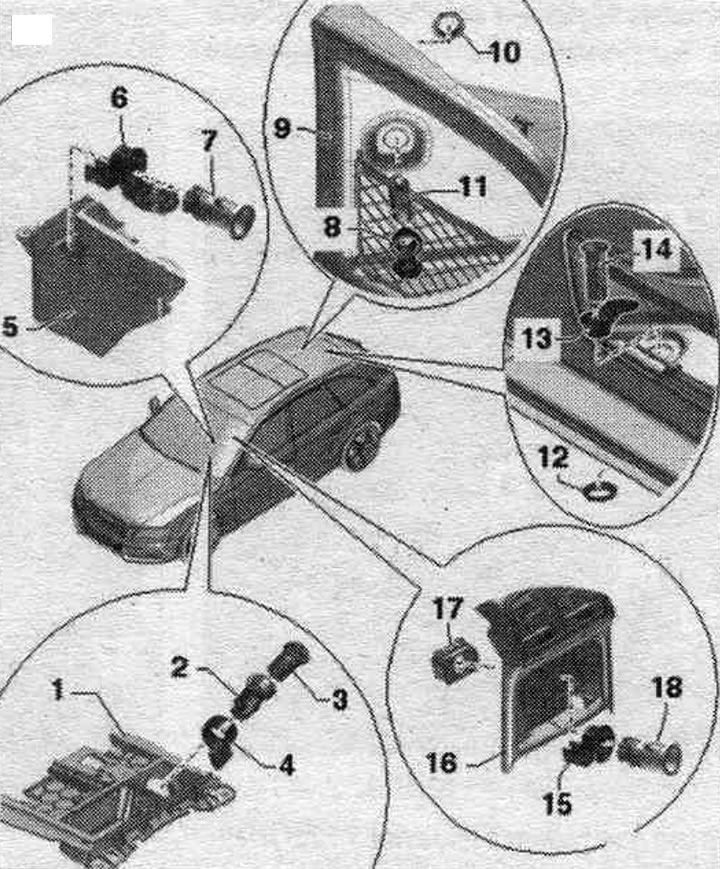
1. Cigarette lighter mount "U1".
2. Cigarette lighter "U1".
3. Cigarette lighter.
4. Cigarette lighter illumination lamp "L28".
5. Center console.
6. Socket illumination lamp "L42": for 12V socket "U5".
7. 12V socket "U5".
8. Mount with cover: for 3 12 V "U19" socket, Avant.
9. Right side trim of the trunk.
10/12. Nut: 2 Nm.
11. Socket 3 12 V "U19", Avant.
13. Mount with cover: for 3 12V socket - 1119, Sedan.
14. Socket 3 12 V -U19, Sedan.
15. Socket illumination lamp "L42": for socket 2 12 V "U18".
16. Rear center, consoles.
17. Mounting: depending on the configuration, with a 2 x 12 V "U18" socket or with a 230 V socket for an inverter with a socket, 12 V-230 V "U13".
18. Socket 2 12 V "U18".
Tightening torque inverter with socket, 12 V-230 V "U13"
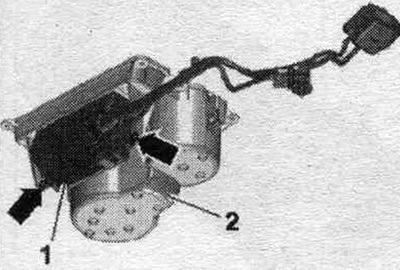
Tighten the arrow bolts to 1.4 Nm.
Removal and installation the "L28" cigarette lighter illumination lamp
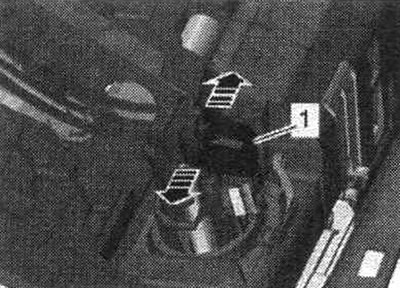
Remove the front ashtray. Remove cover "1" above the cigarette lighter illumination lamp "L28" "arrows".
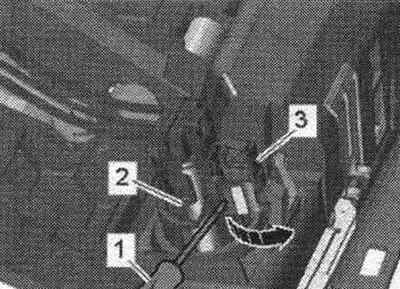
Using a thin screwdriver "1", carefully move the cigarette lighter illumination lamp "L28" "Pos. 3" in the "direction of arrow B" away from the cigarette lighter "U1" "Pos. 2".
Installation in reverse order: install the front ashtray.
Removal and installation the cigarette lighter "U1"
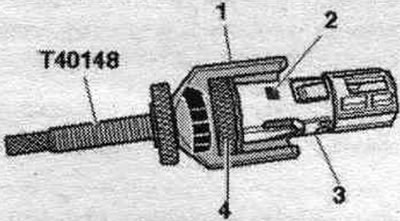
Install the cigarette lighter illumination lamp "L28". The tabs "2" of the puller "T40148" must engage in the recesses of the cigarette lighter "U1" "pos. 3" "arrow"; to do this, slide the threaded rod "1" downwards to the stop.
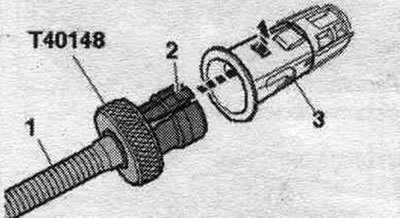
Insert the puller "T40148" into the cigarette lighter "U1" "pos. 1" to the stop. Turn the knurled wheel "2" on the puller "T40148" clockwise to the stop.
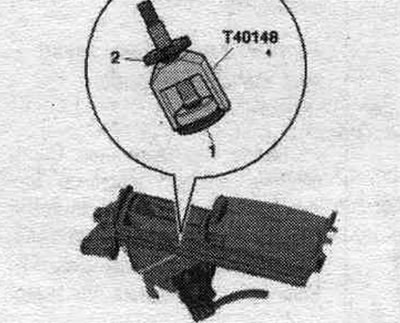
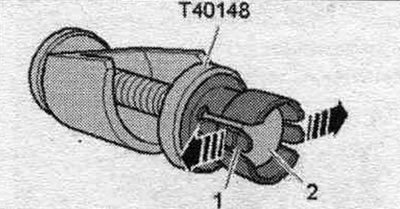
The piston "2" is pulled upwards and the tabs "1" in the puller "T40148" spread apart "arrows". Remove the cigarette lighter from the illumination ring with the puller "T40148".
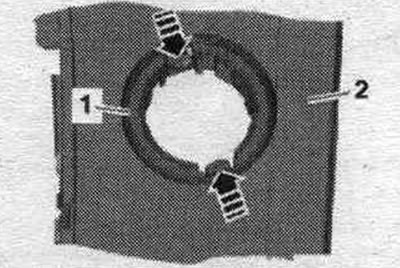
Unlock the clamping brackets in the direction of the arrow. Remove the cigarette lighter with the illumination ring "1" from the front ashtray "2".
Installation
Installation in reverse order. After removing the "T40148" puller, you need to check whether the cigarette lighter mounting strips are bent. If the bars are bent, you need to bend them back so that the cigarette lighter cannot pop out. Remove stop "1" of puller "T40148". Push the piston back and hold it in this position. Turn the knurled wheel "4" on the puller "T40148" counterclockwise "arrow"; in doing so, the tabs "2" are pushed away from the cigarette lighter "U1" "pos. 3", allowing the puller "T40148" to be removed. Insert the cigarette lighter illumination ring so that the retaining clip locks into the retainer. The light ring can only be installed in the mount in one position.
Removal and installation the backlight lamp for the "L42" socket - 12V "U5" socket
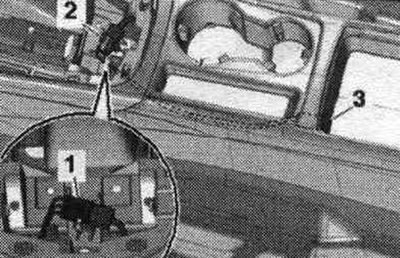
Cars with MMI-Basic equipment: removing the center console cover. Cars with MMI-Comfort basic equipment: removing the used multimedia system. "E380". Release the plug module "2" from the socket. Disconnect plug "1" and attach a long cord to it. The cord is secured to the connector so that during installation the wire for the 12V socket "3" can be pulled forward without removing the center console.
The tongues "2" of the puller "T40148" must enter the recesses of the 12 V socket "U5" "pos. 3" "arrow", to do this it is necessary to move the threaded rod "1" down until it stops. Open cover "1" of 12V socket "U5" and hold it in this position. Insert the "T40148" puller into the 12V "U5" socket until it stops. Rotate the notched wheel "2" in the "T40148" puller clockwise until it stops.
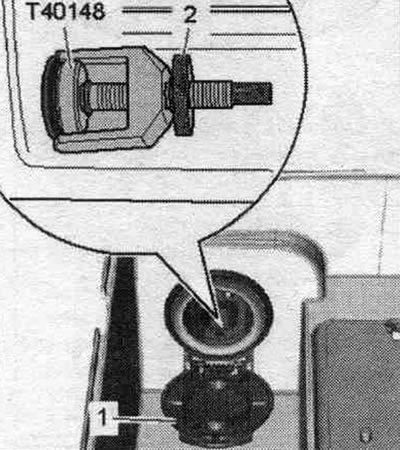
The piston "2" is pulled upwards and the tabs "1" in the puller "T40148" spread apart "arrows". Remove the 12 V socket "U5" together with the puller "T40148" from the illumination ring with the socket illumination lamp "L42". Disconnect the plug connection.
Unlock the clamping brackets in the direction of the arrow. Remove the illumination ring "1" with the socket illumination lamp "L42" from the storage compartment "2" in the center console.
Installation
Installation in reverse order. Remove stop "1" of puller "T40148". Push the piston back and hold it in this position. Rotate the knurled wheel "4" of the puller "T40148" counterclockwise "arrow", while the locking tabs "2" on the 12 V socket "U5" "pos. 3" are released and the puller "T40148" can be removed. Cars with MMI-Basic equipment: installation of the center console cover. Cars with MMI-Comfort basic equipment: installation of a used multimedia system. "E380".
Removal and installation the 3 12V "U19" socket, Sedan
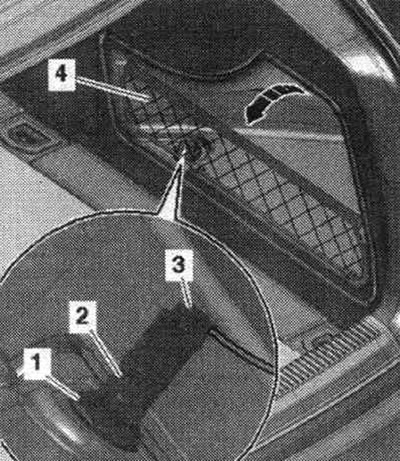
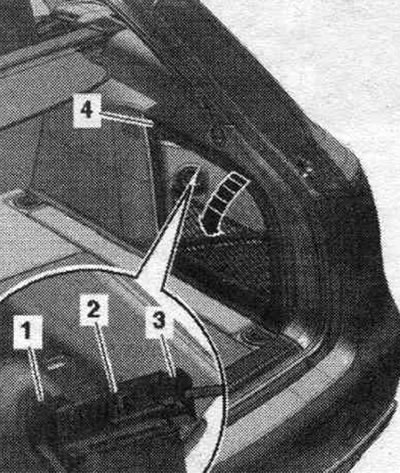
Turn off the ignition. Open the cover "4" of the right luggage compartment side trim "arrow". Disconnect the plug connection "3". Unscrew the nut "1". Remove the 12 V socket 3 "U19" "pos. 2" from the right luggage compartment side trim cover.
Installation in reverse order.
Removal and installation the 3 12 V "U19" socket, Avant
Turn off the ignition. Open cover "4" of the right side trunk trim "arrow". Disconnect plug connection "3". Unscrew nut "1". Remove socket 3 to 12 V "U19" "pos. 2" from the cover of the right side trunk trim.
Installation in reverse order.
[Text provided by the online resource «AudiManual.ru»]