



1. Remove the mat from the trunk.
2. To remove the rear trim 1, loosen the nuts 2. Remove the trunk light connector. Unfasten the trim upwards by releasing it from the four clamps 3.
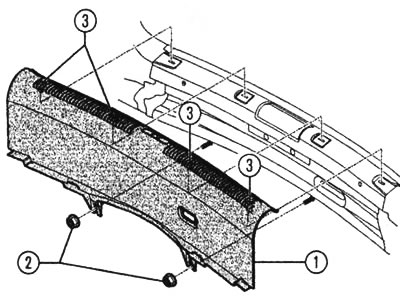
When removing the trims in the trunk, you must first remove the rear trim: 1 - rear trim, 2 - two nuts (5 Nm), 3 - clamps (4 pcs.)
3. After this, in the side trim of the trunk, move the mounting eye 5 upwards (some cars have two lugs) and in each eye, loosen two Phillips-head screws 6. Release the remaining three clamps 4.
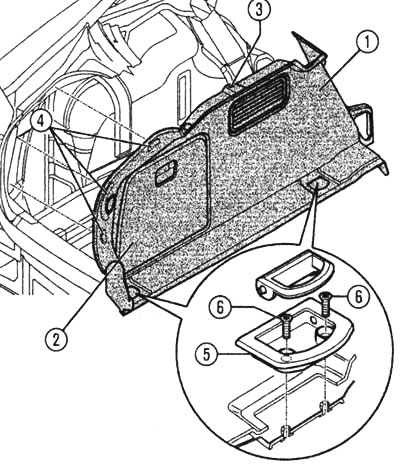
Trunk side trim: Simply unscrew the trim and then unclip it. 1 - trunk lining, 2 - lid, 3 and 4 - clamp, 5 - mounting eye, 6 - Phillips-head screws
4. When installing the trim, the fastening clamps must be replaced. When installing the trim, pay attention to the fit of the locking protrusions and fastening clamps.
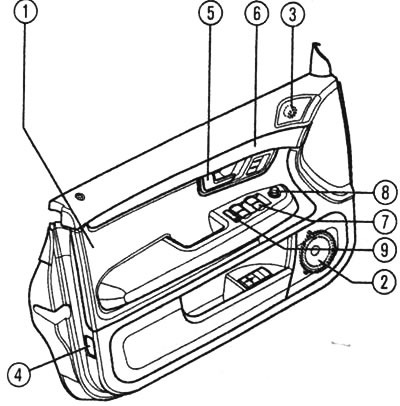
Front door trim: 1 - front door trim, 2 - low-frequency speaker, 3 - high-frequency speaker, 4 - "Door not closed" indicator, 5 - door lock remote control, 6 - decorative plug, 7 - window lift switch, 8 - mirror adjustment switch, 9 - centralized door locking system switch.