
1. To remove the trim, remove the lower part of the armrest 2. Unscrew two screws 3 from the door trim 1.
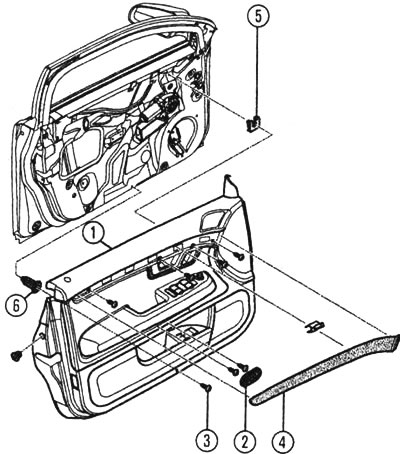
When dismantling, pay attention to the following details: 1 - door trim, 2 - lower part of armrest, 3 - screws, 4 - decorative plug, 5 - recessed nut, 6 - spacer nut.
2. Unfasten decorative cap 4 and remove it forward.
3. Remove the four screws from the trim, which are located under the plug.
4. Lift the door trim about 20 cm from the main part of the door. Disconnect the connectors, unhook the Bowden cable for remote control of the doors.
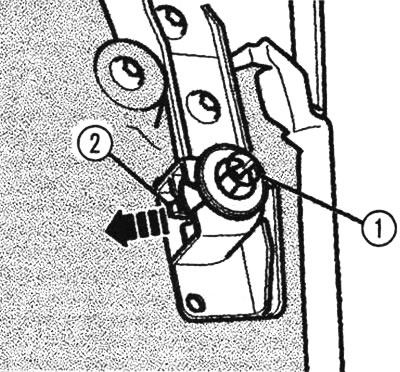
Pull out the clamp 1 for fixing the trim in the direction of the arrow. 2 — locking lug.
5. To loosen the trim fastening clamps, press on the locking lug 2 and pull out clamp 1 in the direction of the arrow.
6. To access the window lift, mirror adjustment and central door locking switches, unscrew the armrest. Carefully remove the switches using a screwdriver.
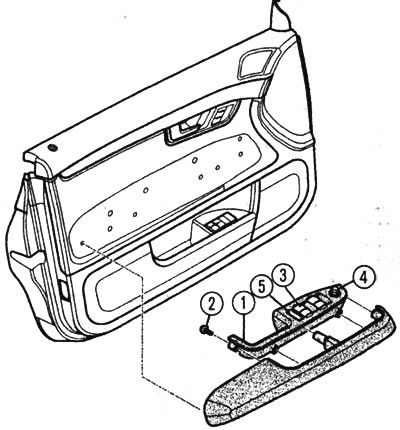
Removal the armrest: 1 - armrest, 2 - screw, 3 - window lift switch, 4 - mirror adjustment switch, 5 - central door locking system switch.
7. Using a flat-head screwdriver, press out the three locking tabs 2 and remove the high-frequency speaker 1.
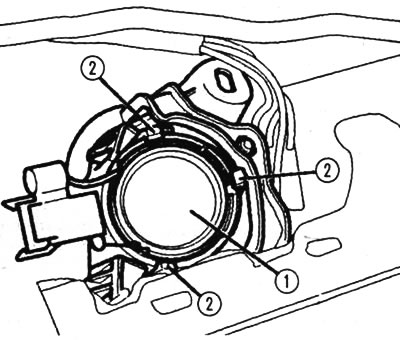
The tweeter is removed using a flat-head screwdriver
8. The subwoofer 2 is removed after loosening three screws 1 (tightening torque 1.5 Nm).
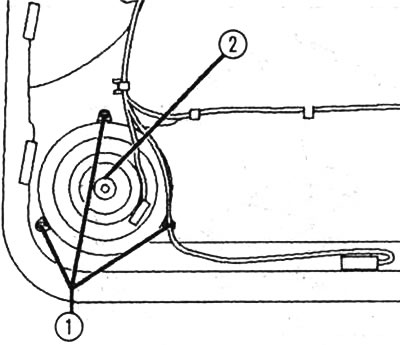
To remove the subwoofer, you need to unscrew the screws
9. Installation is carried out in reverse order.