



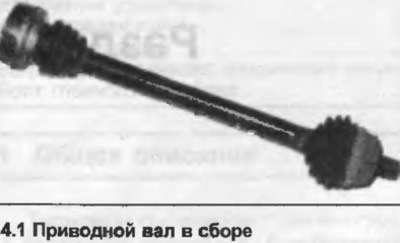
2. Using a suitable punch, knock the cover off the inner CV joint and move the rubber boots toward the middle of the drive shaft.
3. Remove the snap ring from the inner end of the drive shaft.
4. Support the inner CV joint in a vice, then remove the drive shaft.
5. Where used, remove the disc washer from the end of the drive shaft, noting its location.
6. Remove the inner rubber boots.
7. Remove the clips from the outer rubber boots.
8. Remove the boot from the outer CV joint and pull it toward the middle of the drive shaft.
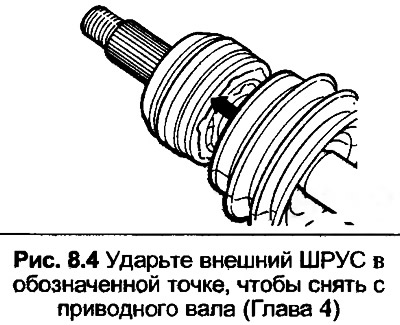
9. Using a wooden mallet, strike the outer CV joint at the point indicated in Fig. 8.4 to release the joint hub from the retaining ring on the drive shaft. Remove the joint.
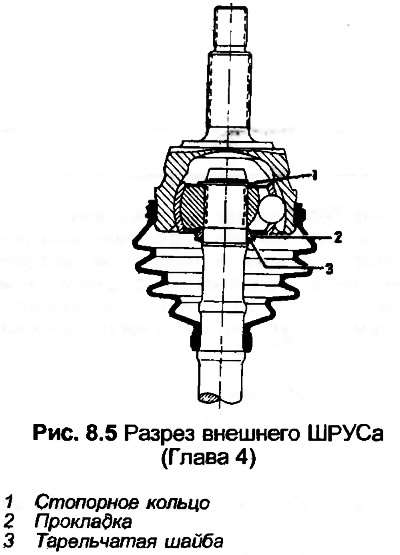
10. Remove the snap ring, gasket and Belleville washer from the end of the drive shaft, noting their location.
11. Remove the outer rubber boots.
12. Clean all parts and check their condition. Each joint can be purchased separately as a kit. This includes a rubber boot, joint, washers, lubricant, and depending on the type, a drive shaft nut/bolt, brackets and inner bolts. Boots are also available separately as a kit. Both retaining rings must be replaced. Do not disassemble the joints if you intend to reuse them.
13. Begin assembly by lubricating the small inner ends of the boots. Then position both boots on the drive shaft, closer to the middle.
14. Position the Belleville washer, spacer, and snap ring on the outer end of the drive shaft. The snap ring should slide freely into the groove. The convex side of the Belleville washer should face the end of the drive shaft.
15. Place the outer CV joint onto the drive shaft until the retaining ring is engaged.
16. Fill the outer joint with the specified amount of grease, applying it to both sides of the joint.
17. Pull the outer boots onto the CV joints, position the small diameter end in the groove of the drive shaft. Use a screwdriver to lift the boots to release the vacuum. Install and tighten the new clamps.
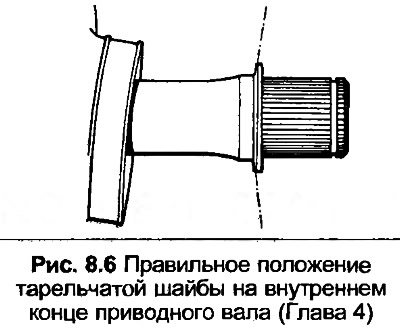
18. Install the Belleville washer on the inboard end of the drive shaft, with the convex side facing the end of the drive shaft. Note that the 2226 cc and 2309 cc models are not equipped with a washer.
19. Pull the inner CV joint onto the drive shaft, with the groove on the hub facing the shoulder or cup washer on the drive shaft. Then install the snap ring into the groove.
20. Fill the outer joint with the specified amount of grease, applying it to both sides of the joint. Use a screwdriver to lift the boots to release the vacuum. Install and tighten the new clamps.
21. Apply sealant to the surface of the cover that contacts the joint, then pull the rubber boots into place, position the small diameter end in the groove of the drive shaft. Lightly hammer the cover onto the joint.