
Table of contents: Vertical fuel filter ↓ Horizontal fuel filter ↓
Caution: After replacing the fuel filter, fuel lines or additional fuel pump on CASA, CASB, CATA and CCMA engines before 05.2010, the fuel supply system must be bled before the first engine start.
Vertical fuel filter
1. The installation details of the vertical fuel filter are shown in the illustration.
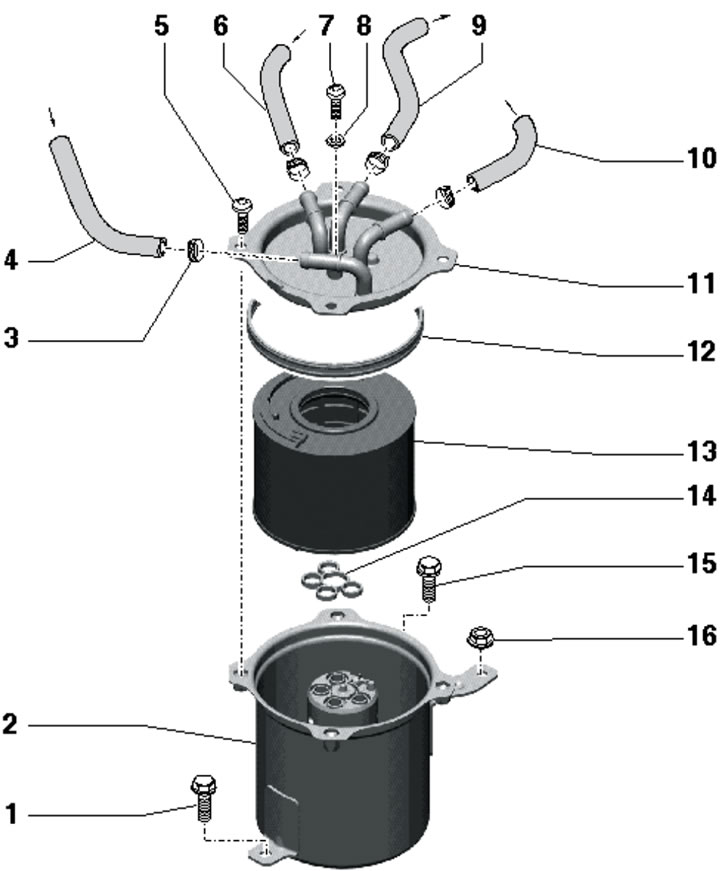
13.1. Vertical fuel filter installation details:
1, 5, 15 - Bolt, 8 Nm;
2 - Fuel filter housing;
3 - Spring clamp;
4 - Fuel supply hose from the tank, connected to the "VF" port on the cover 11;
6 - Fuel return hose from the engine, connected to the "RF" port on cover 11;
7 - Bleed screw, 5 Nm;
8 - Gasket, subject to replacement;
9 - Fuel supply hose to the engine, connected to the "VM" port on cover 11;
10 - Fuel return hose to the fuel cooler, connected to the "RT" port on the cover 11;
11 - Fuel filter cover;
12, 14 - Gasket, supplied only with part 13;
13 - Filter element;
16 - Nut, 8 Nm.
2. Disconnect the fuel hoses from the filter cover (1-4 in the illustration), unscrew the bolts (5 and 7), remove the nut (6) and remove the fuel filter.
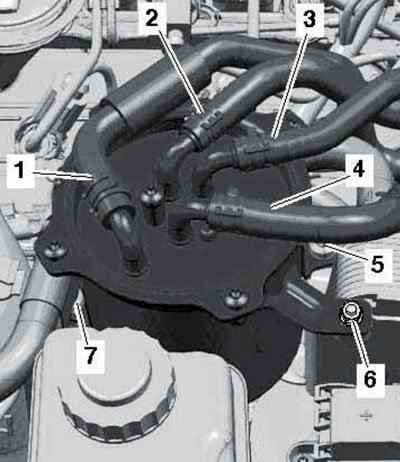
13.2. Removing the vertical fuel filter.
3. Installation is carried out in reverse order.
Horizontal fuel filter
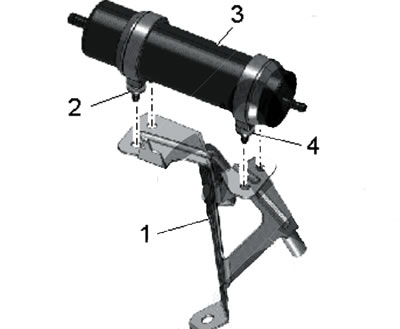
4. The installation details of the horizontal fuel filter are shown in the illustration.
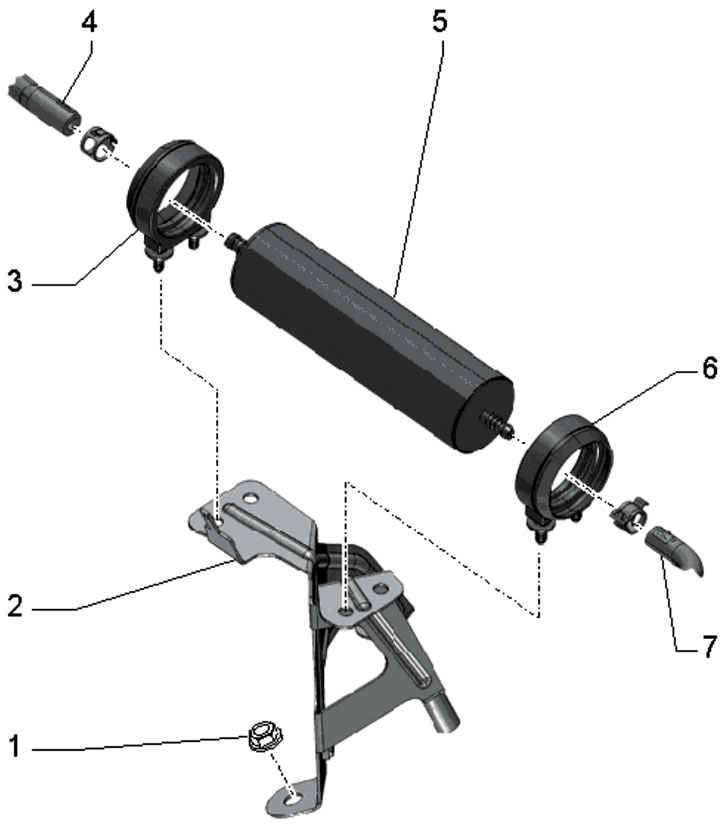
13.4. Horizontal fuel filter installation details:
1 - Nut, 9 Nm;
2 - Fuel filter bracket;
3, 6 - Rubber holder, inserted with protrusions into bracket 2;
4 - Fuel hose;
5 - Fuel filter, arrow pointing in direction of flow;
7 - Fuel hose from the tank.
5. Clamp the filter hoses and loosen the clamps (1 and 3 in the illustration) and disconnect the hoses from the filter (2).
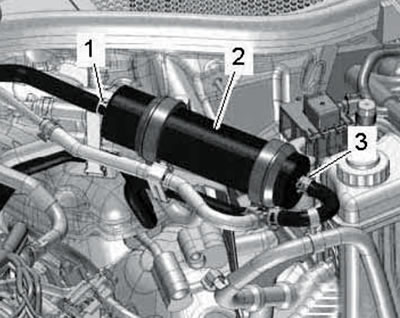
13.5. Vertical fuel filter connections.
6. Spray the ledges (2 and 4 in the illustration) rubber holders with silicone-free grease and remove the filter (3) with holders from the bracket (1).
13.6. Removing the vertical fuel filter.
7. Installation is carried out in reverse order.