
Table of contents: Front direction indicators,… ↓ Fog lights ↓ Rear combination lights in the… ↓ Rear combination lights in the bumper ↓
Note: When replacing lamps, follow the instructions given before the subsection "Replacing headlight bulbs".
Front direction indicators, direction indicator repeaters
1. On models with LED turn signals, their removal is possible after removing the bumper cover (see Chapter 10). Disconnect the connector (4 in the illustration), unscrew the bolts (1 and 5), pull the indicator housing (2) upwards (arrow) and unhook the guide tabs (3).
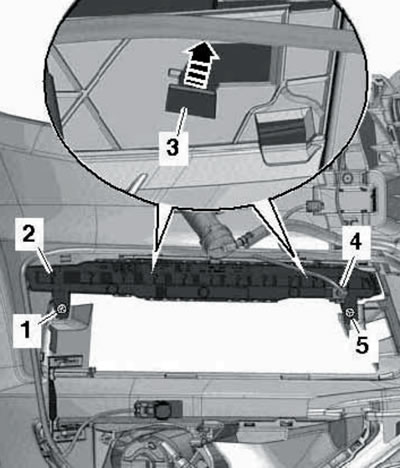
6.1. Removing the LED turn signal.
2. On models with a turn signal combined with a parking light, to remove it, remove the cover underneath it, unscrew the screws (1 in the illustration), pull out the pointer and disconnect the connectors on its back.
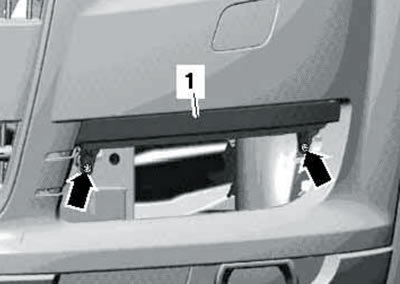
6.2. Fasteners for the direction indicator and parking light assembly.
After removal, the lamps can be replaced.
3. Turn signal repeaters are built into the outside rearview mirrors.
Fog lights
4. Press the clips and remove the fog light cover from the bumper. To remove the fog light, unscrew the three bolts that secure it (see illustration) and disconnect the electrical wiring.
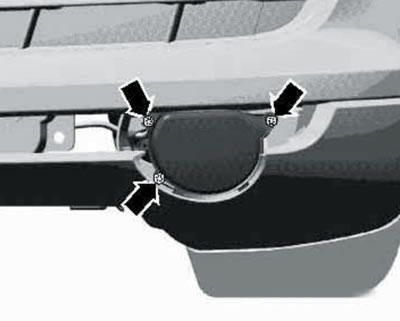
6.4. Fog lamp mounting screws (before 2009.; later - similarly).
When installing, tighten the screws with a torque of 2 Nm. After installation, adjust the fog light (see Section 4).
5. After removing the fog light, you can replace its bulb. On some models, the bulb is covered by a housing.
Rear combination lights in the tailgate
6. The details of installing the rear combination lights in the tailgate are shown in the illustration.
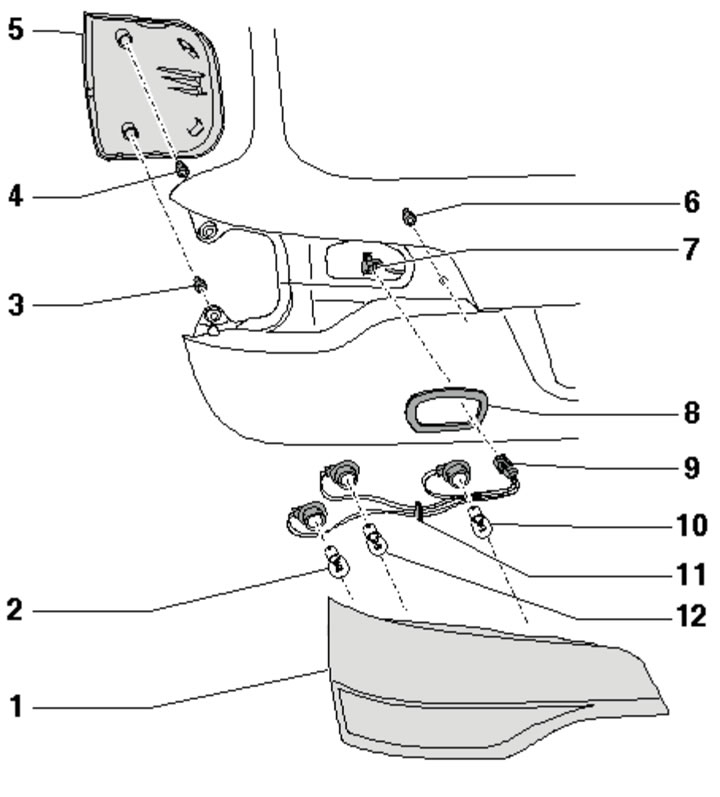
6.6. Details of installation of the rear combination light in the tailgate:
1 - Lantern;
2 - Direction indicator lamp, 21 W;
3, 4, 6 - Nut, 3.5 W;
5 - Lid;
7 - Electrical wiring connector;
8 - Self-adhesive seal;
9 - Main cartridge connector;
10, 12 - Parking light/brake light bulb, 21 W;
11 - Electrical wiring holder.
7. To remove the rear light, remove the tailgate trims (see Chapter 11), give me the nuts (1 in the illustration) and disconnect the connector (2).
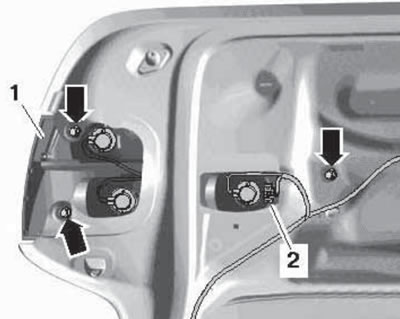
6.7. Fasteners and connectors of the rear combination light.
8. To access the lamps, simply remove the corresponding trim on the tailgate (see illustrations) and unscrew the cartridge.
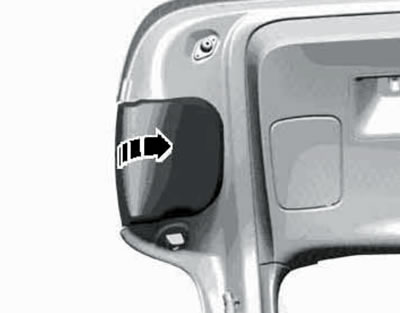
6.8a. Removing the outer cover of the lantern.
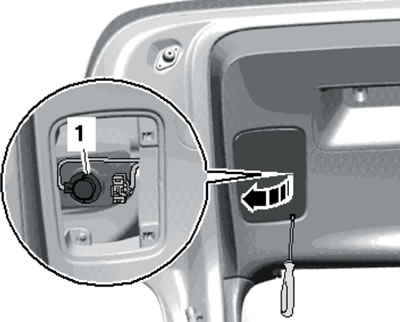
6.8b. Removing the inner cover of the lantern.
Rear combination lights in the bumper
9. The details of installing the rear combination lights in the bumper are shown in the illustration.

6.9. Details of installation of the rear combination light in the bumper:
1 - Lantern;
2 - Parking light/brake light bulb, 21 W;
3 - Direction indicator lamp, 21 W;
4 - 3W bulb, US models only;
5 - Lamp holders;
6 - Electrical wiring connector;
7 - Bolt cap;
8 - Main cartridge slot;
9 - Rear fog light bulb, 21 W;
10 - Reversing light bulb, W16W;
11 - Connector bracket 8;
12 - Bolt, 2.5 Nm.
10. To remove the rear light, remove the trim from the bumper (7 in illustration 6.9), pressing on its outer side. Then unscrew the bolt (1 in the illustration), pull the light (2) out of the bumper cover and disconnect its connector.
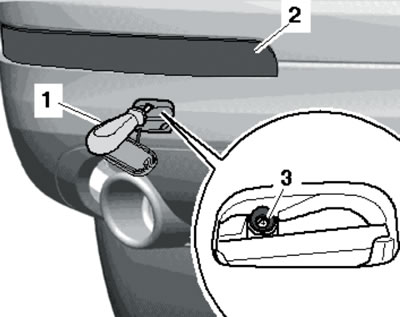
6.10. Fasteners and connectors of the rear combination light.
11. After removing the headlight, you can replace its bulbs.
(The original text of the material can be found on the website AudiManual)