



Table of contents: Flange cover. Tightening torque ↓ Bracket. Tightening torque ↓ Fuel filler neck ground contact ↓ Removal the fuel tank with… ↓ Installation ↓
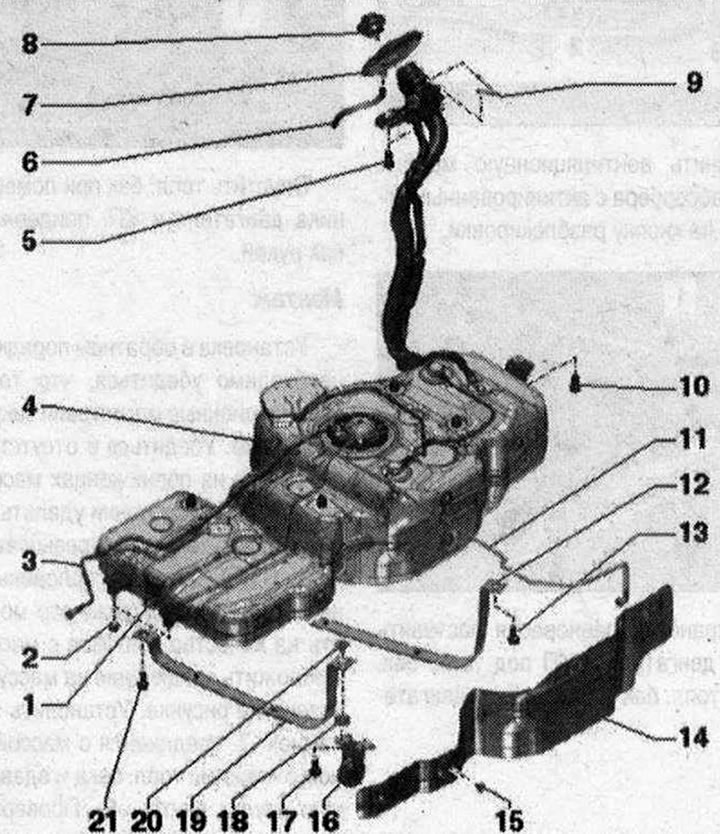
Fuel tank I 1. Fuel line to the metering pump on a car with an independent heater. Do not bend. Clipped onto the fuel tank. To disconnect, press the fitting lock; 2. Nut. 20 Nm; 3. Fuel line to the engine. Do not bend. Clipped to the fuel tank. To disconnect, press the fitting lock; 4. Fuel tank; 5. Bolt. For fastening the filler neck and connection to ground "pos. 9". 20 N·m; 6. Overflow hose; 7. Rubber bowl; 8. Cover. Screw on until it clicks. Attached to the fuel filler flap assembly with a retainer; 9. Ground connection for discharging electrostatic discharge. Check the connector for proper installation and tighten the filler neck wire bolt "pos. 5". After installation, check the electrical contact of the filler neck ring with any non-insulated place on the body using an ohmmeter. Specified value: approx. 0 Ohm; 10/13/21. Bolt. 20 Nm; 11. Ventilation hose to the activated carbon absorber. Do not kink. To disconnect, press the fitting lock. Clipped onto the fuel tank; 12. Tightening clamp, rear; 14. Fuel tank heat shield; 15. Bolt. 2 Nm; 16. Muffler hanger; 17. Bolt; 18. Rubber tip; 19. Tie down clamp, front; 20. Spacer sleeve
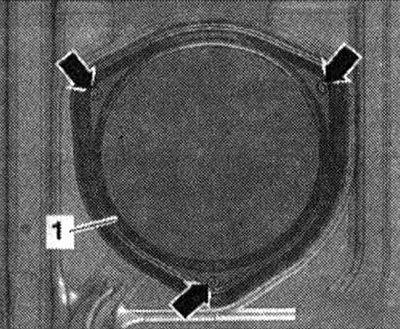
Flange cover. Tightening torque
Tighten the bolts "arrow" of cover "1" to a torque of 1.5 Nm.
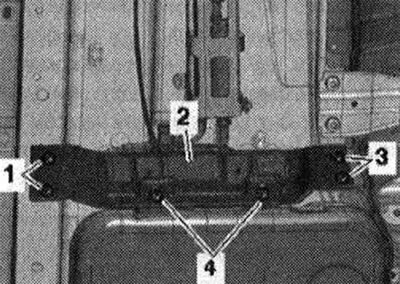
Bracket. Tightening torque
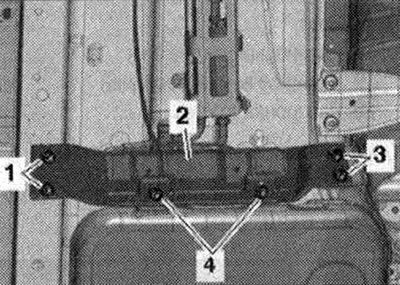
Tighten nuts "1, 3, 4" of bracket "2" to a torque of 20 Nm.
Fuel filler neck ground contact
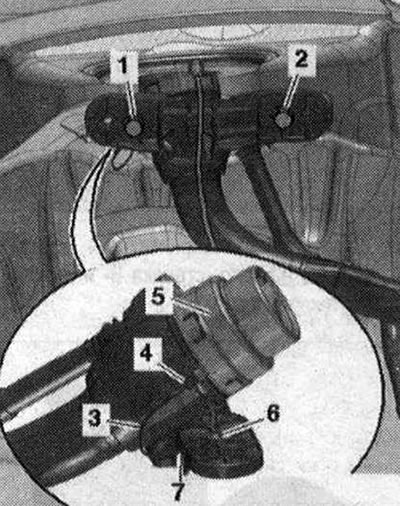
Make sure that the threaded connections "1" and "2" of the fuel tank filler neck are free of corrosion, as this may affect the quality of the contact with the body ground. Route the ground cable "3" as shown in Fig. Insert the contact tab "7" of the ground connection into the fastening hole of the fuel tank and press the spacer sleeve inside "6". Check the tightness of the plug "4" of the ground connection on the metal ring "5" of the fuel tank filler neck. Danger from electrostatic charge. After installation, use an ohmmeter to check the electrical contact of the washer on the filler neck with any unpainted spot on the body. Specified value: approx. 0 Ohm.
Removal the fuel tank with attachments
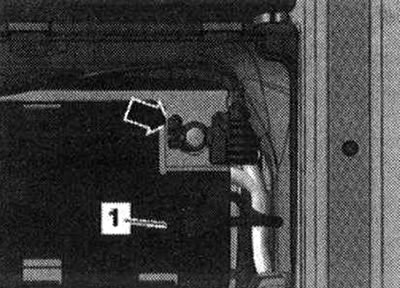
If necessary, move the front passenger seat as far forward as possible. The fuel tank must be empty to remove. If necessary, remove fuel from the fuel tank. Disconnect the battery "arrow".
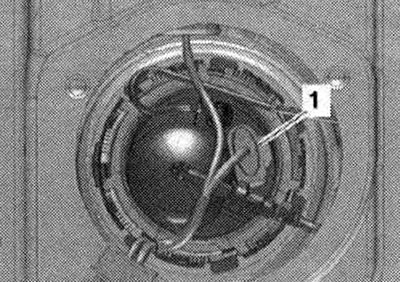
Remove 1/3 of the rear seat on the right. Unscrew the bolts "arrows" and remove the cover "1" of the locking flange. Disconnect the plug "1" from the flange.
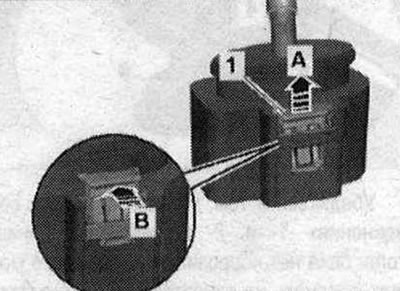
To do this, lift the lock "1" "arrow A", press it "arrow B" and disconnect the plug connector "2".
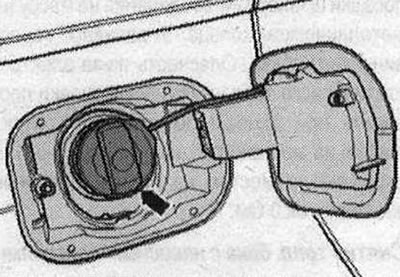
Open the fuel tank hatch. Clean the area around the fuel tank filler neck. Remove the "arrow" cap from the fuel tank filler neck.
Remove the right rear wheel. Remove the rear right mudguard. Unscrew bolts "1" and "2" of the oil supply line. Ignore "Pos. 3...7".
Remove the rear section of the exhaust system. Remove the rear axle.
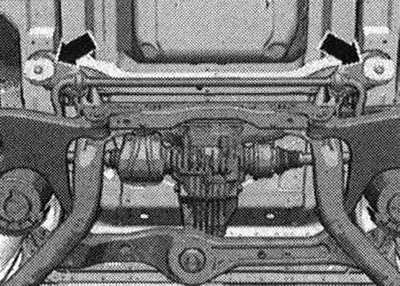
Remove the central right bottom trim. Unscrew nuts "1, 3, 4" and remove bracket "2".
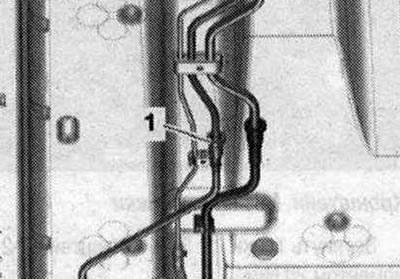
Disconnect the right front fuel line "1" of the fuel tank by pressing the release button.
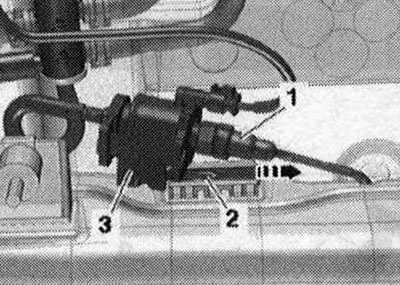
On a car with an independent heater, disconnect the fuel line "1" from the metering pump by pressing the release button. Pry up the retainer "2" with a screwdriver and remove the bracket "3" with the metering pump of the independent heater from the fuel tank "in the direction of the arrow".
Disconnect the ventilation line "1" from the activated carbon absorber by pressing the release button.
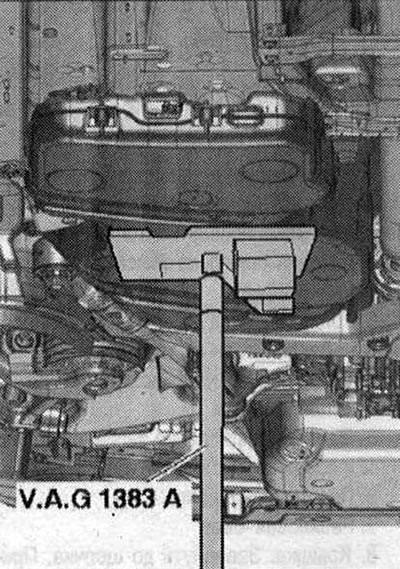
To maintain balance, place the engine and gearbox bracket under the fuel tank. Support the fuel tank with an engine and gearbox lift.
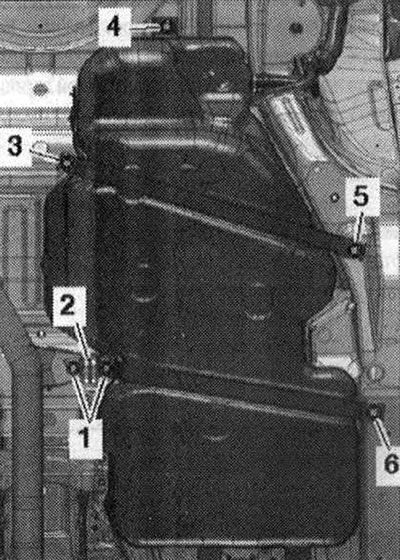
Unscrew bolts "1" and remove bracket "2" of the exhaust system. Unscrew bolts "3...6".
Lower the fuel tank using an engine and gearbox lift, holding the fuel tank with your hand.
Installation
Installation is in the reverse order, making sure that the fuel and ventilation lines are secured to the fuel tank. Make sure there are no traces of oxidation on both ends of the ground wire. If found, remove such traces. Make sure that there is no corrosion on the threaded connections "1" and "2" of the fuel tank filler neck, as this may affect the quality of the contact with the body ground. Route the ground connection "3" as shown in the figure. Install the contact tongue "7" of the ground connection in the mounting hole of the fuel tank and press the spacer sleeve inside "6". Check the reliability of the fit of the connector "4" of the ground connection in the mounting hole "5" of the filler neck. Place the fuel tank on the bottom of the car using clamping straps and an engine and gearbox hoist. When installing the fuel tank, pay attention to the correct entry of the filler neck into the body opening. Install bracket "2" of the exhaust system and tighten bolts "1...6". Tighten bolts "1" and "2" of the fuel tank filler neck. Install the bracket. Install the rear axle. Install the underbody trims. Install the rear part of the exhaust system. Install the rear right mudguard. Install the rear right wheel. Install the flange cover. Install 1/3 of the rear seat on the right. Connect the battery in accordance with the instructions after connecting the battery. On a vehicle with an independent heater, bleed the fuel supply line going to the metering pump.
[This publication is borrowed from the resource «AUDImanual»]