
The gravity valve is not available as a separate spare part.
The valve is removed through the top of the filler neck.
The valve is checked as follows. When the valve is installed in a vertical position, it is open, and when tilted at 45°, it is closed.
When removing the expansion tank, slide the connecting pipe along the fuel filler pipe.
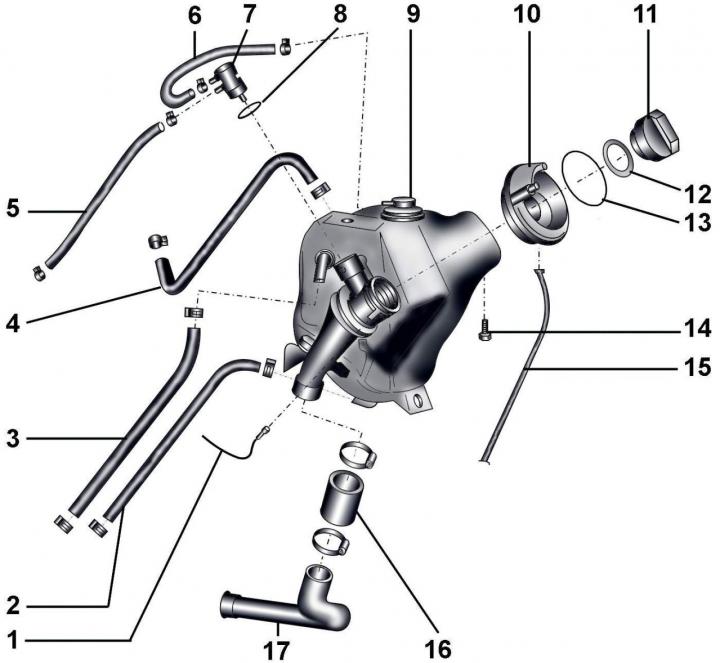
Fig. 5.1–1. Fuel expansion tank: 1-connection to "mass"; 2 – fuel pipe from the fuel tank; 3 – fuel pipe from the fuel tank; 4 – fuel pipe from the fuel tank with white marking; 5 – fuel pipe from gravity valve; 6 – fuel pipe from the expansion tank to the gravity valve; 7 – gravity valve; 8 – sealing ring; 9 – fuel expansion tank; 10 – rubber neck cap; 11 – filler cap; 12 – gasket; 13 – retaining ring of the rubber cap of the neck; 14 – bolt, 10 Nm; 15 – drain hose; 16 – connecting pipe; 17 – fuel filler pipe
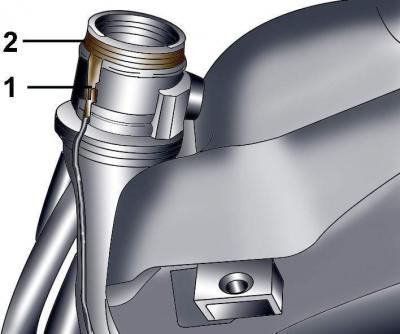
Fig. 5.1–2. Connection of the ground wire (1) to the metal ring (2) on the fuel tank filler pipe
When installing the fuel expansion tank, check that the ground wire tip 1 (Fig. 5.1–2) is securely connected to the metal ring on the fuel tank filler pipe.
After installing the fuel expansion tank, use an ohmmeter to check for resistance between the metal ring on the fuel tank filler pipe and the body ground.
Otherwise, check that the ground wire is securely connected to the negative battery terminal