
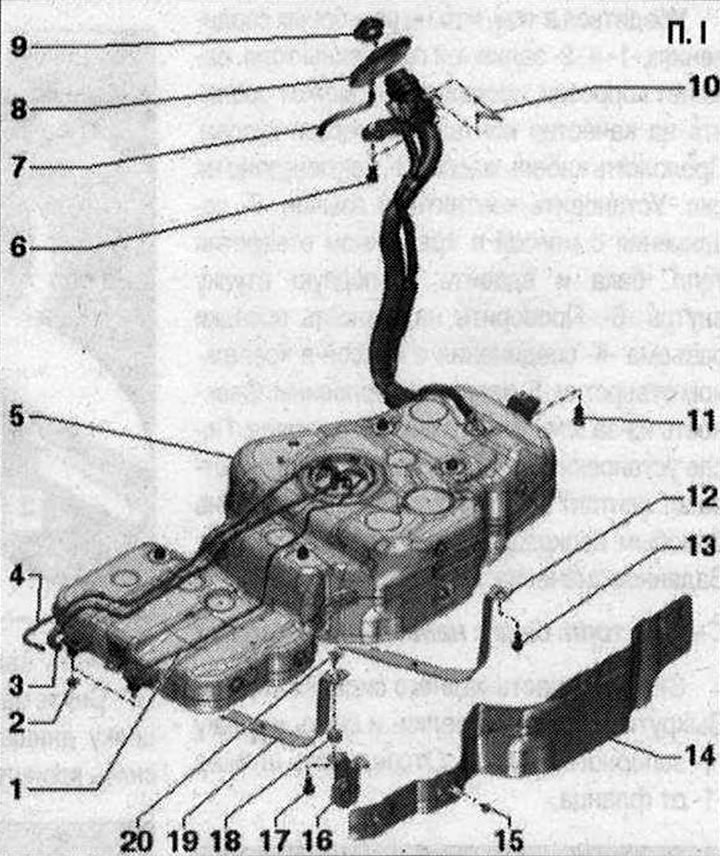
Fuel tank with attachments I 1. Fuel line: to the metering pump on vehicles with an autonomous heater; do not bend; clipped to fuel tank; To disconnect, press the fitting lock; 2. Nut: 20 Nm; 3. Fuel supply line: to the control valve; do not bend; clipped to fuel tank; 4. Return fuel. line: from the control valve; do not bend; clipped to fuel tank; 5. Fuel tank Bracket - tightening torque; 6. Bolt: used for fastening the ground connection to the filler neck - pos. 10-; 20 Nm; 7. Overflow hose; 8. Rubber bowl; 9. Lid: screw until it clicks; 10. Ground connection: for discharging electrostatic discharge; check the reliability of the connector installation and tighten the bolt of the filler neck wire - pos. 6-; 11/13. Bolt: 20 Nm; 12. Bandage: back; 14. Fuel heat shield tank; 15. Bolt: 2 Nm; 16. Exhaust system suspension; 17. Bolt; 18. Buffer; 19. Bandage: front; 20. Spacer
Flange cover - tightening torque
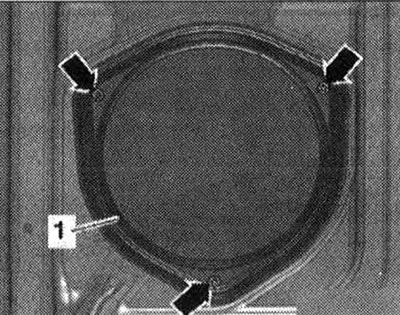
Tighten the bolts -arrows- of the cover -1 to a torque of 1.5 Nm.
Bracket - tightening torque
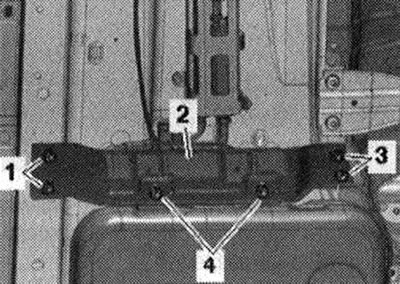
Tighten the nuts -1, 3, 4- of the bracket -2- to a torque of 20 Nm.
Fuel filler ground contact
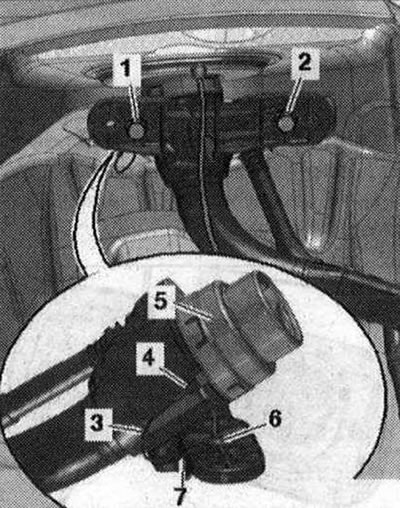
Make sure that the threaded connections -1- and -2- of the fuel filler neck. there is no corrosion in the tank, as this could affect the quality of contact with the body mass. Lay ground cable -3- as shown in fig. Install the contact tongue -7- of the ground connection in the fuel mounting hole. tank and press the spacer sleeve inside -6-. Check that the connector -4- is securely seated in the mounting hole -5- of the filler neck. Hazard due to electrostatic charge. After installation, check with an ohmmeter. contact of the washer on the filler neck with any unpainted place on the body. Set value: approx. Oh Om.
Visitor comments