
Table of contents: Installation ↓ Installation ↓
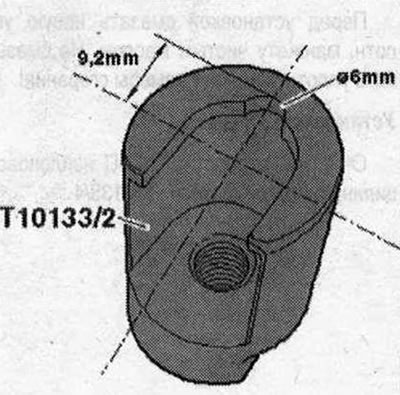
Cut out a semicircle as shown in the picture. The semicircle allows the tool to be placed deeper on the nozzle, which provides a larger plane of contact for the tool. The letter "A" should be written at the end of the serial number of the converted tool.
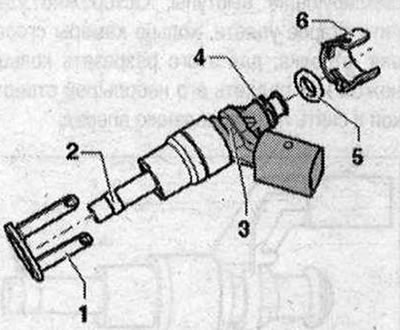
High pressure valve 1. Centrifugal regulator. Replace if damaged; 2. Combustion chamber sealing gasket (Teflon gasket), replace, do not use any lubricant during installation.; 3. Injector groove; 4. Spacer ring. Replace if damaged; 5. Seal. cuff. Replace, lightly lubricate with clean oil when installing; 6. The fuel distributor support ring ensures the tightness of the injection nozzle pressure in the cylinder head
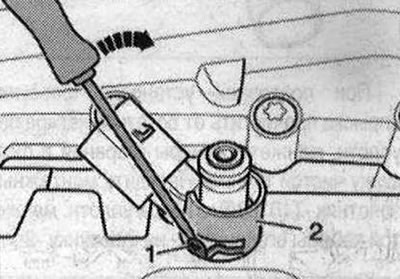
Remove the upper part of the intake manifold. Remove the corresponding lower part of the intake manifold. If the injectors cannot be unscrewed from the cylinder head by hand, proceed as follows: bend the locking tabs "1" of the radial compensator to the sides "arrow" using a screwdriver and pull the support ring "2" off the injector.
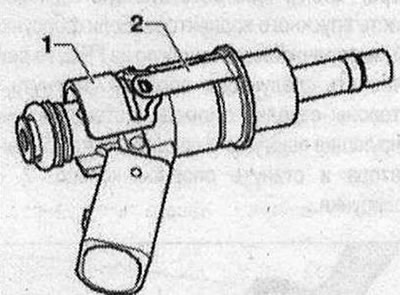
Install the puller "T10133/2A" into the injector groove. Install the puller "T10133/16" and remove the injector by turning the bolt "1".

When installing the puller, you can damage the radial compensator by damaging the locking tabs. Carefully remove the old combustion chamber sealing ring - arrow, to do this, cut the ring with a knife or pry it with a small screwdriver and remove it forward.

In this case, do not allow damage to the injection nozzle groove. If the groove is damaged, the nozzle must be replaced.
Installation
Replace the combustion chamber seals and sealing rings. Replace the spacer ring and radial compensator if damaged. Lubricate the injection nozzle seals with a thin layer of clean oil. Connect the fuel injection system pipes to the same cylinder. Clip the centrifugal regulator "1" onto the support ring "2".
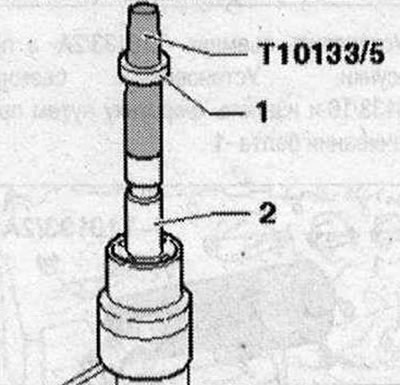
When reinstalling the injection nozzle, clean the groove of the combustion chamber sealing cuff and the nozzle from carbon residues using a clean cloth. Place the mounting valve "T10133/5" with a new combustion chamber sealing cuff "1" on the nozzle "2".
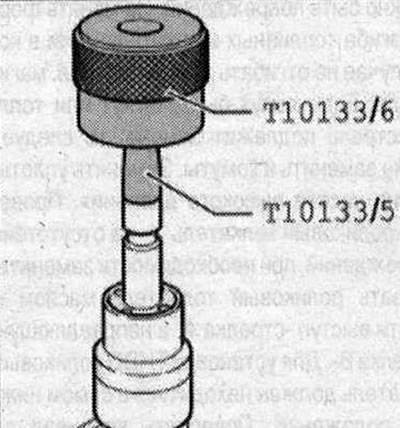
Push the combustion chamber sealing cuff as far as possible onto the mounting spool "T10133/5" using the mounting sleeve -T10133/6. Turn the mounting sleeve "T10133/6" over and push the combustion chamber sealing ring into the sealing ring groove.
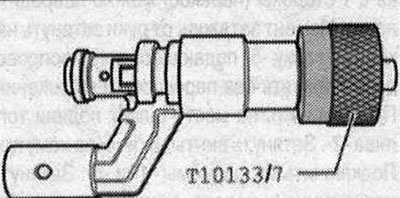
When mounted on the injector, the combustion chamber sealing ring increases in diameter. Therefore, after mounting, its diameter must be narrowed in 2 stages, which are described below. Press the calibration sleeve "T10133/7" with a slight rotation (about 180°) onto the injector until it stops. Remove the calibration sleeve "T10133/7" again, turning it in the opposite direction.
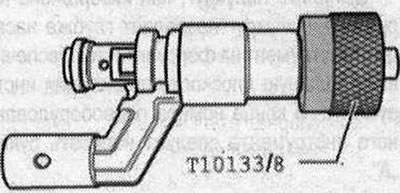
Press the calibration sleeve "T10133/8" with a slight rotation (about 180°) onto the injector until it stops. Remove the calibration sleeve "T10133/8" again, turning it in the opposite direction.
Before installation, lubricate the new sealing cuff with clean oil. Do not lubricate the combustion chamber sealing cuff!
Installation
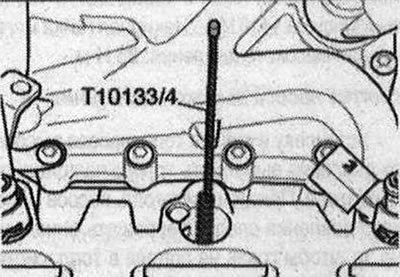
Clean the hole in the cylinder head with a nylon cylindrical brush "T10133/4".
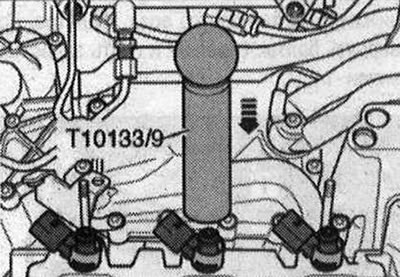
Insert the injector using the mounting mandrel "T10133/9" into the hole in the cylinder head until it stops.
The injector should be easy to install, otherwise wait until the combustion chamber sealing cuff is compressed. Ensure that the injector is installed correctly in the cylinder head: the injector's el. connection should fit into the recess provided for this purpose. Install in the reverse order, installing the lower and upper parts of the intake manifold.
(Material republished from the website «AUDIMANUAL»)