
Table of contents: Removal the upper trim of the… ↓ Installation ↓ Removal the lower trim of the… ↓ Installation ↓
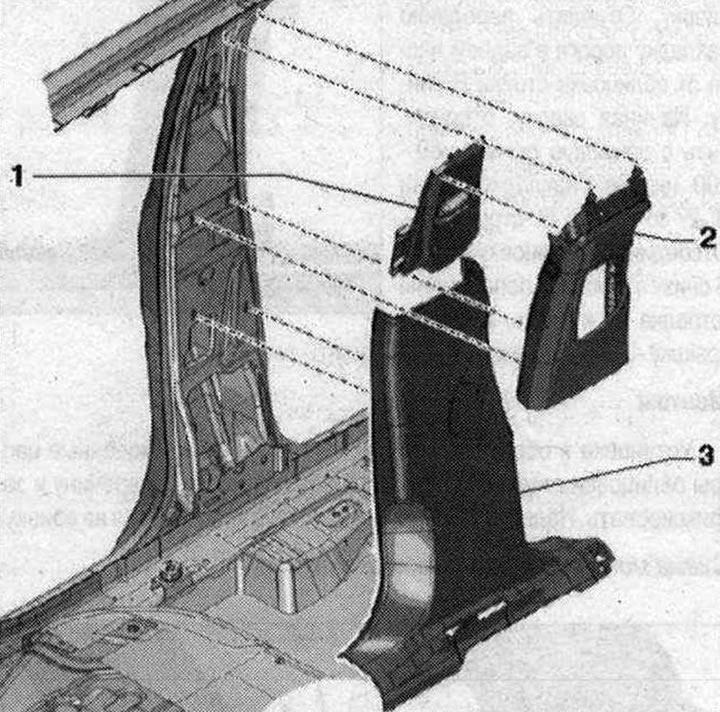
B-pillar trim 1. Seat belt height adjustment slider; 2. Remove the upper trim of the B-pillars from below; 3. Remove the lower trim of the B pillars from below
Removal the upper trim of the B-pillars
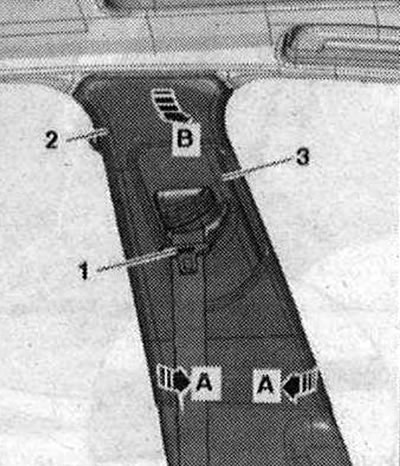
Press the seat belt height adjustment button and set the seat belt height adjustment slider to the lowest position. Unlock the B-pillar trim -2 "arrows A" by installing the mounting wedge "3409" on the lower edge of the trim. Remove the upper B-pillar trim from the body mount "arrow B" by tilting the trim inward and simultaneously removing it downwards. Remove the front seat belt fittings. Guide the seat belt webbing "1" with the lock protrusion through the seat belt height adjustment slider "3" and remove the upper B-pillar trim.
Installation
Pass the seat belt strap "2" with the buckle projection through the seat belt adjustment slider.
Make sure that the belt height adjuster is in the lowest position. Make sure that the fastening "3" of the slider on the upper trim of the B-pillar "1" clicks into the fastening "4" of the seat belt height adjuster. Installation in reverse order: removing the front seat belt cover. First, insert the upper trim of the B-pillar into the opening of the ceiling panel in the fastening on the roof of the body. Slide the edge of the door seal onto the trim. Check the operation of the seat belt height adjuster.
Removal the lower trim of the B-pillars
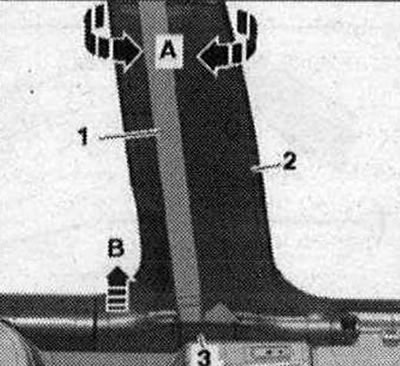
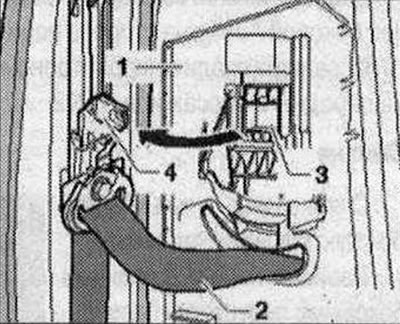
Remove the B-pillar trim at the top. Separate the front sill trim at the rear from the B-pillar trim at the bottom. Starting from the top, use the -80 "200" lever to detach the lower B-pillar trim "2" from the B-pillar "arrows A". Detach the B-pillar trim at the bottom from the lower crossmember "arrow B" and remove. Open the cover "3" on the trim and detach the belt tape "1".
Installation
Installation in reverse order: insert the centering pins of the B-pillar trim first from below into the lower crossbar and secure. Push the edge of the door seal onto the trim.