
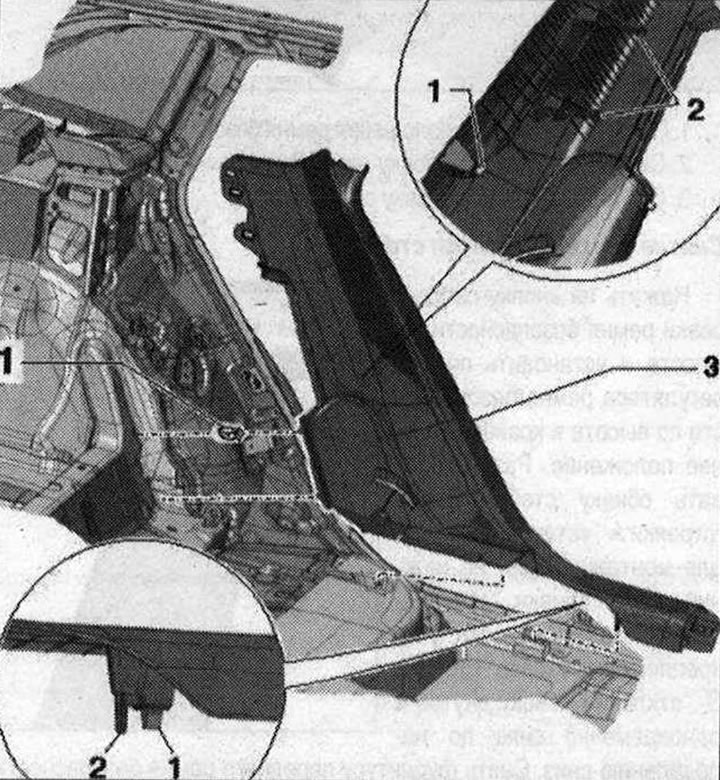
Rear threshold trim installation diagram 1. Insert the clamp into the threshold trim. 5 pcs. Replace if damaged or deformed; 2. Centering protrusions; 3. Rear threshold trim
Option kit driver side rear with squib rear side airbag on driver side "N₂01" front passenger side rear with squib rear side airbag on front passenger side "N₂02"
Removal
Remove the rear seat. Remove the side trim of the trunk.
Option complete with rear side airbags: Turn on the ignition. Disconnect the battery ground cable with the ignition on. Unscrew bolt "1". Carefully disconnect cap "2" with the "Airbag" icon using a screwdriver and unscrew the rear side Airbag bolt located behind it.
All
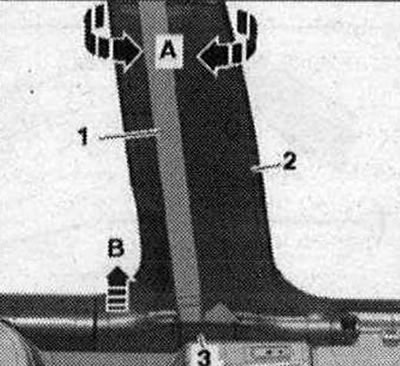
Separate the threshold trim "1" from the lower cross member using the lever "80-200", starting from the front "arrow A". Disconnect the rear threshold trim "arrows B" and remove it downwards from the belt guide "arrow C". Open the cover "2" on the threshold trim and disconnect the belt tape.

Option complete with rear side airbags: Raise the threshold trim so that you can unfasten bracket "1" with the electrical connector from the threshold trim. Open the bracket, remove and disconnect the electrical connector. To do this, pull the connector lock "3" until it stops "arrow", this will unlock the plug connector "2" and "4" and it can be removed.
Remove the rear threshold trim.
Installation
Option complete with rear side airbags: Please note that the electrical connectors must be inserted all the way until they lock into place audibly.
All
Installation in reverse order: if the threshold trim clamps remain in the attachment points on the body, remove them and place them on the threshold trim for installation. Check the clamps for defects and deformations, replace if necessary. Insert the threshold trim from above into the belt guide and press until the clamps are audibly locked. Cover with the edge of the door seal.
Option complete with rear side airbags: Connect the battery ground cable with the ignition on.
(The text is based on materials from the website: audimanual.ru)