
Table of contents: Removal ↓ Installation ↓
Removal
Remove the door sill trim.
Loosen the seat belt mounting bolt at the lower mounting location.
Fold down the screw caps. To do this, insert a thin wire, such as a paper clip, into the groove and fold the cap down.
Loosen the screws securing the safety handle, which are mounted on the roof of the passenger compartment, on the trim of the middle pillar.
Remove the top of the upholstery 1 (fig. 12.86) with clamps 2 of the holes.
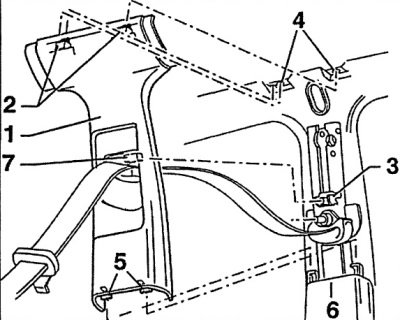
Fig. 12.86. Upper trim of the middle pillar
1 - upper trim of the middle pillar,
2 - clamp,
3 - seat belt height adjustment lever,
4 - hole,
5 - locking protrusion,
6 - lower trim of the middle pillar,
7 - seat belt height adjustment button.
Remove the bottom of the trim 1 (fig. 12.86) with the fixing tabs 5 from the lower trim of the middle pillar 6 and remove it.
Installation
Insert the upper trim of the middle pillar with the fixing tabs 5 (fig. 12.86) into the lower trim of the middle pillar 6.
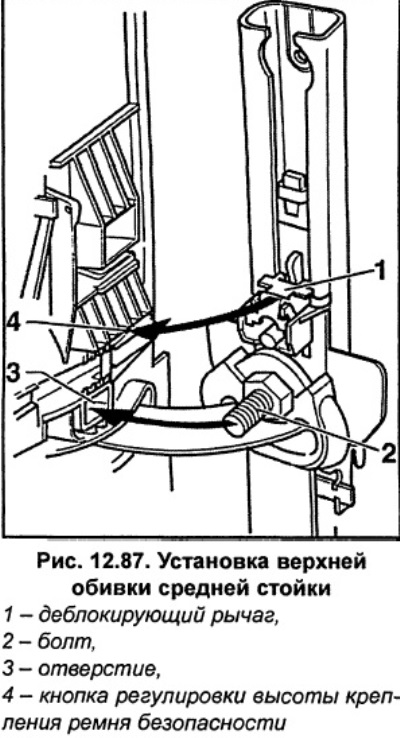
In the following way, insert the height adjustment button 7 into the height adjustment lever:
Direct the slider of button 4 (fig. 12.87), without pressing the button, on the release lever 1 of the height adjustment and at the same time insert the cylindrical end of the bolt 2 into the hole 3.
Insert the top of the trim into both holes.
Press the upholstery firmly until the clips click into place.
Place the door seal on the left and right sides above the trim.
Check the operation of the seat belt in the following way. Press and release the button, it should return to the upper position by itself. Slide the height adjuster and fix it. In this case, the height adjuster should fix with a click in five possible positions. Otherwise, remove the upholstery and reinsert the slider with the button into the height adjuster.
Secure the roof mounted safety handles with screws and replace the screw covers.
Install the seat belt in the lower anchorage so that the belt webbing is turned 180° clockwise. Tighten the bolt to 55 Nm.
Install the door sill trim.