Table of contents: Removal ↓ Installation ↓
Removal
Remove the upper B-pillar trim.
Remove the door sill trim.
Press up both retaining tabs with a screwdriver and pull up the trim 1 (fig. 12.89) in the direction of the arrow until it protrudes above the seat belt guide.
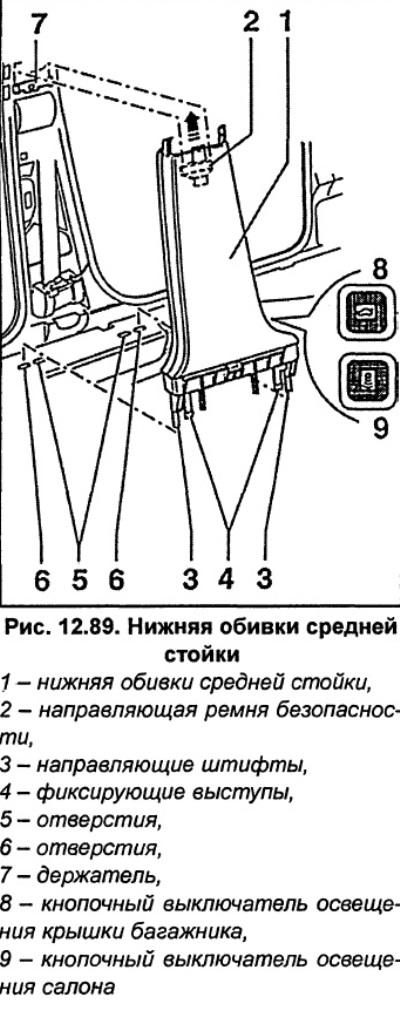
Disconnect the electrical connector for the trunk lid light switch 8 (fig. 12.89) and interior lighting.
Note: To remove the pushbutton switch, squeeze the side retaining tabs and push the switch out through the trim from the inside.
Installation
Insert upholstery 1 (fig. 12.90) into the roof holes.
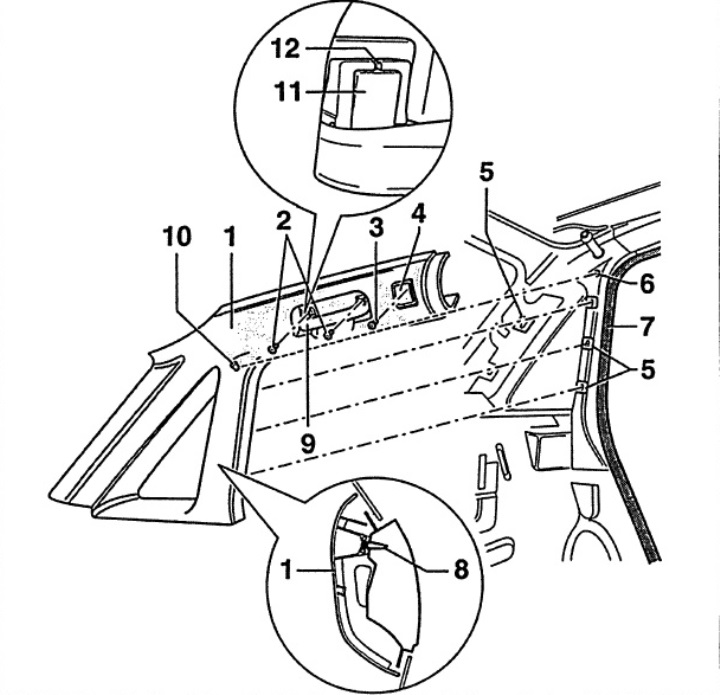
Fig. 12.90. Upper trim of the rear pillar and trunk pillar
1 - upper trim of the rear pillar and trunk pillar,
2 - screws,
3 - screw,
4 - hook for outerwear,
5 - holes,
6 - hole,
7 - seal,
8 - clamp,
9 - roof mounted safety handle,
10 - rod,
11 - screw cover,
12 - groove.
Position the sheathing so that rod 10 (fig. 12.90) entered hole 6.
Press the upholstery so that the seven clips 7 (fig. 12.90) entered holes 5.
Further installation is carried out in the reverse order of removal.