
Table of contents: Removal ↓ Installation ↓
Removal
Bottom of the oil pan
1. Drain the coolant.
2. Unscrew the drain plug at the bottom of the oil pan and drain the engine oil.
3. Set the upper front cross member to the service position (see paragraphs 5.1-5.15).
4. Unscrew the bolts (see arrows in the illustration) and remove the support.
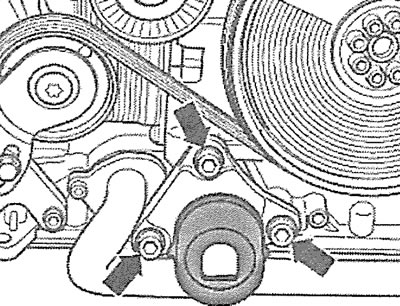
11.4. Unscrew the bolts (see arrows) and remove the support
5. Unscrew the bolts (see arrows in the illustration) and remove the cooling system pipe.
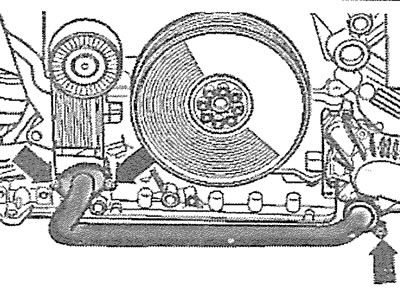
11.5. Unscrew the bolts (see arrows) and remove the cooling system pipe
6. Unscrew nuts 1-4 of the left and right anti-roll bar mounting cushions (see illustration).
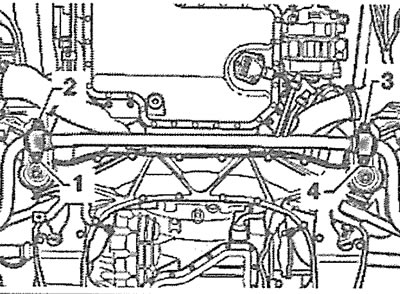
11.6. Unscrew nuts 1-4 of the left and right anti-roll bar mounting cushions
7. Release the wire harness from the holder (see arrow in illustration) at the bottom of the oil pan.
11.7. Release the wire harness from the holder (see arrow) at the bottom of the oil pan
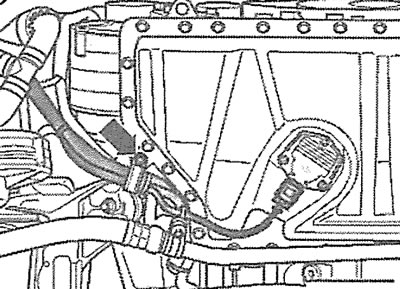
8. Disconnect the engine oil level and temperature sensor plug (see arrow in illustration) and release the sensor wire.

11.8. Disconnect the engine oil level and temperature sensor plug (see arrow)
9. Unscrew the mounting bolts and remove the lower part 1 of the oil pan (see illustration). Collect the remaining oil in a suitable container.
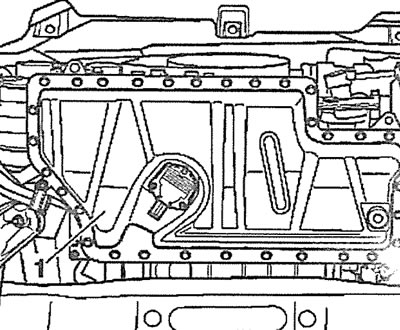
11.9. Unscrew the mounting bolts and remove the lower part 1 of the oil pan
Upper part of the oil pan
Caution! To remove the upper part of the oil pan, the engine must be removed.
10. Remove the engine and mount it on a suitable support or mounting stand (see the relevant chapter).
11. Remove the lower part of the oil pan.
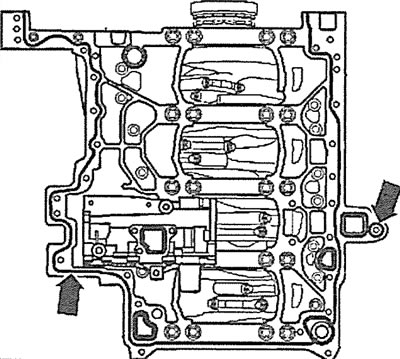
12. Unscrew bolts 1-7 securing the upper part of the oil pan, press it out of the clamping bushings and remove the upper part of the oil pan (see illustration).
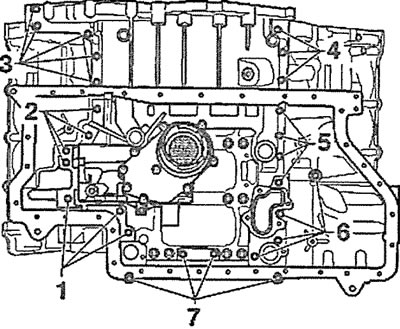
11.12. Unscrew bolts 1-7 securing the upper part of the oil pan, press it out of the clamping bushings and remove the upper part of the oil pan
Installation
The oil pan is installed in the reverse order of removal.
13. Clean the surfaces to be sealed and remove any remaining sealant using drill attachments (see illustrations 11.13 and 11.13a).
11.13. Clean the surfaces to be sealed and remove any remaining sealant from them using drill attachments (lower part of the oil pan) |
11.13a. Clean the surfaces to be sealed and remove any remaining sealant with a drill attachment (top of oil pan) |
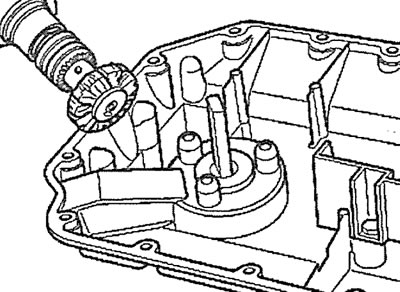
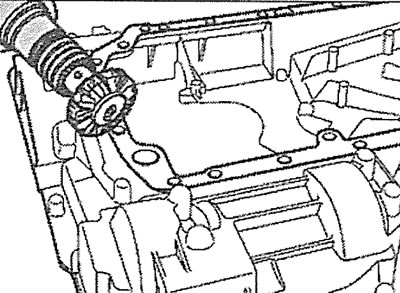
14. Apply to the mating surface of the oil pan before installing it (see arrows in illustrations 11.14 and 11.14a) a layer of sealant approximately 1.5-2.0 mm thick. If you apply more sealant, the excess will get into the engine oil and clog the mesh filter of the oil intake.

11.14. Apply to the mating surface of the oil pan before installing it (see arrow) a layer of sealant approximately 1.5-2.0 mm thick (lower part of the oil pan) |
11.14a. Apply to the mating surface of the oil pan before installing it (see arrows) a layer of sealant approximately 1.5-2.0 mm thick (top of oil pan) |
Attention! After applying the sealant, the tray should be installed in place no later than 5 minutes later.