
Table of contents: Removal ↓ Installation ↓
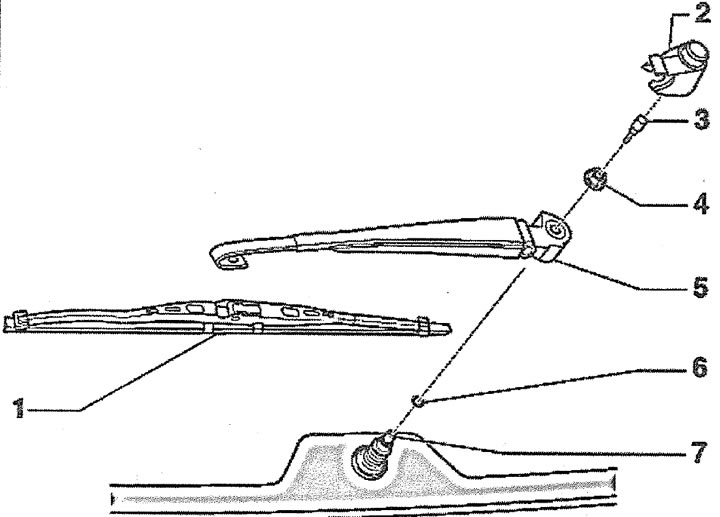
19.0. Rear Window Wiper Components:
1 - brush
2 - protective cap of the wiper arm mounting nut
3 - jet
4 - rear window wiper arm mounting nut. Tightening torque - 12 Nm
5 - rear window wiper lever
6 - O-ring. To be replaced after each dismantling
7 - axle with tube
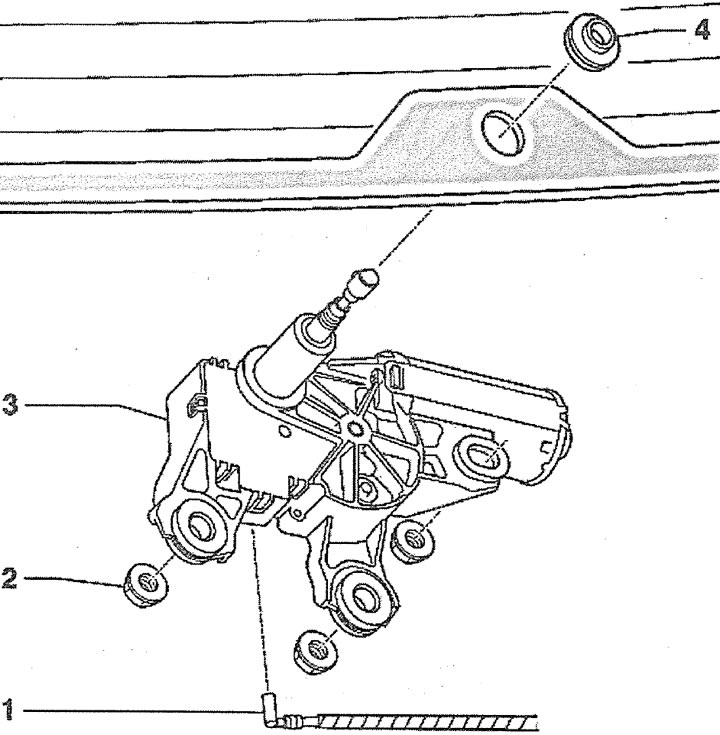
19.0a. Rear window wiper motor:
1 - cleaning liquid supply hose
2 - Electric motor mounting nut. Tightening torque - 8 Nm
3 - rear window wiper motor
4 - sealing gasket
Removal
1. Turn on the ignition.
2. Turn the rear window wiper on and then off to reset the motor to its original position.
3. Turn off the ignition.
4. Remove the protective cap 1 from the rear window wiper arm mounting nut by carefully prying it off with a screwdriver (see arrows in the illustration).
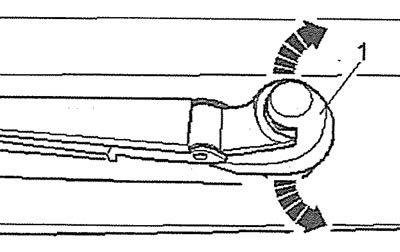
19.4. Remove the protective cap 1 from the rear window wiper arm mounting nut by carefully prying it off with a screwdriver (see arrows)
5. Loosen the tightening of nut 1 securing the rear window wiper arm (see illustration).
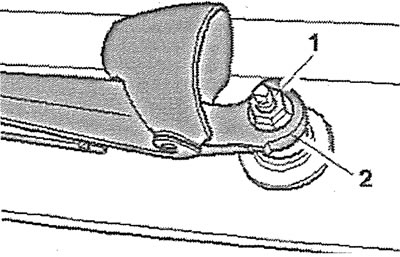
19.5. Loosen the tightening of nut 1 securing the rear window wiper arm
6. Loosen the fit of the wiper arm 2 on the axle (see illustration 19.5), unscrew the nut that secures it and remove the lever.
7. Remove the trunk lid trim.
8. Disconnect plug 2 (see illustration).
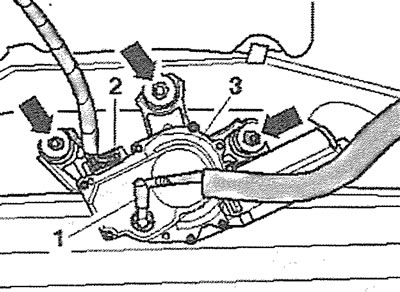
19.8. Disconnect plug 2
9. Disconnect the hose 1 for supplying the washing liquid (see illustration 19.8).
10. Unscrew the nuts(see arrows in illustration 19.8) and remove the rear window wiper motor.
Installation
The rear window wiper motor is installed in the reverse order of removal.
(Information obtained from this resource AudiManual)