
Table of contents: ADR engine ↓ Removal ↓ Installation ↓ All engines except ADR ↓ Removal ↓ Installation ↓
ADR engine
External parts of the cylinder head
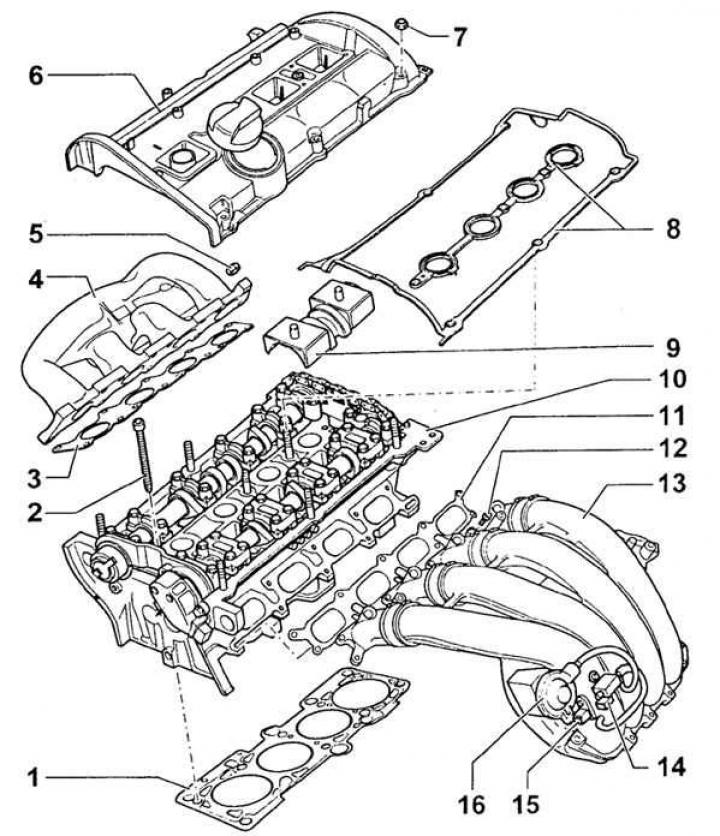
- 1. Head gasket
- 2. Head bolts
- 3. Exhaust manifold gasket
- 4. Exhaust manifold
- 5. Exhaust manifold nuts
- 6. Camshaft cover
- 7. Camshaft cover nuts
- 8. Camshaft cover gasket
- 9. Oil deflector
- 10. Cylinder head
- 11. Intake manifold gasket
- 12. Intake manifold bolts
- 13. Intake manifold
- 14. Intake manifold valve
- 15. Air temperature sensor
- 16. Intake manifold valve vacuum block
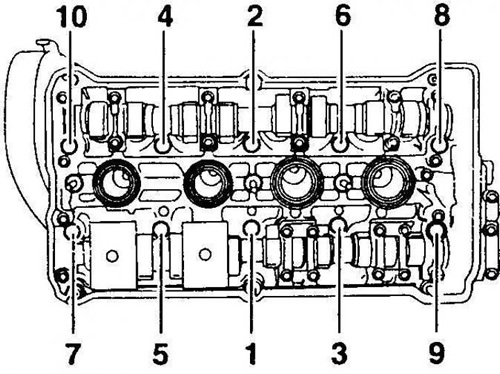
Cylinder Head Bolt Tightening Sequence (ADR)
Removal
1. Disconnect the negative battery cable.
2. Raise and support the front of the vehicle. Remove the top engine cover.
3. Unscrew the outlet pipe from the outlet manifold.
4. Disconnect the exhaust manifold from the cylinder head.
5. Drain the coolant.
6. Disconnect the upper hose from the coolant pipe.
7. Disconnect the wires from the intake manifold air valve located behind the generator.
8. Disconnect the wire from the air temperature sensor located under the air valve.
9. Disconnect the expansion tank hose from the coolant pipe at the top of the engine.
10. Disconnect the air intake pipe from the air filter.
11. Disconnect the wires from the injectors.
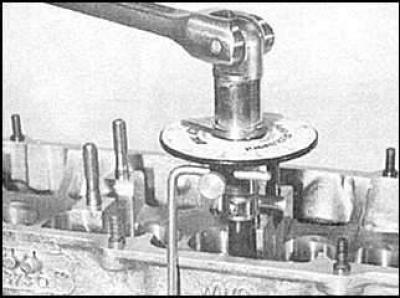
12.Disconnect the wire from the Hall sensor on the front left side of the head.
13. Disconnect the wire from the automatic camshaft adjustment valve located at the rear of the head.
14. Disconnect the wiring from the ignition coil.
15. Disconnect the spark plug wires and remove the coil.
16. Disconnect the wire from the temperature sensor at the back of the head.
17. Remove the top portion of the rear timing belt cover.
18. Disconnect from the throttle position switch.
19. Disconnect the wire harness from the clamps.
20. Disconnect the fuel supply and return hoses from the fuel line.
21. Disconnect the accelerator cable from the throttle lever.
22. Disconnect the air conditioner air hoses and the brake servo hose.
23. Unscrew the intake manifold bracket.
24. Disconnect the heater radiator hoses.
25. Remove the rear coolant pipe.
26. Remove the auxiliary drive belt.
27. Remove the intake manifold bolts.
28. Disconnect the intake manifold from the head.
29. Disconnect the wire from the oxygen sensor.
30. Remove the upper timing belt cover.
31.Remove the timing belt.
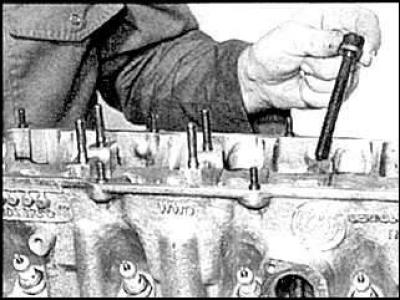
32. Loosen the head bolts in the reverse tightening sequence (see fig. Bolt tightening sequence (ADR)).
33. Remove the head.
Installation
Installation is carried out in the reverse order. During installation, replace all old gaskets with new ones. The tightening sequence of the head bolts is shown in the figure (see Fig. Bolt tightening sequence (ADR)).
All engines except ADR
Cylinder Head Bolt Tightening Sequence (Non-ADR)
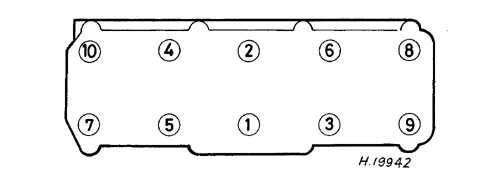
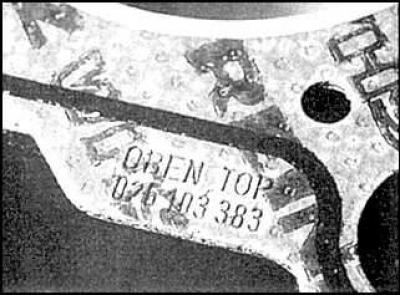
Mark on the top side of the gasket
Removal
1. Disconnect the negative battery cable.
2. Raise and support the front of the vehicle. Remove the top engine cover.
3. Unscrew the outlet pipe from the outlet manifold.
4. Disconnect the exhaust manifold from the cylinder head.
5. Drain the coolant.
6. Remove the intake manifold.
7. Disconnect the spark plug wires and remove the spark plugs.
8. Remove the timing belt.
9. Remove the generator.
10. Disconnect the air intake pipe from the air filter.
11. Disconnect the ground wire from the head.
12. Disconnect the hoses from the cylinder head.
13. Disconnect the wires from the temperature sensors.
14. Remove the head bolts in the reverse order of tightening.
15. Remove the bolts and washers.
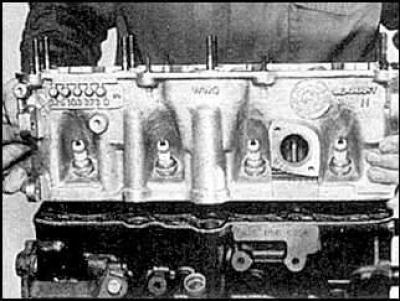
16. Remove the head.
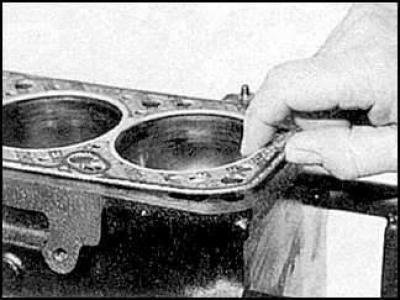
17. Remove the head gasket.
Installation
Installation is carried out in the reverse order of removal. Tighten the head bolts to the required angle (see Fig. Mark on the top side of the gasket, Cylinder head bolt tightening sequence).