
Table of contents: Removal ↓ Installation ↓
Removal
Caution! If mechanical damage to the turbocharger is detected (for example, damage to the supercharger impeller) it is not enough to replace the turbocharger alone. To avoid further malfunctions, it is necessary to check the air filter housing, replaceable air filter element and air duct hoses for contamination. Check the boost pressure line and intercoolers for foreign bodies. If foreign bodies are found in the boost pressure system, clean the boost pressure line and, if necessary, replace the intercooler.
Remove the right front wheel. Remove the catalytic converter. Unscrew the heat shield of the left drive shaft "arrows".
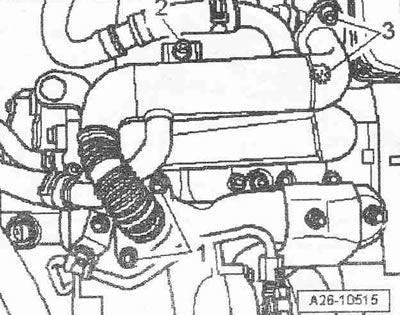
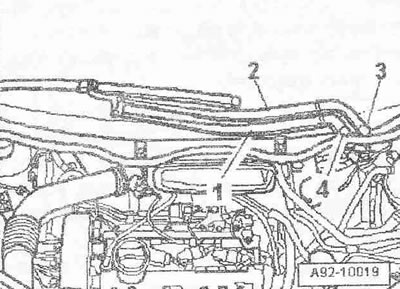
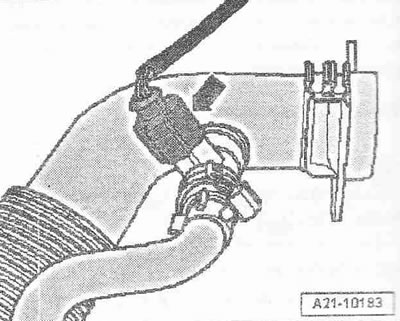
Remove the vacuum hose "1" from the boost pressure control power vacuum pneumatic element and set it aside. Loosen the bolts "2" and remove the air guide pipe from the turbocharger. The air guide pipe remains in the installation position
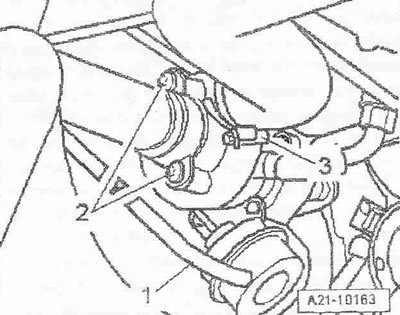
Disconnect the air duct hose "3" from the turbocharger. Unscrew the nuts "1". For clarity, shown with the engine removed. Bolts "2 and 3" are unscrewed later.
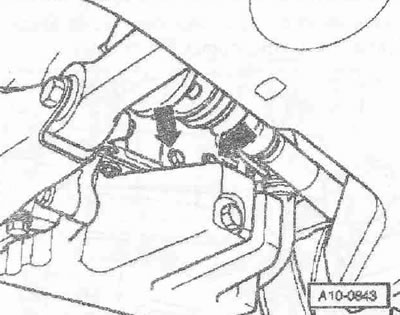
Unscrew the heat shield of the turbocharger "arrow". Remove the hood. If available, unfasten the bracket. Remove the engine cover "arrow". Remove the noise insulation underneath it.
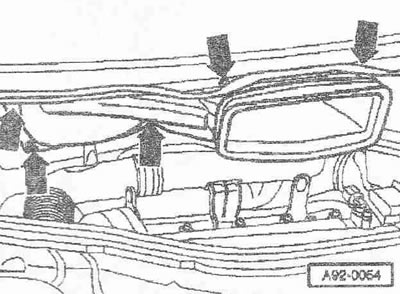
Lift the caps "3 and 4" of both parts of the windshield wiper arm with a screwdriver. Loosen the nuts of both parts of the windshield wiper arm with a few turns. Loosen the arms "1 and 2" of the windshield wiper on the axles one by one with light rocking movements. Completely unscrew the nuts and remove both parts of the windshield wiper arm. If it is not possible to remove the arm in this way, then in this case it is necessary to use a standard puller.
Disconnect the washer fluid supply pipe "3". If present, disconnect the plug connectors "4 and 5" of the heated windshield washer nozzles. Loosen the hose clamp "6" using hose clamp pliers "V.A.G 1921" and remove the drain hose from the deflector grille. Remove the rubber seal "1" of the deflector grille. Remove the deflector grille "2".
Loosen the nuts and bolts of the "arrow". Pull the fresh air supply duct forward and remove it, turning it to the right side of the car.
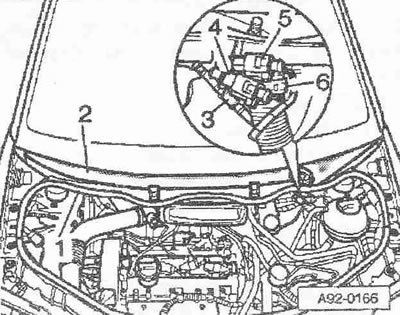
Remove the air duct hose "3" from the intake manifold flap motor "V157" by slightly loosening the clamp "2". Disconnect the vacuum hose "1" of the mechanical EGR valve. Disconnect the air duct hose "1" from the air flow meter "G70". Disconnect the plug connector "3" of the air flow meter "G70". Unscrew the nut "2". Remove the crankcase ventilation hose "4" from the cylinder head cover. Pull out the air guide pipe together with the air flow meter "G70".
If present, disconnect the plug connector "arrow" of the crankcase ventilation heating element "N79". Remove the air guide pipe.
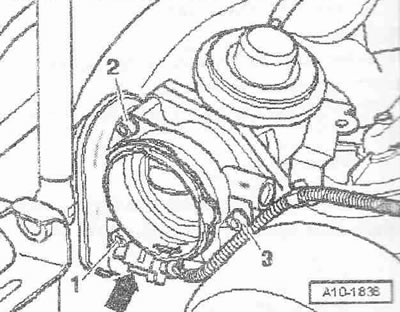
Disconnect the plug connector "arrow" of the intake manifold flap motor "V157". Unscrew bolts "1...3" and remove the intake manifold flap motor "V157".
Loosen the clamps of the coolant supply hoses to the EGR radiator "3094". Remove the EGR coolant supply hoses from the radiator.
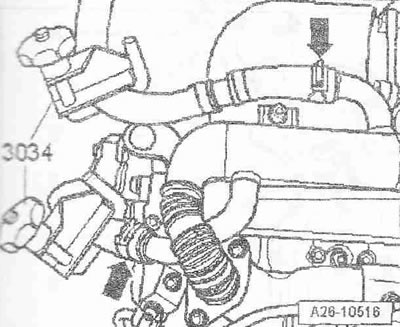
Loosen bolts "2 and 3" and remove the EGR radiator. Ignore item "1".
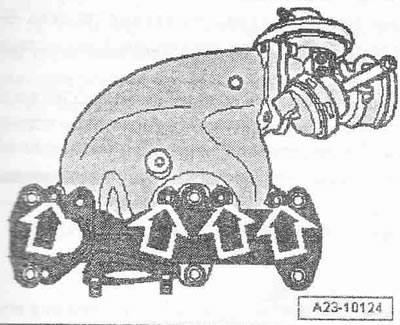
Unscrew the "arrow" bolts and remove the intake manifold.
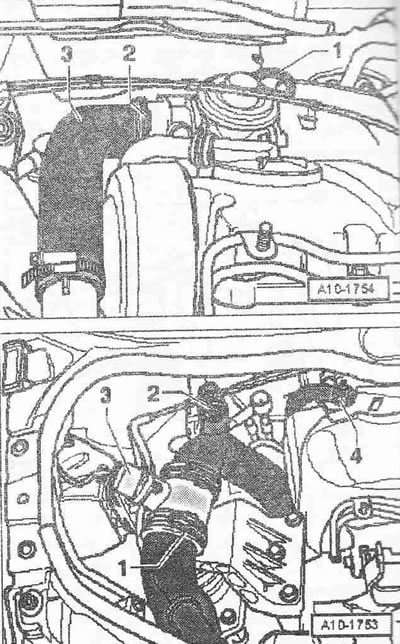
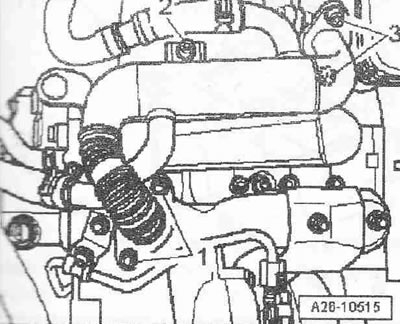
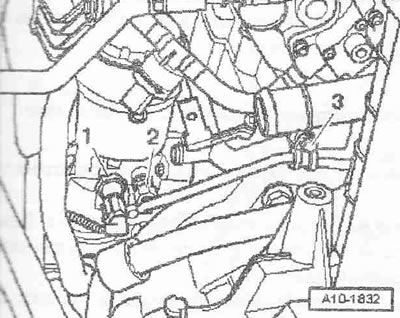
Remove the oil pre-supply line "2" to the turbocharger from the oil filter bracket. Unscrew the bracket of the oil pre-supply line "3". Ignore pos. "1".
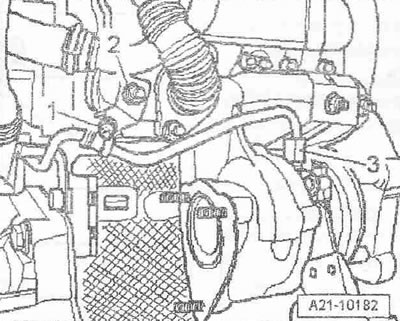
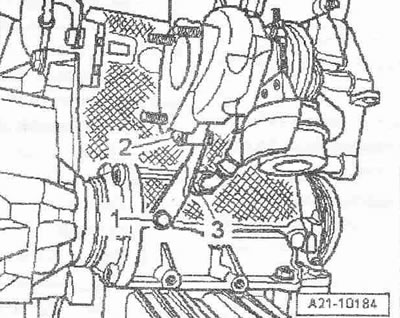
Loosen bolt "1" by about 3 turns. Unscrew nut "2". Unscrew oil return pipe "3" from turbocharger and put it aside.
Unscrew the air guide pipe bracket from the oil pan "arrows".
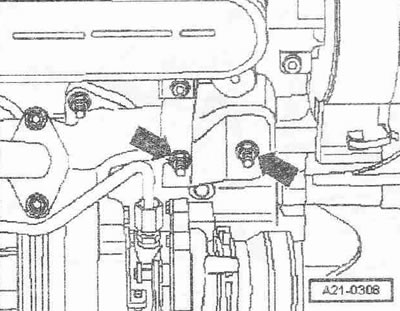
Unscrew bolts "1 and 2" and remove the turbocharger support. Unscrew the oil return pipe "3" from the cylinder block.
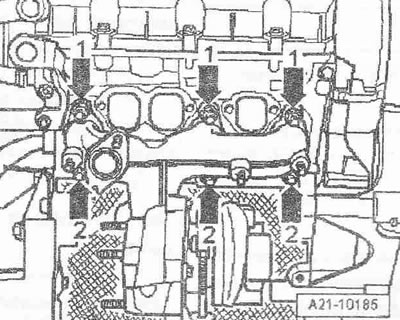
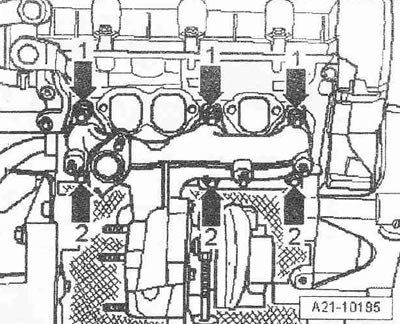
Unscrew the lower nuts "arrows 2".
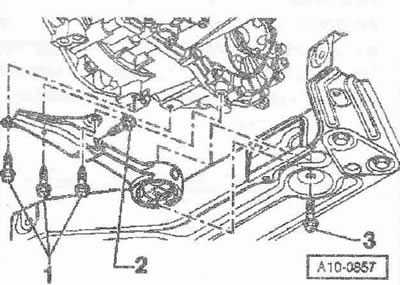
Unscrew the bolts "1" of the pendulum support. Ignore pos. "2" and "3".
Unscrew the upper nuts "arrows 1". Remove the turbocharger by lifting it up to the left.
Installation
Installation is in the reverse order, replacing the seals, cuffs and self-locking nuts. Fill the turbocharger with engine oil up to the connecting nipple of the oil pre-supply line. The supercharging system must be sealed. The hoses and hose nipple of the air supercharging system must be cleaned of oil and grease before installation. Use clamps of the appropriate series to secure all hose connections. Install the intake manifold. Install the air ducts in the clamps. Install the wiper arm. Check the oil level. After completing the installation of the turbocharger, run the engine in idle mode for about 1 minute without developing high speeds to ensure the supply of oil to the turbocharger.
Tightening torques:
- Turbocharger to cylinder head: 25 Nm 1)
- Heat shield to turbocharger: 22 Nm
- Turbocharger support to cylinder head: 25 Nm
- Return oil supply pipe to cylinder head: 30 Nm
- Turbocharger oil pre-supply pipe: 22 Nm
- Oil pre-supply pipe to oil filter bracket: 22 Nm
- EGR cooler to mechanical EGR valve: 22 Nm
- EGR cooler to intake manifold: 20 Nm
- EGR cooler to turbocharger: 22 Nm 1)
- Intake manifold flap motor "VI57" to mechanical EGR valve: 10 Nm
- Air guide pipe to turbocharger: 8 Nm
- Air guide pipe to oil pan: 8 Nm
- Air guide pipe to body: 8 Nm
- Heat shield drive shaft to cylinder block: 33 Nm
- Engine compartment cover to bracket: 5.5 Nm
1) Replace the nuts.