
Repair Chevrolet Repair Toyota Repair Honda Repair AvtoVAZ Repair Mercedes-Benz Repair BMW Repair Opel
Home  |  Contacts  |  Sitemap  |    
English Русский
Български
Беларускі
Український
Српски
Hrvatski
Română
Polski
Slovenský
Magyar
AudiManual.ru


  • AUDI 80
  • AUDI 100
  • AUDI A3
  • AUDI A4
  • AUDI A6
  • AUDI A8
  • AUDI Q
  • OTHER
  • ARTICLES
Q7 Typ 4L (2005-2015, diesel) Q5 Type 8R (2008-2017)

Removal the fan frame (Audi Q5-8R)

  • Home
  • Audi Q
  • Q5 Type 8R (2008-2017)
  • Power unit
  • Diesel engine 3.0 l
  • Removal the fan frame
            0
Remove the front noise insulation "1". Install the tray for the service cranes "VAS 6208" under the engine. Unscrew the plug "arrow" of the drain hole on the connecting nipple and drain the coolant.

Remove the front noise insulation «1». Install the tray for the service cranes «VAS 6208» under the…


Caution. Risk of injury from radiator fan starting up by itself. Before starting work in the fan frame area, disconnect the electrical connectors.


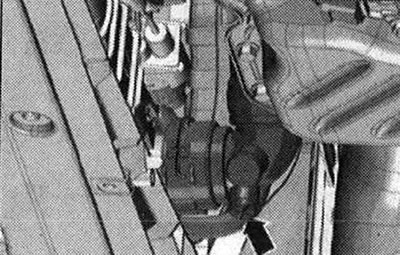
Disconnect the electrical connector "1" of the radiator fan, move the lock back "arrow" and press the stopper down. Release the wiring harness.
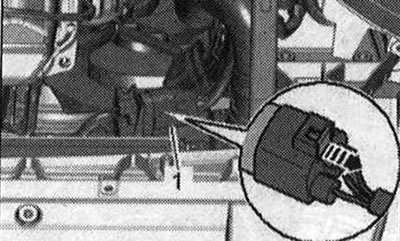
Disconnect the electrical connector «1» of the radiator fan, move the lock back «arrow» and press…


Install a device for pumping out and collecting oil under the place of disconnection. Unscrew the bolts "arrows" and disconnect the ATF lines from the radiator. To prevent ATF oil leakage, tie the ATF lines on the side member. To prevent contamination from entering, close the disconnected lines and pipes on the intercooler with a clean plug from the plug kit for the "VAS 6122" engine.
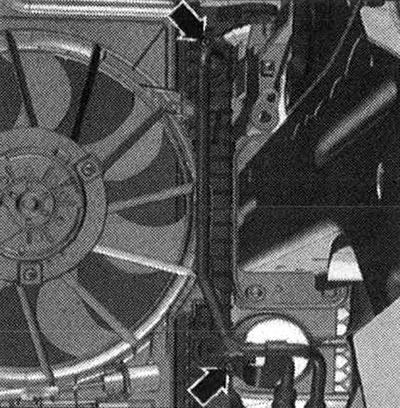


Install a device for pumping out and collecting oil under the place of disconnection. Unscrew the…


Unscrew bolts "1" and "2", remove the noise insulation screen of the bumper trim in the rear direction.
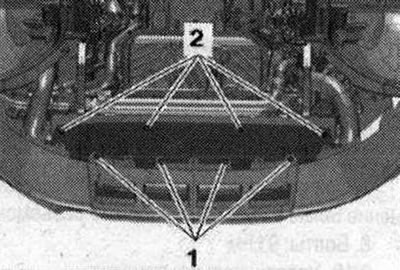
Unscrew bolts «1» and «2», remove the noise insulation screen of the bumper trim in the rear…


To remove the "arrow" spacer clamp, carefully press the clamping pin "1" by the dimension "x" until an audible click is heard into the "arrow A" spacer clamp. Dimension "x" = 5 mm. Remove the unlocked spacer clamp "2" with the clamping pin.
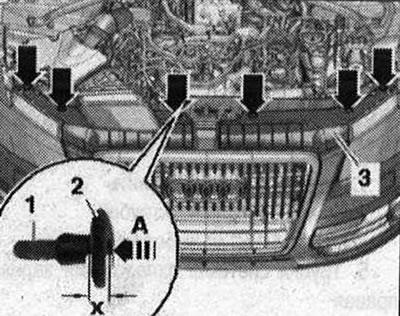
To remove the «arrow» spacer clamp, carefully press the clamping pin «1» by the dimension «x» until…


Unscrew the bolts "arrows". Remove the air duct "1" from the intermediate flange "2" of the air filter housing.
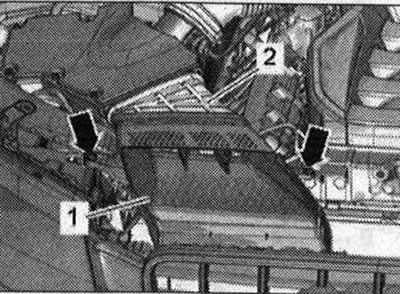


Unscrew the bolts «arrows». Remove the air duct «1» from the intermediate flange «2» of the air…


Unlock the lock "arrow A" with a screwdriver "1". Disconnect the air intake grille "2" from the bumper cover "arrow B". Repeat the entire process of performing the work on the other side of the car.
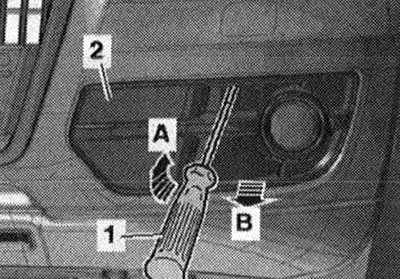
Unlock the lock «arrow A» with a screwdriver «1». Disconnect the air intake grille «2» from the…


Disconnect the upper air duct "1" by unlocking the "arrow" fasteners.
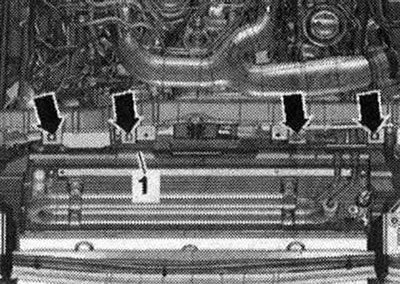
Disconnect the upper air duct «1» by unlocking the «arrow» fasteners.


Unlock the fastening brackets "arrows A" and move the air duct "1" to the left and right towards the center of the car "arrow B".
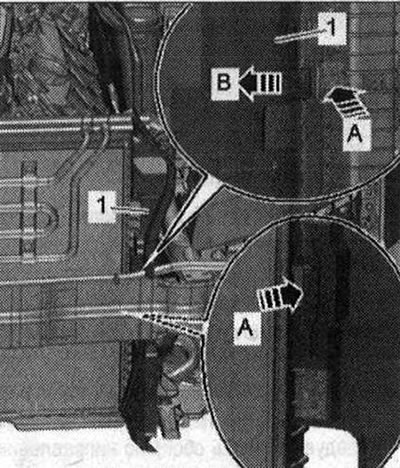


Unlock the fastening brackets «arrows A» and move the air duct «1» to the left and right towards…


Remove the connecting nipple from the radiator by loosening the clamp "1" and loosening the hose clamp "2".
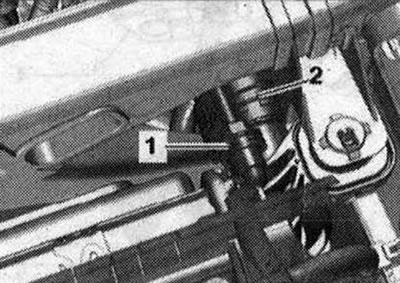
Remove the connecting nipple from the radiator by loosening the clamp «1» and loosening the hose…


To the right and left, unlock both radiator mounting bolts and pull them up "arrows". Remove the radiator from the top in the forward direction.
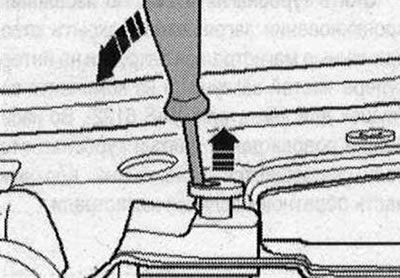
To the right and left, unlock both radiator mounting bolts and pull them up «arrows». Remove the…


Simultaneously press the fan frame fastening tabs "arrow" on the right and left and remove the fan frame from the radiator in an upward direction.
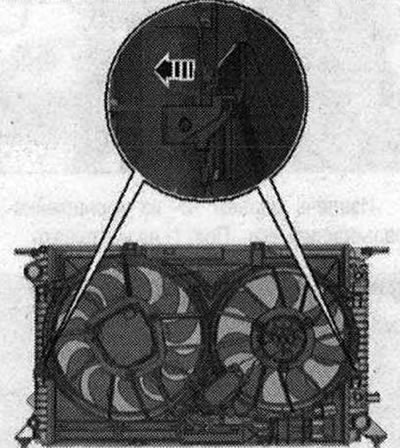


Simultaneously press the fan frame fastening tabs «arrow» on the right and left and remove the fan…


Installation


Installation is in the reverse order. Hose fittings, air duct tubes and hoses must be cleaned of oil and grease before installation. Secure all hose connections with hose clamps of the appropriate series. Install the air duct on the intermediate flange of the air filter housing. Install the radiator frame trim and the noise insulation screen of the bumper trim. Tighten the ATF line bolts. Fill with coolant. Check the ATF level.
The article was checked by auto expert Timur Bazhenov
This article is available at russian, bulgarian, belarusian, ukrainian, serbian, croatian, romanian, polish, slovak, hungarian

Share information:
Previous articles
Audi Q Q5 Type 8R: Diesel engine 3.0 l
Next articles

Radiator and radiator fan
Removal the coolant temperature sensor
Coolant supply pipes
Coolant pump and thermostat
Turbocharger — removal and installation
Intercooler — details
Injection system
System overview


Similar articles on other Audi car models:
Windscreen wiper motor and frame — removal and installation Audi 80 B3 (1986-1991, petrol)
Repair and replacement of welded elements of the body frame Audi 100 C3 (1982-1990, petrol)
Removal and installation the front door window frame Audi A4 B6 (2000-2006)
Front door/front door frame Audi A6 C5 (1997-2004)
Lower front frame Audi A8 D2 (1994-2002)
Balance shaft and crankshaft frame — design description Audi A2 (1999-2005)
Link to this page in different formats


Visitor comments

No comments yet


How much will 34 + 31 =


Q7 4L(2005-2015, diesel) 
  • General information
  • Operating instructions
  • Maintenance
  • Power unit
  • Diesels 3.0 l (BUG, BUN, CAS)
  • Diesels 3.0 l (CATA, CCMA)
  • Diesels 3.0 l (CJGA/CJGC)
  • Diesels 4.2 l (BTR, CCFA/CCFC)
  • Cooling system
  • Fuel and exhaust system
  • Engine management system
  • Starting and charging
  • Transmission
  • Automatic gearbox
  • Drive shafts
  • Chassis
  • Brake system
  • Front suspension
  • Rear suspension
  • Steering system
  • Body
  • Air conditioner
  • Exterior
  • Interior
  • Electrical equipment
  • Equipment and devices
  • Electrical circuits
 
Q5 8R(2008-2017) 
  • General information
  • User manual
  • Power unit
  • Petrol engine 2.0 l
  • Petrol engine 3.2 l
  • Fuel system (petrol)
  • Diesel 2.0 liter (CA)
  • Diesel 2.0 liter (CG/CJ/CM)
  • Diesel engine 3.0 l
  • Fuel system (diesel)
  • Transmission
  • Manual gearbox 0B1
  • Manual gearbox 0B2
  • Automatic gearbox 0B5
  • Automatic gearbox 0B6
  • Chassis
  • Front suspension
  • Rear suspension
  • Brake system
  • Steering
  • Body
  • Exterior
  • Interior
  • Doors, locks and windows
  • Safety system
  • Ventilation and heating
  • Electrical equipment
  • Power devices
  • Equipment and devices
  • Lighting and alarm
  • Audio system
  • Electrical circuits
 
AudiManual.ru © 2017-2026 · Mobile version · Feedback · Sitemap: EN BG BY UA RS HR RO PL SK HU · Site search · News and articles
80 B2 · 80 B3 petrol · 80 B3 · 80 B4 · 100 C3 diesel · 100 C3 petrol · 100 C3 · 100 C4 petrol · 100 C4 · A3 Type 8L · A4 B5 petrol · A4 B5 · A4 B6 petrol · A4 B6 · A4 B7 · A4 B8 · A6 C4 · A6 C5 · A6 C5 Allroad · A8 D2 · Q5 Type 8R · Q7 Typ 4L · Audi A2 ·
This site uses cookies 🍪. Click the button to accept this fact.