
Instructions: Before installation, all mounting and working surfaces must be lubricated.
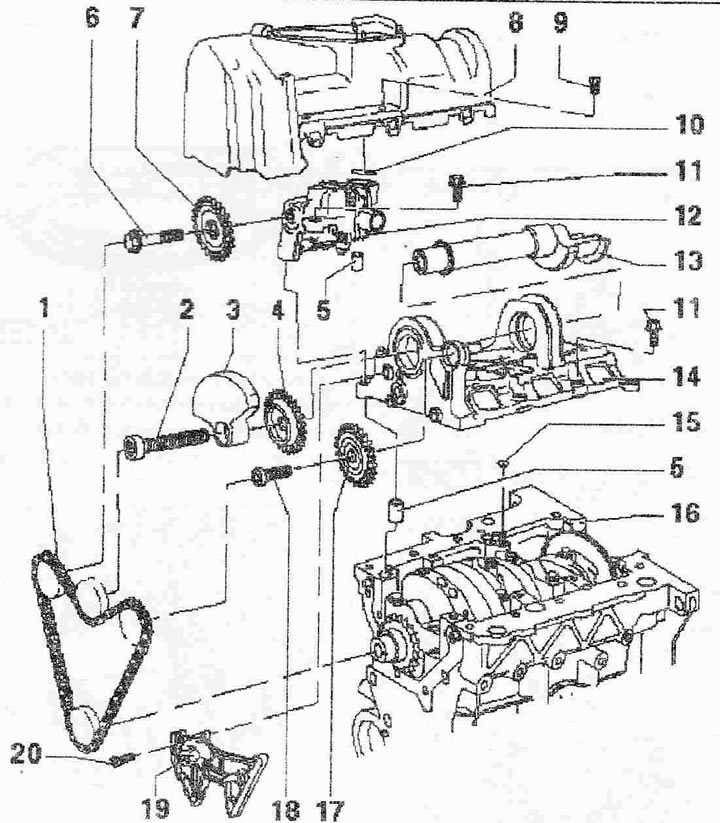
Balance shaft and crankshaft frame:
1. Chain. Observe the installation position
2. 100 Nm + tighten by 90°, replace. Use the "T10061" attachment to loosen and tighten
3. Counterweight, installation is possible only in one position
4. Balance shaft sprocket, installation is possible in only one position
5. Centering sleeve
6. 20 Nm + turn 90°, replace
7. Oil pump sprocket, installation is possible in only one position
8. Oil separator
9.5 Nm
10. O-ring, replace, check for secure fastening, lightly lubricate with oil for installation
11. Bolt. Oil pump to crankshaft frame: 20 Nm + 90°; replace bolt. Crankshaft frame to cylinder block: 14 Nm +180°: replace bolt
12. Oil pump with pressure reducing valve 11.5 bar, before installation make sure there are two centering bushings
13. Balance shaft
14. Crankshaft frame, before installation, make sure there is a centering sleeve in the cylinder block and a sealing ring in the crankshaft frame
15. Sealing ring, replace, monitor tightness of fit in crankshaft frame
16. Cylinder block, replaceable only as a complete assembly with the crankshaft
17. Freewheel sprocket
18. 20 Nm
19. Chain tensioner with bar, for removal fix with the locking pin "T10060 A" or "T10060"
20. 8 Nm + turn 90°, replace
[The original text is available on the website: audimanual.ru]