
Table of contents: Cars with a solid pipe between the… ↓ Cars with a connecting clamp on the… ↓
After each removal of the exhaust pipes, they must be straightened to avoid stress, which can lead to cracks or noise during driving. The exhaust system must be adjusted when cold.
1. Jack up the car and place it on jack stands.
Cars with a solid pipe between the main and additional mufflers
2. Loosen the bolts securing the clamps to the exhaust pipe.
3. Move the exhaust system forward in the direction of the arrow shown in the illustration so that the tension "a" of the front suspension cushion of the additional muffler is 5-9 mm.
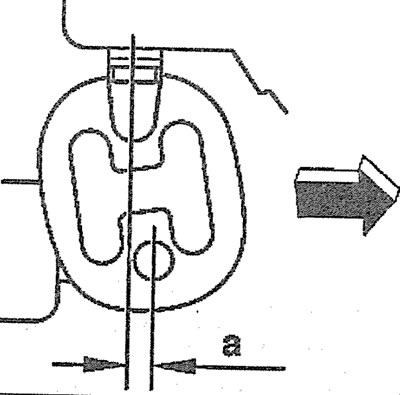
5.3. Move the exhaust system forward in the direction of the arrow so that the tension "a" of the front suspension cushion of the additional muffler is 5-9 mm
4. Tighten the bolts of the connecting clamps on the inlet pipe, maintaining this position of the additional muffler, with a force of 40 Nm.
Cars with a connecting clamp on the main and additional muffler pipe
5. Loosen the bolts securing the clamps to the exhaust pipe.
6. Move the exhaust system forward in the direction of the arrow shown in Illustration 5.3 so that the tension "a" of the front suspension cushion of the additional muffler is 5-9 mm.
7. Tighten the bolts of the mounting clamps on the exhaust pipe evenly to 40 Nm.
8. Feed the main muffler in the direction indicated by the arrow in the illustration so that the tension "a" of the rear suspension cushion of the main muffler is 7-11 mm.
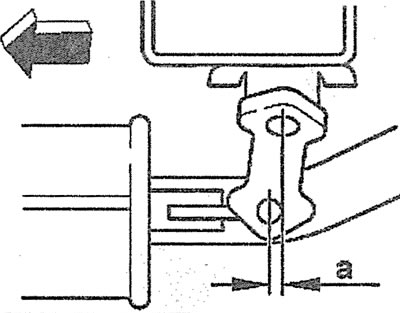
5.8. Feed the main muffler in the direction indicated by the arrow so that the tension "a" of the rear suspension cushion of the main muffler is 7-11 mm
9. Tighten the clamp bolts on the muffler pipe evenly to 40 Nm.
10. Align each exhaust pipe with the recess in the bumper so that the "x" distances on both sides are the same (see illustration).

5.10. Align each exhaust pipe with the recess in the bumper so that the distances "x" on both sides are the same
11. If necessary, adjust the distance "x" by unscrewing the nuts/bolts (see arrows in the illustration) fastenings of the connecting spacer, change the distance between the pipes and tighten the nuts/bolts with a force of 25 Nm.
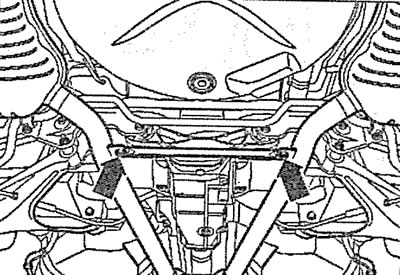
5.11. Unscrew the nuts/remove the bolts (see arrows) connecting strut fastenings
12. Make sure that the distance "y" from the exhaust pipe to the bumper is 19-27 mm, the distance "7" is 11-16 mm (see illustration).
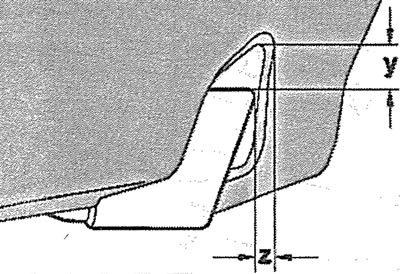
5.12. Make sure that the distance "y" from the exhaust pipe to the bumper is 19-27 mm, the distance "z" is 11-16 mm