



Table of contents: Standard trans. seat (manual… ↓ Disconnecting and connecting plug… ↓ Plug connections of the plug block ↓ Removal and installation seat guide… ↓ Overlays on the threshold side and… ↓ Seat height adjustment and reg.… ↓ Backrest of the front seat ↓ Overview of seat back pad attachment… ↓ Removal and installation the… ↓ Adjusting the longitudinal position… ↓
Standard trans. seat (manual adjustment)
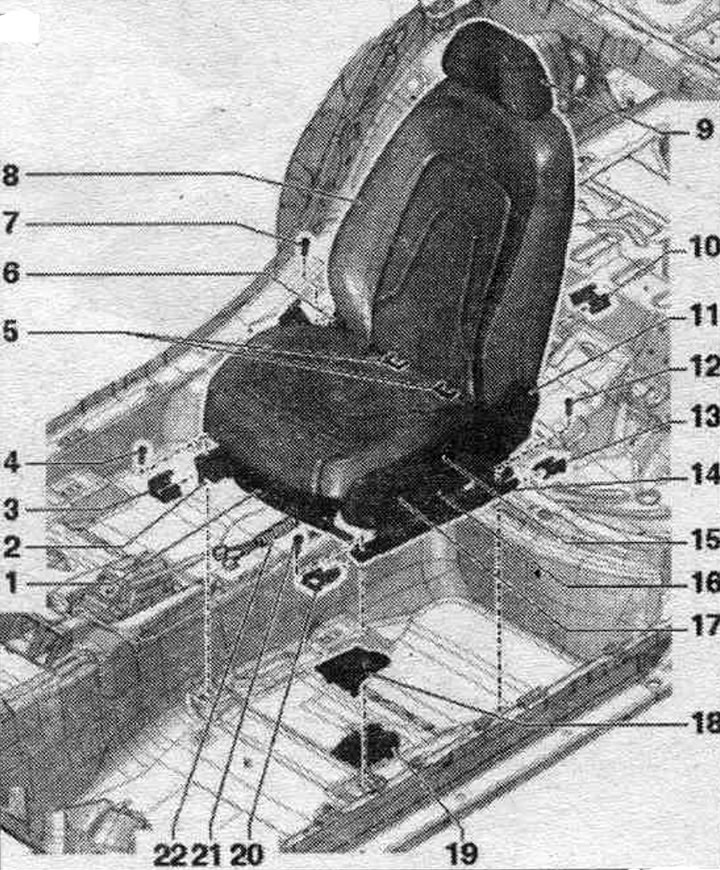
1. Storage compartment.
2. Adjusting the longitudinal position of the seat.
3. Right front guide cover. seats.
4. Bolt: 50 Nm.
5. ISOFIX child seat anchorages: for front seat only. passage.
6. Tunnel side cover.
7. Bolt: 50 Nm.
8. Standard per. seat (manual adjustment).
9. Headrest: manual adjustment.
10. Rear guide cover. right seat.
11. Reg. flywheel. seat back angle.
12. Bolt: 50 Nm.
13. Seat guide cover, rear left.
14. Lower recess frame: Separating the lower frame of the seat base with longitudinal adjustment from the upper frame of the seat base (seat base) not provided for in relation to standard trans. seats (manual reg).
15. Seat height adjustment.
16. Overlay on the threshold side.
17. Regulator switch. lumbar support positions. seats "E176": side front. passenger: reg. switch. lumbar support positions of the front seat. passage. "E177".
18. Connection module cover.
19. Plug-in connector.
20. Seat guide cover, front left.
21. Bolt: 50 Nm.
22. Corrugated pipe: for modular wiring.
Removal
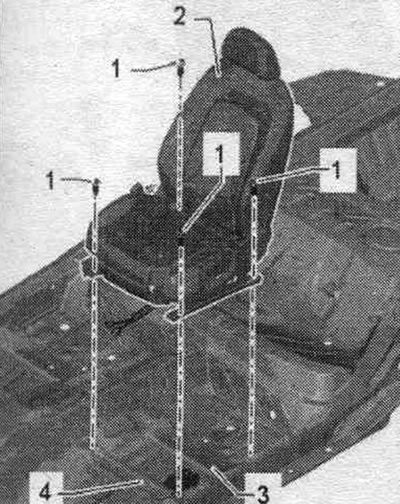
Turn on the ignition. Disconnect the battery ground cable with the ignition on. Remove the fittings front. seat belt. Move the headrest to the lowest fixed position. Using the reg. handle. longitudinal position, move seat "2" to the extreme rear upper position. Disconnect the plug connections from the floor connection module. Connect the Airbag adapter "VAS 6281". Unscrew the bolts "1" (2 pieces) at the front of the console "4". Using the reg. handle. longitudinal position, move seat "2" to the extreme front. position. Unscrew bolts "1" (2 pieces) at the rear of console "3". With the help of a mechanic, remove seat "2" from the car.
Installation
Installation in reverse order. Remove the Airbag adapter "VAS 6281" only after installing the seat. Please note that the plug connections must be inserted all the way until they click into place. Insert the plugs into the connectors of the connection module in the bottom of the vehicle.
ATTENTION! Connect the battery only when the ignition is on. In case of improper repair of pyrotechnic parts (for example, airbags, tensioners) after connecting the battery, they may be activated unintentionally.
Disconnecting and connecting plug connections
The connector socket is located on the bottom under the front of the seat.
Disconnect the plug connections
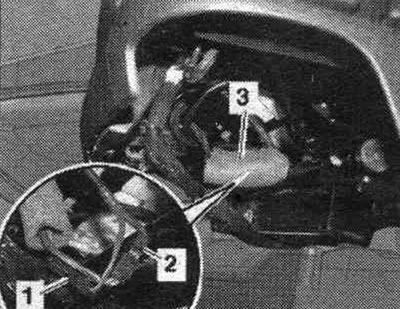
Move the headrest to the lowest fixed position. Raise the seat to the rear, upper position. Turn on the ignition. Disconnect the battery ground cable with the ignition on. Unlock trim "1" with wedge for dismantling "3409" from the front and remove the trim in the "direction of the arrow" from the connection module "2".
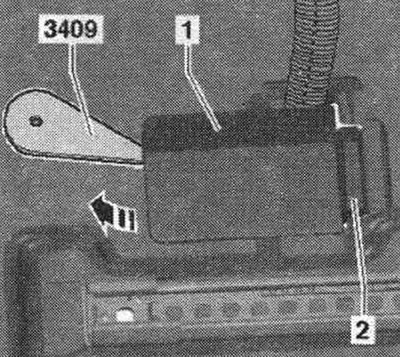
Remove the wire holder "3" upwards from the connection module. The number of plug connections may vary depending on the configuration. The description shows the option with the maximum configuration. Disconnect the side airbag connector "1". Attach the Airbag adapter "VAS 6281" to the front seat side airbag connector. Version with seat heating system: disconnect the system connector. seat heating "2". Version with electric seat adjustment: disconnect the power plug per. seat "4". Disconnect the seat belt buckle plug. "5".
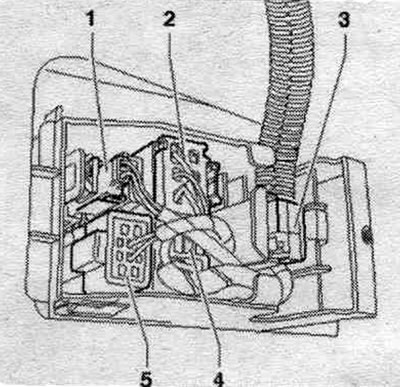
Cars with a DVD player: Move sleeve "3" to the side. Disconnect plug connections "1" and "2" and release the wiring harness.
Connecting plug connections
The connection of plug connections is carried out in reverse order, and the following must be observed. Connect the battery ground cable with the ignition on. If the Airbag "K75" indicator lamp indicates a malfunction after installation, query the fault memory, clear it and query it again.
Plug connections of the plug block
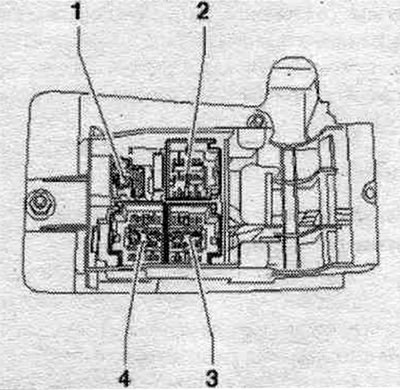
1. Side Airbag.
2. Seat heating.
3. Power supply of the mechanism per. seat position.
4. Belt buckle.
Removal and installation seat guide covers
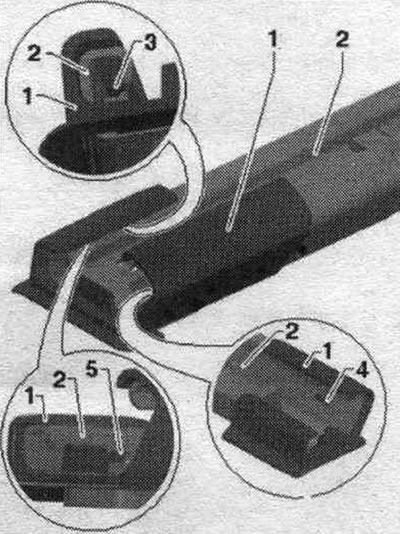
Remove the front seat. Unlock the locking tabs "3, 4, 5" of the trim from the seat guide "2". Remove the trim "1" as parallel to the seat guide as possible, moving forward.
Installation
Installation in reverse order. Please note that the plug connections must be inserted all the way until they click into place. Connect the battery ground cable with the ignition on.
Overlays on the threshold side and on the tunnel side
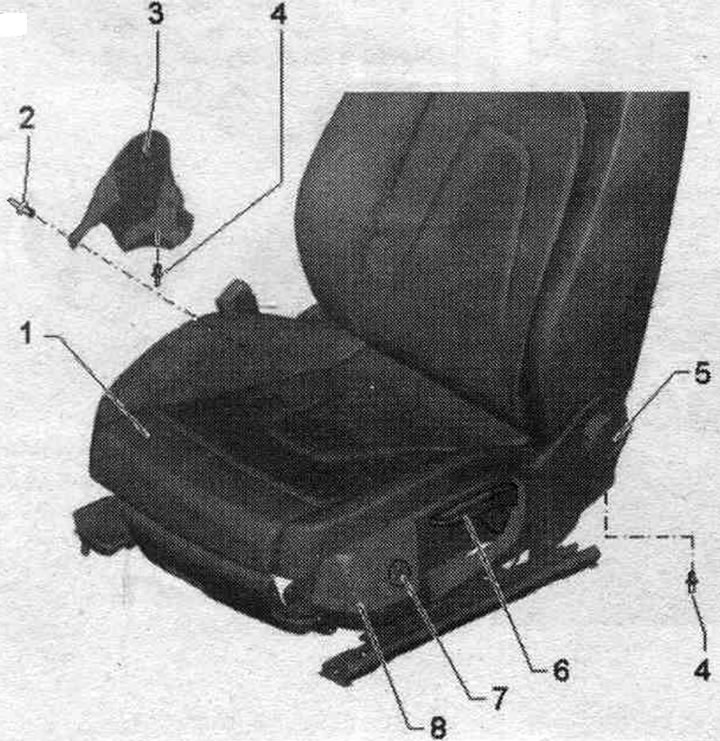
1. Front seat.
2. Blind rivet.
3. Tunnel side trim: Can only be replaced with the seat removed.
4. Blind rivet.
5. Reg. handwheel. seat back angle.
6. Handle per. seat height.
7. Regulator switch. lumbar support positions: driver's side: switch per. lumbar support positions of waters. seats "E176", from the front side. passage: switch per. lumbar support positions of the front seat. passage. "E177".
8. Door sill trim: Can be replaced without removing the seat.
Seat height adjustment and reg. handle. seat height
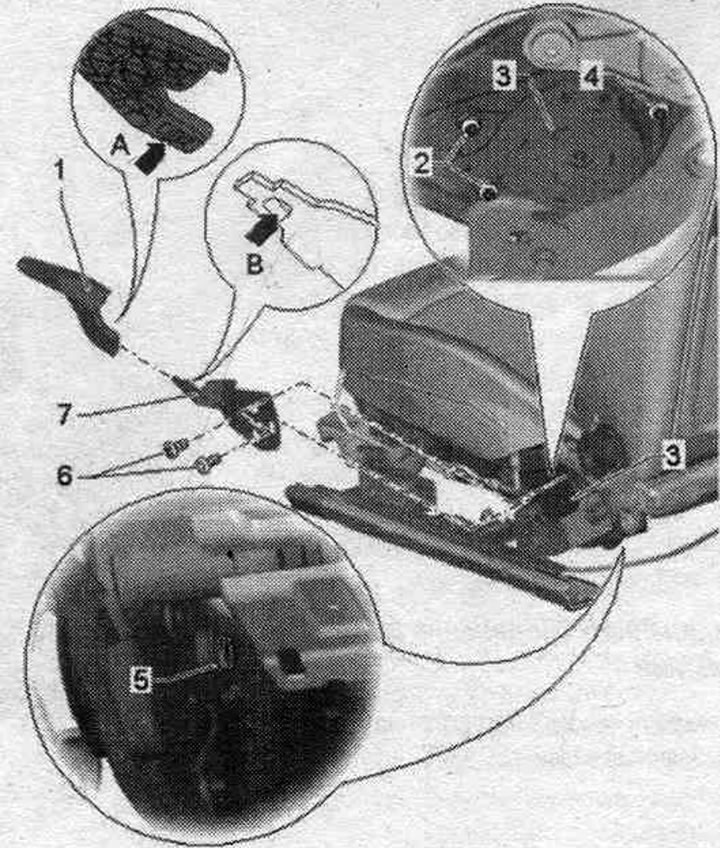
1. Seat height adjustment handle: with cover "A" for fixing with protrusion "B" of lever "pos. 7".
2. Bolts: 2 pcs.; take into account the different length of the bolt "pos. 4"; 6.5 Nm.
3. Seat height adjustment.
4. Bolt: take into account the different lengths of the bolts "pos. 2"; 10 Nm.
5. Lock washer: Replace after each removal.
6. Bolts: 2 pcs.; 8 Nm.
7. Lever: for reg. handle. seat height; with protrusion "B" for fixing the handle per. seat height "pos. 1".
Backrest of the front seat
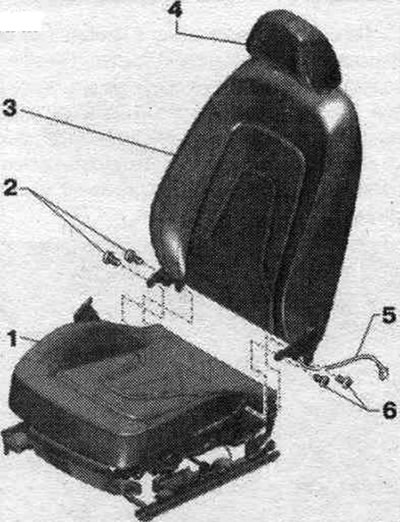
1. Seat base.
2. Bolts: self-locking; replace after each removal; threaded holes for bolts should be cleaned, for example with a tap; 33 Nm.
3. Back.
4. Headrest.
5. Wire harness: extends from the side airbag to the connection module; depending on the configuration option, other wiring harnesses may be available, for example, for the seat heating system and lumbar support.
6. Bolts: self-locking; replace; 33 Nm.
Tightening torque for DVD player mounting plate
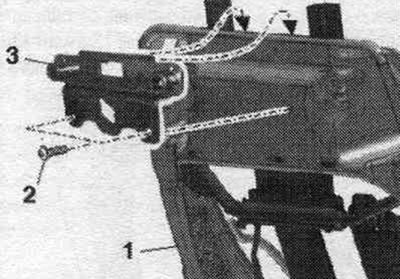
Tighten bolts "2" of the mounting plate to a torque of 6 Nm.
Tightening torque of the support sleeve for DVD player
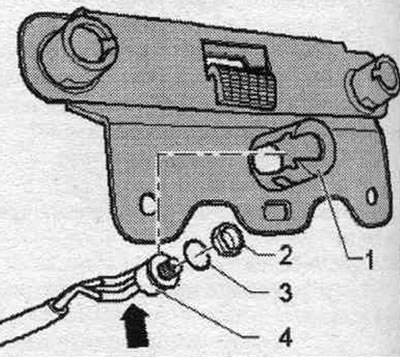
Tighten nut "2" to a torque of 0.4 Nm.
2-piece seat back cover and seat back frame cover
Note: The 2-piece seat back cover consists of a removable seat back cover and a seat back frame cover. The installation overview is given for a standard trans. seats. The backrest upholstery and backrest frame trim are similar to those of other seat options.
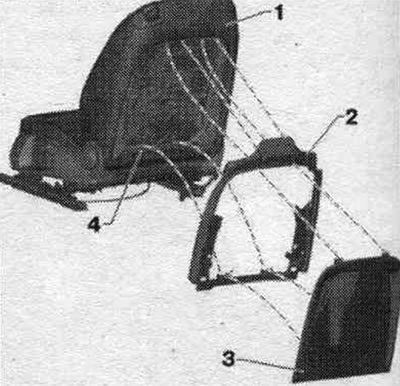
1. Front seat.
2. Seat back frame trim.
3. Backrest lining.
4. Back frame.
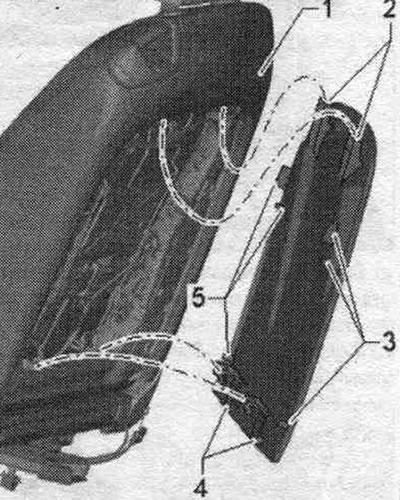
Overview of seat back pad attachment points
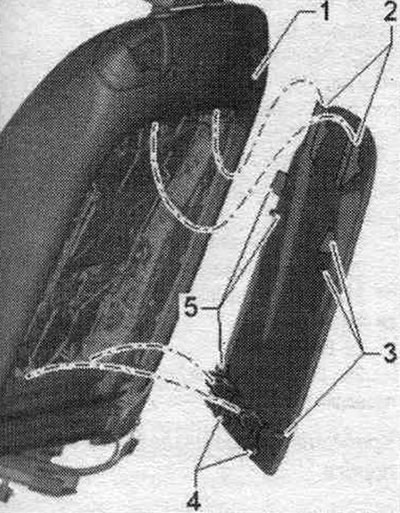
1. Backrest, front seat.
2. Upper hook (2 pieces).
3. Fixing tabs on the left side (3 pieces).
4. Bottom hook (2 pieces).
5. Fixing tabs on the right side (3 pieces).
Removal
Removal and installation can be carried out with the seat installed.
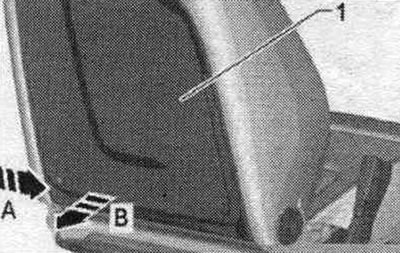
Remove the side lower hooks "3" (2 pieces) of the backrest lining "2" from the backrest frame overlay "1".
To do this, move the seat back cover "1" in the "direction of arrow A" towards the center of the seat. Then remove the seat back cover in the "direction of arrow B" downwards. Perform all work on the other side in the same way.
Separate the backrest trim "2" from the side - arrows A, B, E, F-.
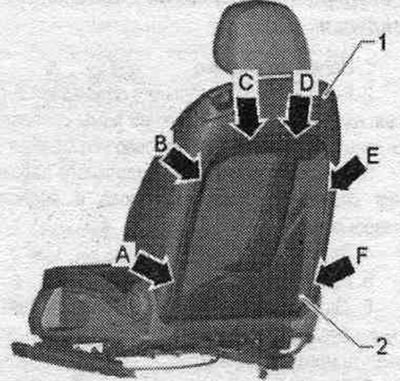
To do this, grasp the backrest trim "1" at the rear and remove it from the right side of the seatback "2." Do the same with the backrest trim "1" on the opposite side. Unfasten the side locking tabs "3" or "5".
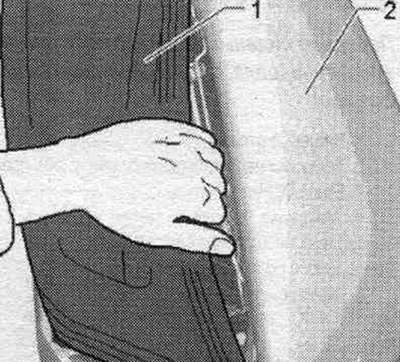
Remove the seat back trim "1" further and bend it back so that the upper hooks "2" come out of the seat back frame. Tilt the seat back cover "1" slightly backwards.
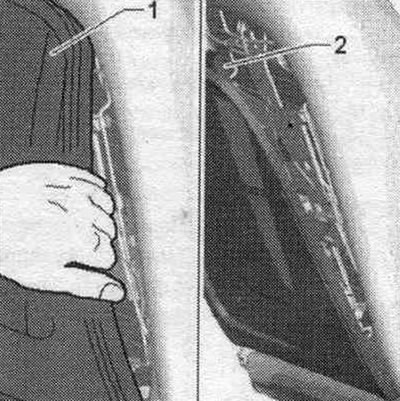
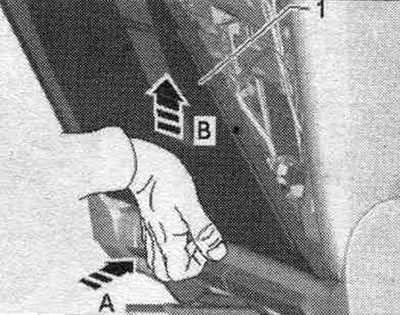
To do this, slide the seatback cover "1" in the direction of arrow A. Lift the seatback cover in the direction of arrow B and remove it from the seatback frame.
Installation
Installation in reverse order. First insert the upper hooks "2" under the upper cross casing of the seat back frame. Tilt the seat back frame trim downwards and secure the side retaining tabs "3" and "5" and the lower hooks "4." Make sure that the side tabs "3" and "5" are properly secured to the seat back frame trim and that the lower hooks "4" are properly positioned on the seat back frame trim shoes.
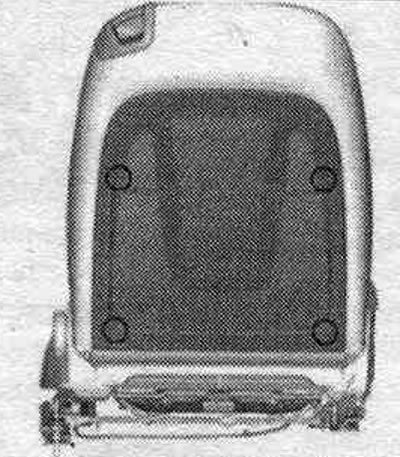
Press the seat back trim firmly against the seat back in the places indicated by circles. Make sure the backrest trim is properly secured. The seat back trim at the bottom should not be removed.
Removal and installation the backrest frame trim
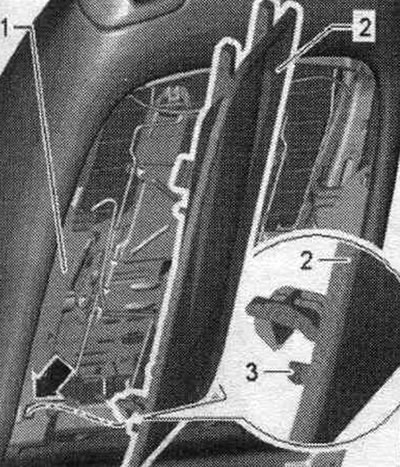
Remove the backrest cover. Remove the backrest upholstery so that the 2 fixing tabs "arrow A" and "arrow B" of the seat back frame trim "2" at the rear are visible.
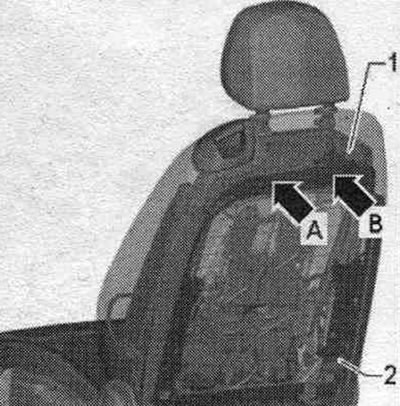
Separate the retaining tabs "arrow A" and "arrow B" of the seat back frame lining "2" from the seat back frame "1".
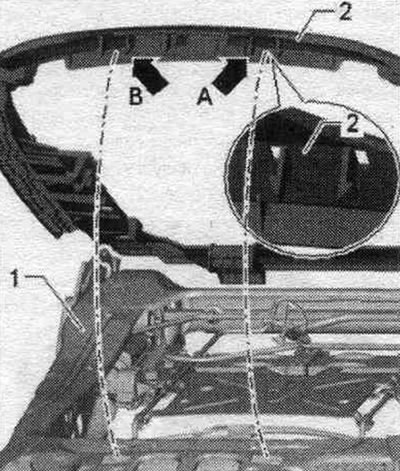
Remove the backrest frame trim "2" upwards from the seatback frame "1". At the same time, unfasten the lower shoes "arrows" (2 pieces) of the seatback frame. Remove the trim from the seat back frame.
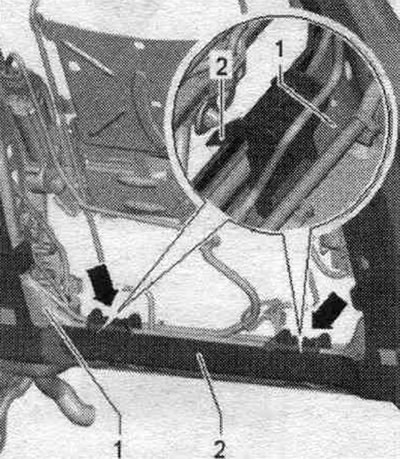
Installation in reverse order.
Adjusting the longitudinal position of the seat
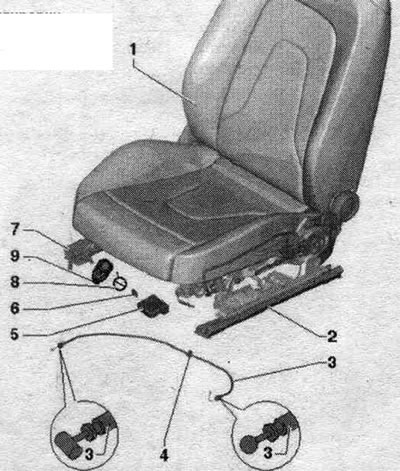
1. Front seat.
2. Seat longitudinal adjustment: included with the seat base lower frame; cannot be replaced separately.
3. Cable in a reg. sheath. longitudinal position of the seat: adjustment of the cable in the casing is not possible.
4. Clamp or tie.
5. Handle: for longitudinal adjustment. seats.
6. Clamp: Replace after each removal of the per. handle. longitudinal position of the seat, take into account the installation. position.
7. Lever: for longitudinal adjustment. seats.
8. Lever spring for securing the cable to the longitudinal per. system. seats; different nodes on the side of the driver, and the front passage.
9. Lever for connecting the system cable. per. longitudinal position of the seat; the same part for the driver's seat and the front passenger seat.