
Note. A description of the parts and components of the driver's seat is given; it is similar for the front passenger seat; installation is additional. details are made in a mirror. For greater clarity, the floor covering is not shown in the figure.
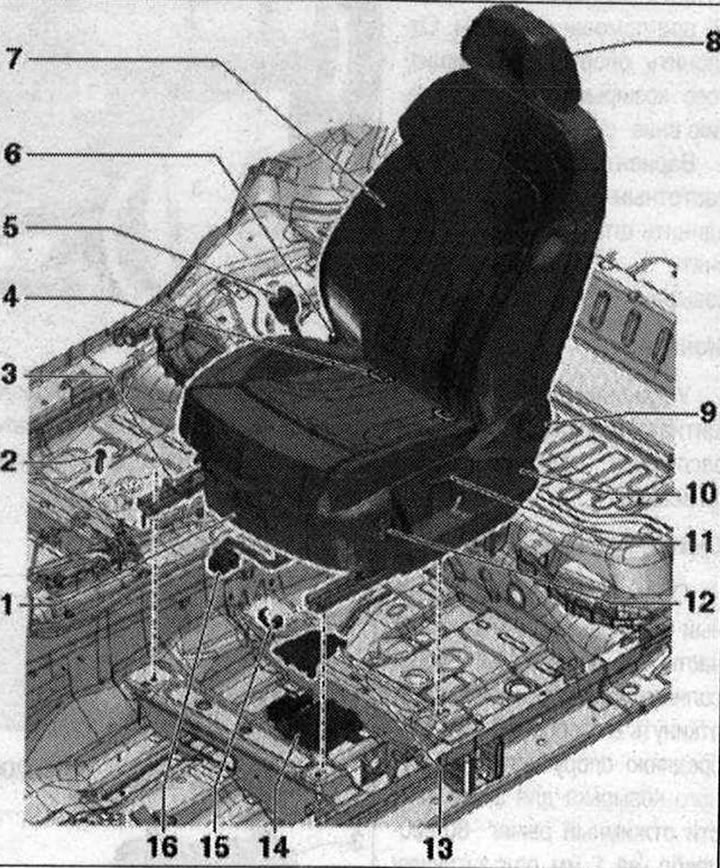
Standard front seat (manual adjustment) 1. Drawer/storage compartment; 2. Bolt. 4 things. 50 Nm; 3. Handle for longitudinal adjustment of the seat; 4. ISOFIX child seat anchors (only for front passenger seat); 5. Belt lock; 6. Tunnel side cover; 7. Front seat. There is no provision for detaching the top of the seat from the bottom of the seat well for the manual front seat; 8. Headrest; 9. Seat back adjustment screw; 10. Threshold side trim; 11. Seat height adjustment; 12. Lumbar support lever. Removing the lumbar support adjustment switch; removing and installing a four-way lumbar support; 13. Connection module cover; 14. Plug block; 15. Cover for seat rail. 4 things.; 16. El. connector with corrugated tube for modular wiring
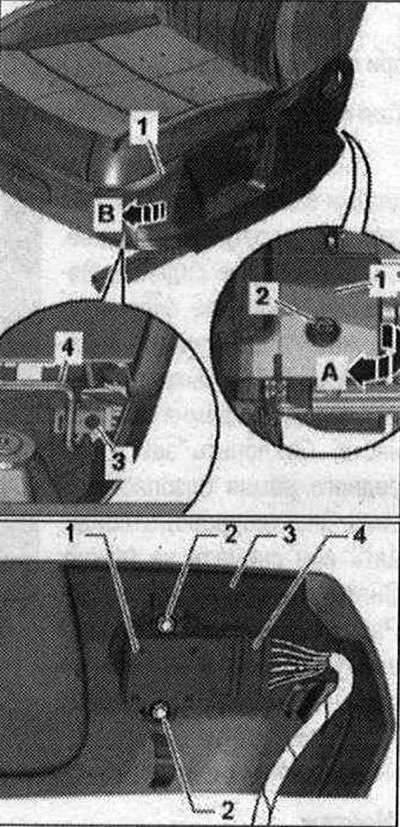
Disconnecting and connecting connectors
The connector block is located on the bottom of the car under the front of the seat. Move the headrest to its lowest fixed position. Raise the seat to the rear, upper position. Turn on the ignition. Disconnect the battery ground cable with the ignition on. Unlock the trim -1 using a removal wedge -3409- from the front and remove the trim -in the direction of the arrow- from the connection module -2-.


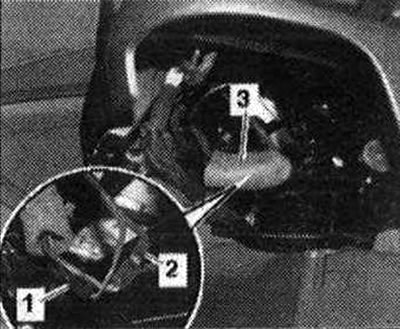
Remove the cable bracket -3- upwards from the connection module. The number of connectors may vary depending on the kit. The description shows the option with the maximum kit. Disconnect the side Airbag connector -1-. Place the Airbag adapter -VAS 6281 - onto the front seat side Airbag connector.
Set option with seat heating: Disconnect the seat heating connector -2-.
Set option with electrically adjustable seat: Disconnect power supply plug for seat adjustment -4-. Disconnect the seat belt buckle connector -5-.
Set option with DVD player: move bushing -3- to one side. Disconnect el. connectors -1- and -2- and release the wiring harness.
Connecting the plug connectors
Assembling the plug connections is carried out in the reverse order, it must be taken into account that the electrical The connectors must be inserted all the way until they click into place. Connect the battery ground cable with the ignition on.
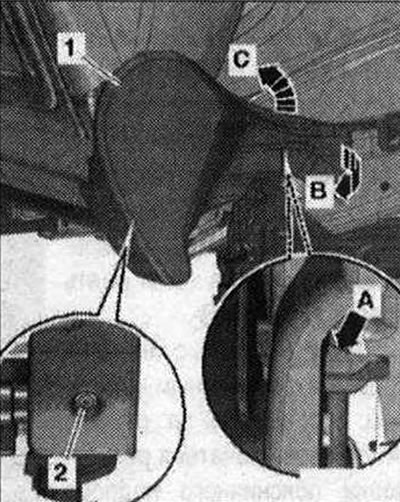
Tunnel side cover 1. Clamping pin; 2. Spacer clamp; 3. Tunnel side cover. Can only be replaced with the seat removed
Removing the tunnel side cover
Removal and installation of the trim must only be done with the front seat removed. Remove the front seat. Attach front seat to seat repair holder -VAS 6136-. Unscrew the front seat belt buckle. Move the front seat belt buckle down. There is no need to disconnect or remove the electrical wire. Remove spacer clip -2-. Unlock locking lug -arrow A- and pull trim -1- out -arrow B-. Detach the trim on the tunnel side from the seat in -direction of arrow C- and remove.
Installation
Install in the reverse order, making sure that the locking lug is seated correctly. Please note that email The connectors must be inserted all the way until they click into place. Connect the battery ground cable with the ignition on.
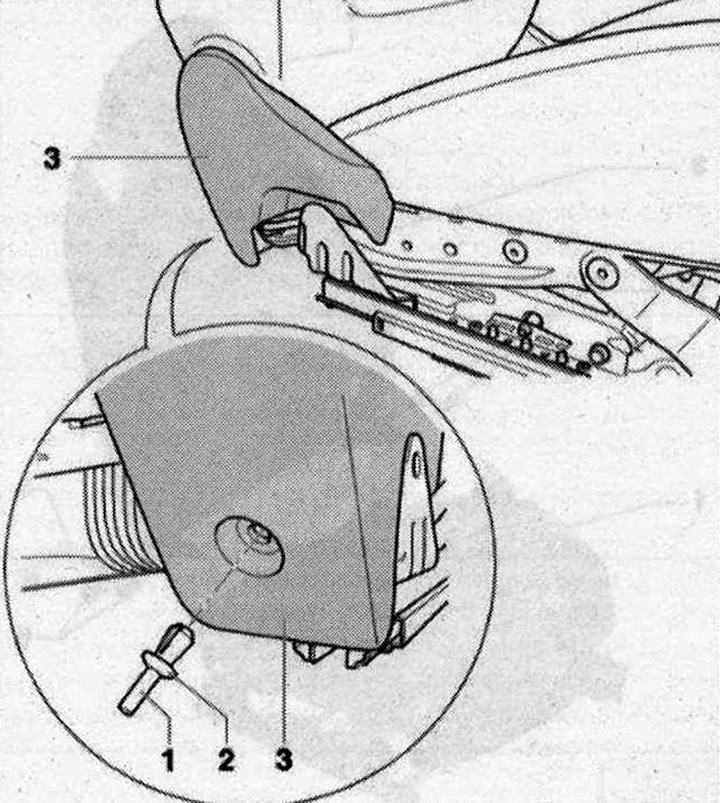
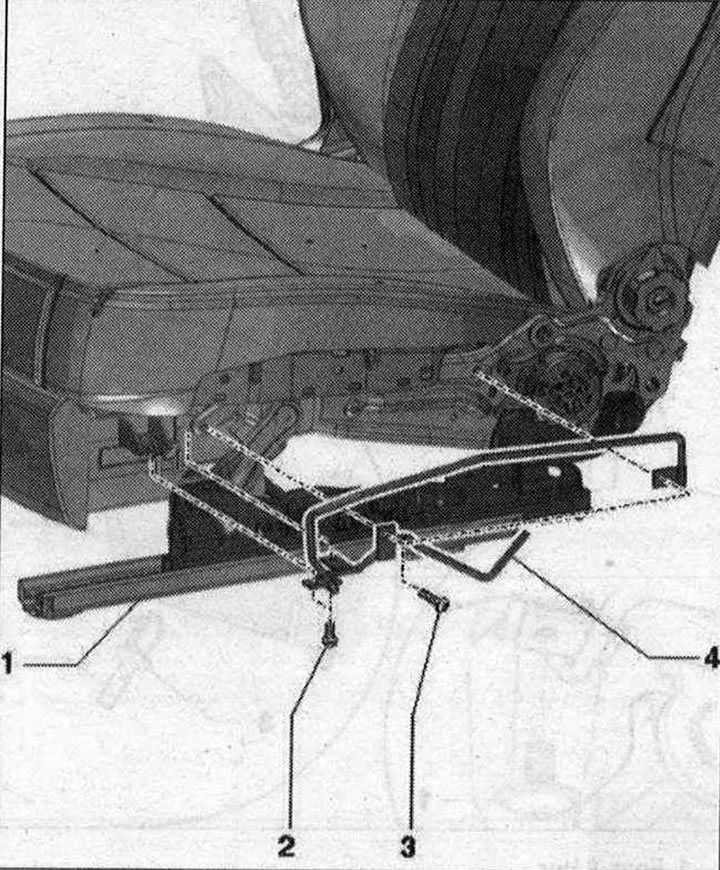
Threshold side trim 1. Bolt. 8 Nm; 2. Clamping pin; 3. Spacer clamp; 4. Trim on the side of the threshold. Can be replaced without removing the seat
Removal
Removal can be carried out on the installed seat. Move the seat all the way up. Remove the seat back adjustment screw. Remove the seat height adjustment handle. Unscrew the bolt -3- and remove the clamp -2- of the trim. Detach trim -1- at rear from seat -arrow A-. Slightly pull the trim towards the rear, unclip it from the retaining clip -4- and remove it forwards -arrow B-.
Set option with four-way lumbar support: disconnect the el. connector -4- from lumbar support adjustment switch -1-.
-Pos. 2- do not take into account. Remove trim -3- from sill side.
Installation
Install in the reverse order, making sure that the trim on the threshold side is correctly secured with the clamp. Make sure that the wire is positioned as close as possible to the plug connector -4-.
Threshold side trim bracket 1. Front seat. Manual adjustment; 2/3. Bolt. 2 pcs. 8 Nm; 4. Fastening bracket for the threshold side trim
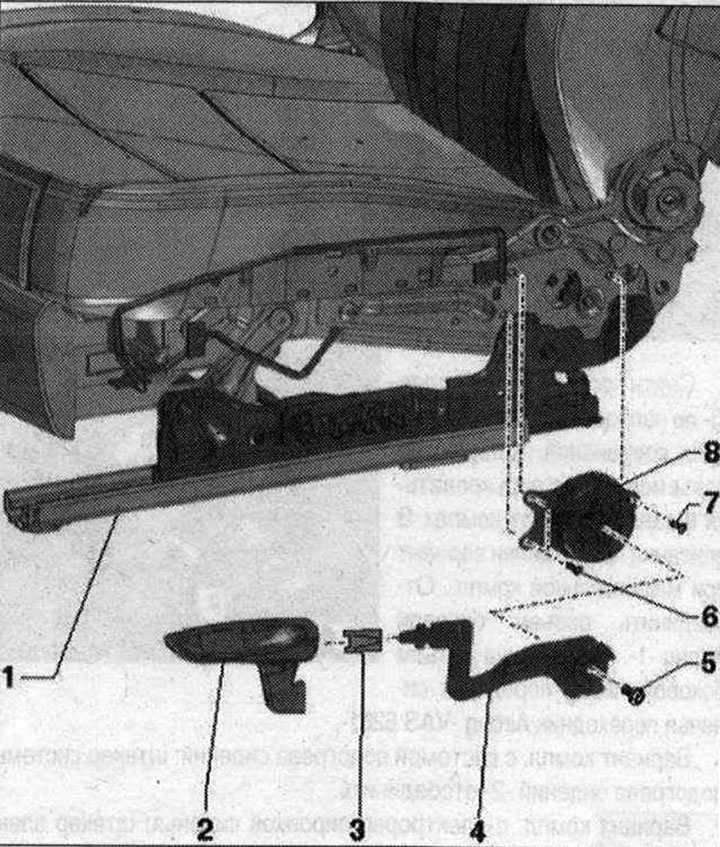
Seat height adjustment 1. Front seat. Manual adjustment; 2. Seat height adjustment handle; 3. Clamp; 4. Lever for seat height adjustment handle; 5. Bolt. 19.5 Nm; 6. Bolt. 2 pcs. 6 Nm; 7. Bolt. 6 Nm; 8. Seat height adjustment
Visitor comments