



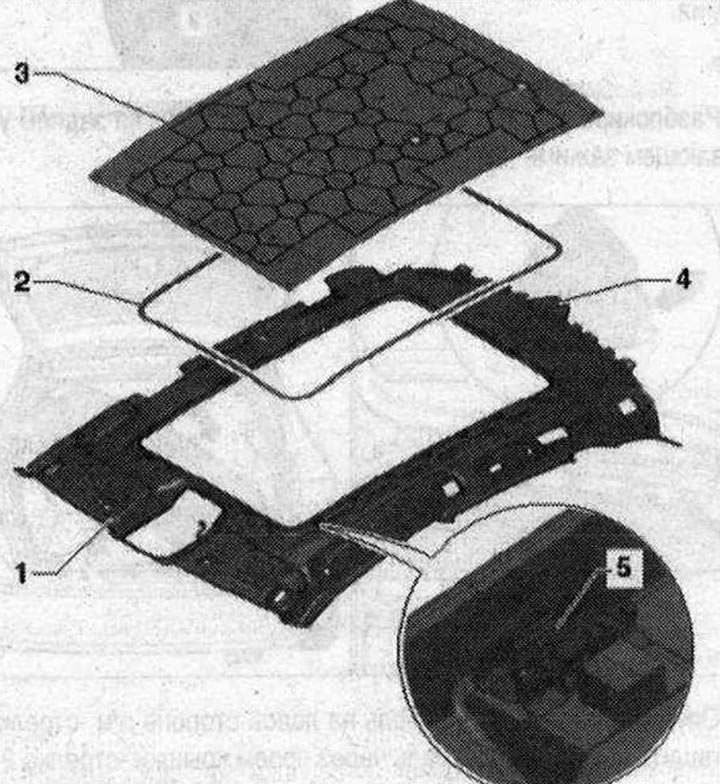
Ceiling panel parts and components 1. Ceiling panel. The ceiling panel is very sensitive to bending. A bent ceiling panel must be replaced; 2. Frame. Sliding hatch kit variant. Marking facing the luggage compartment; 3. Roof reinforcements. Install on the body; 4. Centering clamp; 5. Clamp. 23 pcs. Install on the inner ceiling panel. Replace if damaged or deformed. Unlock
Removal
Fold the rear seatbacks forward. Recline the front seatbacks to a 45° angle. Remove the upper A-pillar trim. Remove the upper B-pillar trim. Remove the C-pillar trim. Remove the rear roof panel trim. Remove the D-pillar trim. Remove the mesh partition hanging eyes. Remove the sun visors. Remove the interior light/reading lamp. Remove the center sun visor support. Remove the handle in the roof frame.
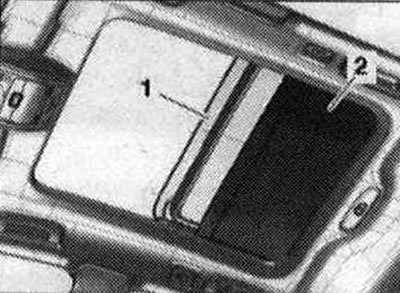
Option complete with sliding sunroof: fully open sunroof "1". Open sunblind "2" approximately 2/3.
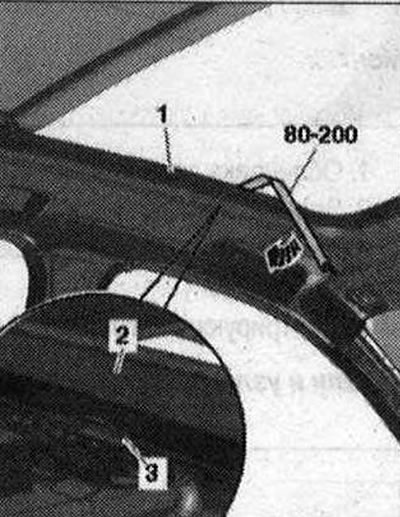
Clean the release lever "80-200" to avoid contamination of the ceiling panel. Move the lever "80-200" between the frame "2" for the opening of the sliding sunroof and the inner ceiling panel "1" so that you can feel one of the locks "3". Unlock the frame from the locks sequentially using the lever "80-200" "arrow" as shown in the figure.
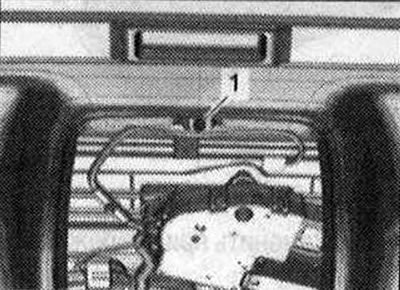
Remove bolt "1" from the hole in the roof for the interior light/reading lamp.
All
Unlock the "arrow" retaining clips on the rear retaining clip with a small screwdriver.
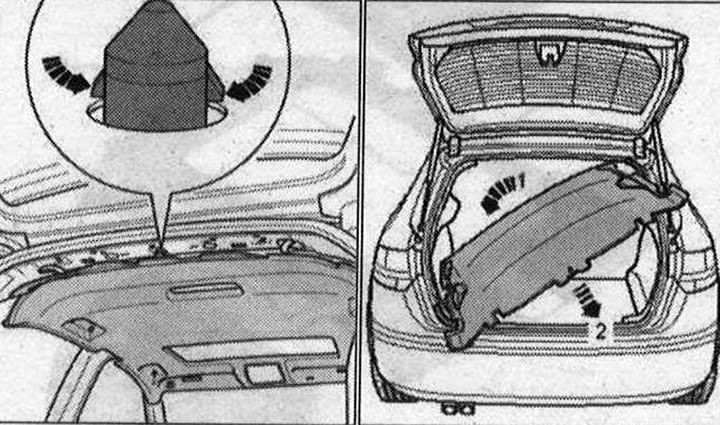
Lower the ceiling panel on the left side of the car "arrow 1".
Pull out the ceiling panel through the opening in the cover "arrow 2".
Installation
If the ceiling panel clamps remain in the attachment points on the body, remove them and place them on the ceiling panel for installation. Check the clamps for defects and deformations, replace if necessary. Installation in the reverse order, while observing the safety regulations for handling pyrotechnic units. Before fastening, align the ceiling panel and press it until it is audibly fixed in the fastening brackets on the hatch opening frame