
Note: The description is given using the Sedan models as an example; for station wagon models the procedure is similar.
1. The installation details of the inflatable curtain are shown in the illustration.
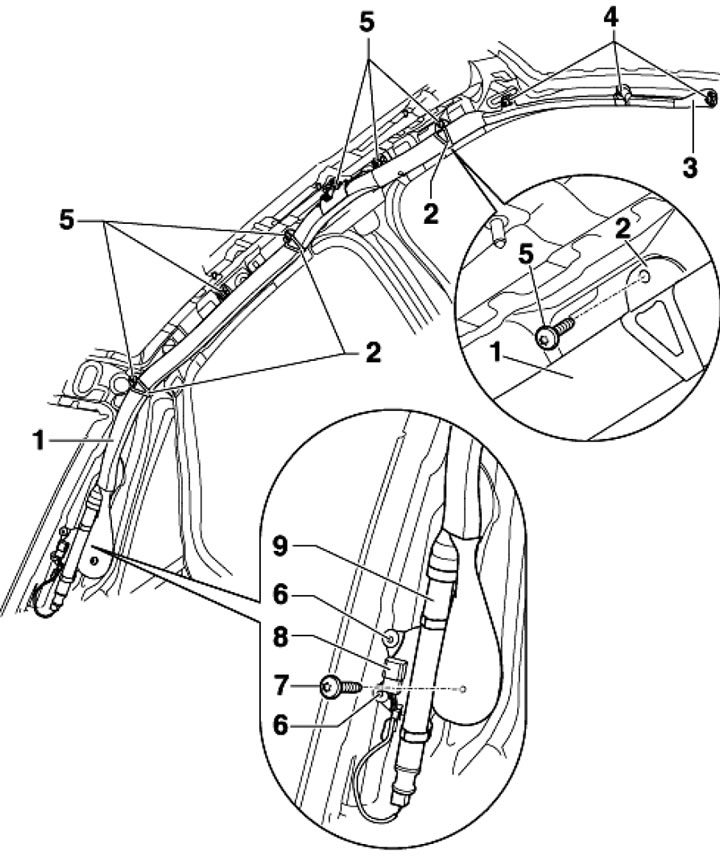
17.1. Inflatable Curtain Installation Details 1. Inflatable curtain; 2. Holders; 3. Tip; 4. Self-locking bolts, 3 pcs., subject to replacement, 4 Nm; 5. Self-locking bolts, 6 pcs., subject to replacement, 4 Nm; 6. Self-locking bolts, 2 pcs., subject to replacement, 4 Nm; 7. Self-locking bolt, subject to replacement, 4 Nm; 8. Connector; 9. Gas generator
2. Disconnect the negative cable from the battery.
3. Remove the sun visor.
4. Remove the upper A and B pillar trim sections, headliner trim and D pillar trim.
5. Disconnect the connectors, loosen the bolts (4, 5 and 7 in Illustration 17.1).
6. Remove the three holders from the cover frame (2 in illustration 17.1) and lower the front part of the inflatable curtain onto the front seat. Loosen the two bolts (6) and remove the inflatable curtain.
7. Installation is performed in the reverse order of dismantling the components. First, install the holders.
Note: To remove the switches, press them away from the trim panel (if necessary, remove the panel first) and disconnect the connector.
The original version of the article is posted on the website AudiManual.ru