
Table of contents: Left lower instrument panel trim -… ↓ Glove box - removal ↓ Rear Console - Removal ↓ Front Console - Removal ↓
Left lower instrument panel trim - removal and installation
The lower left trim panel of the instrument panel also serves as a small item storage shelf. It always has to be removed if access to the rear of the instrument panel is required.
1. Using a thin socket wrench, remove the four screws securing the trim (see illustration).
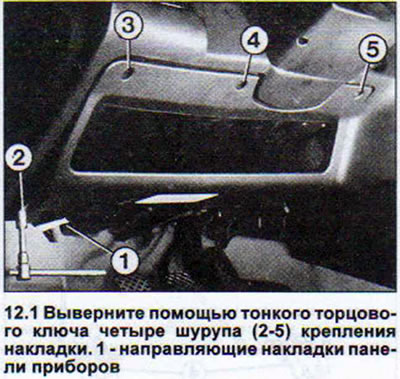
2. Move the pad down a little and, pushing it back, remove it. When installing it again, insert the front edge of the pad into both guides near the floor and near the pedal axle (see illustration 12.1). Do not tighten the mounting screws too tightly.
Glove box - removal
3. Unscrew the two screws securing the glove box hinge at the bottom of the instrument panel (see illustration).
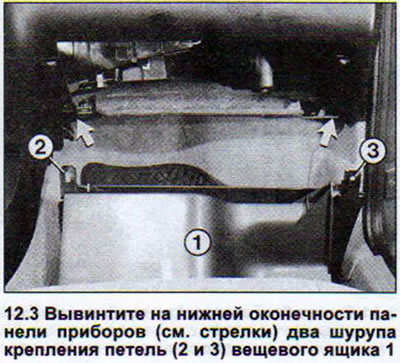
4. Press the drawer stoppers and tilt the drawer down.
Rear Console - Removal
5. Tighten the parking brake lever.
6. Use a screwdriver to pry up the fastening of the parking brake lever trim and remove it by pushing it back (see illustration 12.7).
7. Remove the lever handle trim by pressing the locking lever on the lever handle (see illustration).
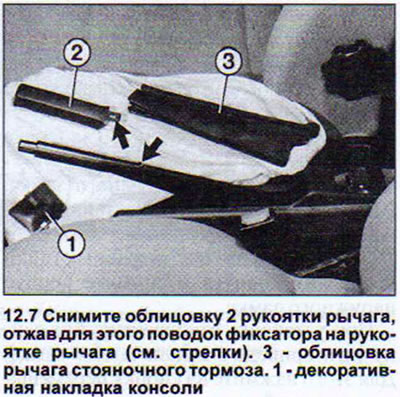
8. Remove the decorative trim on the console in front of the handbrake lever by prying it off at the top edge with a small screwdriver (see illustration 12.7).
9. Remove the hex head screw located under the trim panel and remove the interior ashtray.
10. Remove the two hex head screws located under the ashtray.
11. Pull the rear part of the console up by the front edge, then forward and remove it through the handbrake lever.
Front Console - Removal
12. Disconnect the negative (-) battery terminal.
13. Remove the rear part of the console.
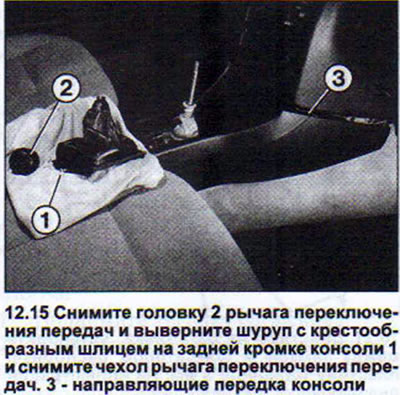
14. Remove the gear shift lever head (manual transmission) or the automatic transmission control lever.
15. Remove the Phillips screw securing the seat on the right and left sides and remove the mounting bolts underneath.
16. Remove all three knobs on the heater and interior fan control unit.
17. Remove the two screws securing the heater control panel and remove it. On vehicles with fully automatic air conditioning, remove the air conditioning control unit.
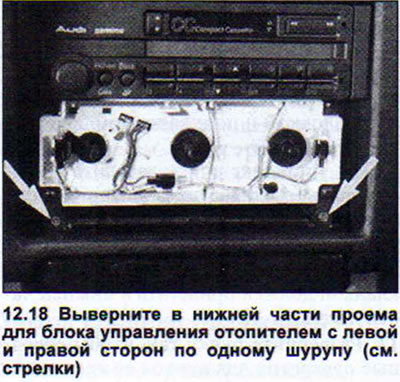
18. Unscrew one screw on each side of the lower part of the opening for the heater control unit (see illustration).
19. Press the ashtray console down. On cars equipped with additional instruments, you need to remove the narrow plate by moving it down.
20. Disconnect the console from the instrument panel by pushing the console back into the passenger compartment. If necessary, disconnect the plug.
During subsequent installation, the front console must fit into the instrument panel guides.
[The text is based on materials from the website «AudiManual.ru»]